
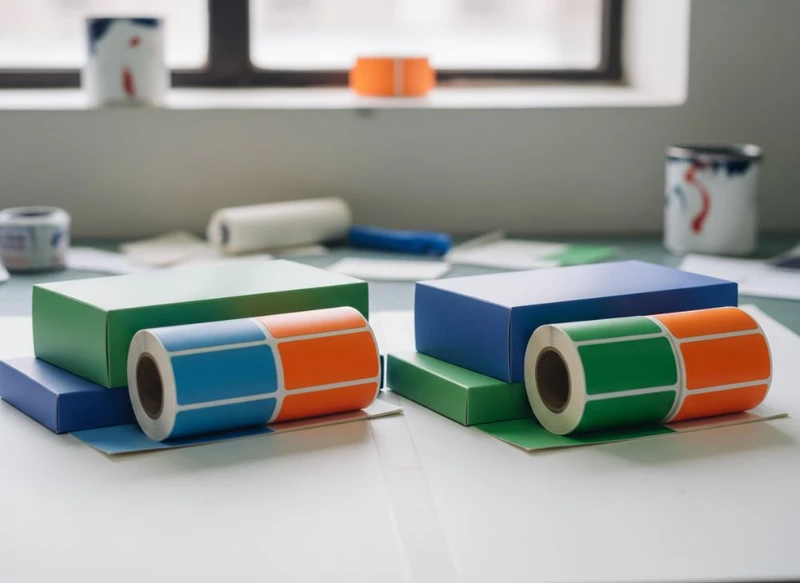
Most paper box and label sticker printing mistakes begin before production: an unsuitable file, an incomplete specification, or artwork that looks correct on screen but does not allow for print, cutting and folding tolerances. The practical solution is to prepare press-ready artwork, specify the intended material and finish clearly, and approve a proof that reflects the final use as closely as possible.
When troubleshooting common paper box and label sticker printing mistakes, separate the issue into one of four areas: colour, artwork setup, material compatibility, or conversion. A colour shift is usually a colour-management or substrate issue; a lifted label is more often linked to the adhesive, surface or application conditions; and cracking at a fold commonly points to board choice, grain direction, heavy ink coverage or crease setup.
Avoiding Colour Shifts and Inconsistency (CMYK vs. Pantone)
Colour can differ between a monitor, digital proof, printed sheet and finished package. This is normal because screens create colour with light, while print uses ink on a physical surface. The board or label material also affects the result: uncoated paper usually produces a softer appearance than a coated white stock, while coloured, recycled or textured materials can alter perceived colour further.
Use CMYK for full-colour artwork
CMYK is the standard process-colour method for photographs, gradients and designs containing many colours. It is generally appropriate when your artwork includes:
- Product images or lifestyle photography
- Multiple colours and tonal transitions
- Short-run designs where variable content may be required
- Artwork that does not depend on one exact brand colour
A frequent mistake is supplying RGB artwork from a screen-based design file. RGB colours can be more vivid than the printable CMYK range, so conversion may make bright blues, greens, oranges or fluorescent-looking shades appear less intense. Convert images to an appropriate CMYK profile before final export, but remember that profile choice should be confirmed with the printer handling the job.
Specify Pantone or another spot colour where consistency matters
Spot colours are pre-mixed inks identified by a colour reference system such as Pantone. They can be useful for a logo or signature brand shade that needs a more controlled appearance across packaging items.
Choose a spot colour when:
- A brand identity depends on a particular solid colour
- The design uses one or two key flat colours
- Colour matching across boxes, labels and other printed pieces is important
- Metallic or fluorescent ink effects are required, subject to production compatibility
Spot colour is not automatically the right answer. It can add complexity and may not be available or suitable for every print method, substrate or run size. A Pantone reference printed on one material may still look different on another. Ask for the intended substrate and print method to be considered when approving the colour.
Reduce colour surprises before print
Use these controls in your artwork review:
- Keep logo files as vector artwork where possible.
- Name spot-colour swatches consistently; do not create several duplicate swatches for the same colour.
- Avoid relying on a monitor as the final colour reference.
- State whether the colour is a visual guide or a critical brand requirement.
- Confirm whether colours will be printed on white stock, coloured stock, foil, clear film or another surface.
- Request a production-appropriate proof or colour target where colour precision is important.
Also consider finishing. Gloss lamination can make colours seem deeper, whereas matt lamination can soften reflection and change how a colour is perceived. Varnish, foil and white ink beneath transparent material can have similar visual effects.
Dealing with Bleed and Safe Zones in Box Artwork
Bleed and safe zones prevent unwanted white edges, cropped text and important graphics being too close to folds or cuts. They are essential for carton packaging because a box has both a printed flat layout and a three-dimensional finished form.
Bleed is extra artwork extending beyond the final cut line. It allows for small movement during trimming or die-cutting. Safe zone is the inner area where text, logos, barcodes and important design details should sit clear of cut lines, folds and perforations.
Set up the dieline correctly
A box dieline shows where the board will be cut, creased, folded and glued. It is a production guide, not a decorative element.
Before placing your artwork:
- Use the approved dieline supplied for the specific box format.
- Keep cut, crease, perforation and glue-area indicators on a separate non-printing layer.
- Do not resize or redraw the dieline without checking the structural consequences.
- Extend background colours, patterns and images beyond every cut edge.
- Keep critical artwork inside the safe zone specified for that dieline.
- Keep text and fine rules away from crease lines, especially on narrow panels.
Using an old dieline for a revised product size is a common and expensive error. Even a small change to depth, board thickness or closure style can affect panel dimensions and glue flaps.
Account for folds, glue areas and panel visibility
Artwork that appears balanced on a flat dieline can look misaligned once folded. A logo crossing a front-panel edge may not meet perfectly at the corner. A barcode placed too close to a flap may become difficult to scan, while text in a glue area may disappear during assembly.
For folding cartons and custom printed boxes, identify the front panel, side panels, base, closure and glue flap before finalising artwork. Check the layout as a folded mock-up, not only as a flat PDF.
Avoid placing these items across folds or close to die-cut edges:
- Small text
- Fine borders
- QR codes and barcodes
- Registration marks intended as design features
- Faces or product images requiring accurate alignment
- White reverse text over dark, heavily inked areas
Preventing Sticker Lifting and Adhesion Issues
A sticker that lifts at the edge, bubbles or falls away is not always a printing problem. Adhesion depends on the relationship between the label face material, adhesive, product surface, label shape and application environment.
The right label for a smooth glass jar may not suit a textured carton, a curved bottle, a chilled product or a rough recycled paper surface.
Check the product surface first
Before choosing the adhesive, describe the actual application surface:
- Smooth or textured
- Flat, curved or sharply angled
- Clean, dusty, oily, waxy or moisture-prone
- Paper, board, glass, metal, plastic or another substrate
- Applied at room temperature, chilled, frozen or warm
- Used indoors, outdoors or where abrasion is likely
Low-surface-energy plastics, rough board and surfaces with oil, dust or condensation can all make adhesion more difficult. Labels can also lift when applied over a tight curve, near a corner or around a small diameter container.
Match the label construction to the use
A label is a construction rather than just a printed image. It includes face stock, adhesive, release liner and, where relevant, a protective finish. Confirm that these components suit your product and application process.
Common mistakes include:
| Problem | Likely contributing factor | Practical check |
|---|---|---|
| Corners lift | Sharp corners, rough surface or insufficient adhesive contact | Use rounded corners and test on the final surface |
| Bubbles appear | Application over dust, moisture or air pockets | Clean and dry the surface before application |
| Label slips on a curve | Stiff face material or tight container radius | Check material flexibility and label size |
| Adhesive fails in cold conditions | Adhesive not suited to application or storage temperature | Confirm the expected temperature range |
| Print scuffs | No protective finish for handling conditions | Consider varnish or lamination where compatible |
Rounded label corners are generally less likely to catch during handling than sharp corners. For curved containers, leave sufficient space between the label edge and strong curves or moulded features.
Do not assume that a sample applied once will prove long-term performance. Test labels on the actual product surface, using the intended application method and realistic handling conditions. If packaging will carry food, cosmetic, chemical or other regulated product information, verify the relevant local labelling and material requirements for the intended market.
For self-adhesive formats, compare material options and artwork needs before ordering custom printed stickers.
Paper Box Creasing and Folding Problems
Crease cracking, uneven folds, broken fibres and mis-shaped cartons can affect both appearance and assembly. These issues are particularly noticeable on dark, heavily printed or coated packaging.
A crease is designed to guide the board to fold in a controlled line. The final result depends on the board’s thickness and construction, the direction of the paper grain, ink coverage, coatings, crease rule setup and folding process.
Common causes of cracking at folds
Cracking often occurs when the outer surface stretches as the carton folds. It is more visible when a dark solid colour, metallic effect or dense ink area sits directly over the crease.
To reduce the risk:
- Discuss board grade and folding suitability before production.
- Identify grain direction if folding performance is important.
- Avoid placing dense dark coverage directly over prominent creases where the design allows.
- Consider a design adjustment, such as a lighter fold area or a pattern that makes minor disruption less visible.
- Confirm whether lamination, varnish or another finish supports the intended fold.
- Ask for a physical folded sample when the visual finish at creases is critical.
Do not confuse creasing with scoring or perforation
These conversion features serve different purposes:
- Creasing creates a controlled fold in carton board.
- Scoring is a pressed line that can assist a fold, depending on material and process.
- Perforation creates a tear-open line.
- Die-cutting cuts the finished shape from the sheet.
A line that is intended to tear should not be specified merely as a fold, and a fold line should not be treated as an ordinary printed rule. Clearly label each element on the dieline layer.
Gift boxes can add further structural requirements because rigid board, wrap paper, magnets, ribbons and inserts are assembled differently from folding cartons. When developing premium presentation packaging, check the intended structure before designing gift packaging artwork.
Quality Control Checklist for Print Deliveries
Quality control works best when it is based on an agreed specification rather than a general impression that the job “looks right”. Create a signed-off reference before production, then inspect delivered packaging against that reference.
Check before approving production
Confirm the following:
- Correct product name, variant, ingredients or other required information
- Current barcode, QR code and contact details
- Correct dieline revision and finished dimensions
- Material, board or label stock selection
- Print colours, spot-colour references and finish
- Quantity and pack configuration, where relevant
- Orientation of front panel, opening, base and closure
- Label shape, corner radius and application position
- Any variable data, numbering or version changes
- Proof approval status and approver name
Inspect a representative delivery sample
Select samples from different packs or points in the delivery rather than checking only the top item. Compare them with the approved proof or specification.
Look for:
- Correct copy, language, version and product variant
- Colour that is reasonably consistent with the approved target
- Sharp text, barcodes and fine graphics
- Clean cuts without unwanted nicks or hanging fibres
- Die-cut alignment that remains within agreed tolerance
- Creases that fold cleanly without excessive cracking
- Correct gluing, closure and structural assembly
- Labels with clean edges and sound adhesive contact
- Scuffing, scratches, offsetting or marks from packing and handling
- Missing, duplicated or incorrectly positioned labels
Record findings with photographs, quantities affected, carton or batch identifiers where available, and a clear comparison to the approved standard. This makes it easier to distinguish isolated handling damage from a recurring production issue.
Ensuring Sharp Detail on Small Label Graphics
Small labels create a high risk of detail loss because text, icons and linework occupy very little physical space. Fine elements can fill in, break up, blur or become difficult to read when printed and finished.
The most reliable remedy is simplification. A clear, legible label usually performs better than a design that tries to reproduce every feature from a larger package.
Design for the finished label size
Before finalising a miniature label, print it at actual size on an office printer as a readability check. This will not predict production colour or print quality, but it can reveal cramped copy and over-detailed graphics.
Use these practical design rules:
- Use vector artwork for logos, icons, text and line art.
- Supply raster images at sufficient effective resolution for their final printed size.
- Avoid extremely thin lines and tiny reversed-out text.
- Keep contrast high between text and background.
- Do not use compressed, low-resolution screenshots or web images.
- Allow space around QR codes and barcodes.
- Avoid detailed imagery behind essential copy.
- Confirm the minimum reproducible type and line settings with the chosen printer.
Barcodes and QR codes should be generated from valid source data, not recreated by tracing an image. Their scan reliability depends on size, contrast, quiet zones, printing method, substrate and placement. Test scanning on a final production-representative sample before relying on the code operationally.
Correcting Misalignment on Die-Cut Stickers
Die-cut sticker misalignment occurs when the printed artwork does not sit correctly within the cut shape. It can show as an uneven white border, a logo too close to one edge, or an outline that appears off-centre.
Some degree of cutting variation is inherent in print conversion, so artwork must be designed to tolerate movement. The tighter and more decorative the border, the more obvious minor movement becomes.
Design around realistic cutting tolerance
Avoid creating a narrow, even border that runs around the entire sticker unless the process and tolerance have been confirmed. A border can make a small shift look much larger than it is.
Instead:
- Build in adequate bleed beyond the cut path.
- Keep important elements well inside the safe area.
- Make intentional borders wider where the design permits.
- Use a full-bleed background or irregular decorative edge to make slight variation less visible.
- Supply the cut path as a clearly named spot-colour line on a non-printing production layer, if requested.
- Keep multiple sticker designs consistently positioned on the supplied template.
For contour-cut stickers, ensure that the cut path is smooth and does not contain unnecessary points. Complex corners, tight internal angles and very small cut-outs can create production challenges or weaker labels.
If the sticker is intended to be applied manually, also assess how easily it can be handled. Very small labels, narrow shapes and complex cut-outs may be harder to peel and position consistently.
Preparing Press-Ready Files: A Technical Guide
A press-ready file gives the printer enough information to reproduce the approved design without guessing. The preferred delivery format is often a high-quality PDF, but file requirements can vary by workflow. Confirm the required PDF standard, colour profile, bleed and layer setup before exporting.
Essential press-ready file checks
Use this preflight list:
- Correct dimensions: Build artwork at the final size shown on the approved dieline or label template.
- Bleed included: Extend backgrounds and edge-to-edge images beyond the cut line by the amount requested.
- Safe areas respected: Keep copy, codes and key artwork inside the designated safe zone.
- CMYK and spot colours set correctly: Convert unintended RGB elements; retain named spot colours where required.
- Fonts embedded or outlined: Follow the printer’s preference, and keep an editable source file internally.
- Images linked at suitable resolution: Check effective resolution after scaling, not only original image resolution.
- Overprint reviewed: Incorrect overprint settings can cause text or objects to disappear or change colour.
- Transparency flattened only when required: Modern workflows may handle transparency, but confirm the requested export settings.
- Dieline separated: Keep cutter guides, crease lines and annotations on a separate layer and set them as instructed.
- No printer marks unless requested: Crop marks, registration marks and colour bars can interfere with imposed packaging files.
- File name is clear: Include product, version, size and date or revision number.
Keep source files organised
A press-ready PDF is not a substitute for controlled artwork management. Keep the original editable files, linked images, fonts where licensing permits, colour references and approval records in a version-controlled folder. This reduces the risk of sending an outdated label or box design for a repeat order.
Before releasing any packaging artwork, compare the final PDF against the approved copy deck and dieline at 100% view. Then inspect it as a folded box or applied label concept, not merely as flat artwork.
A well-prepared specification gives both buyer and printer a better basis for discussing a suitable packaging solution. XGolden Print has experience in custom packaging and printing projects; its company background may be useful if you are assessing a potential production partner. Start with a final dieline, a clearly named artwork version and a written checklist of the material, finish and application requirements that your packaging must meet.
