
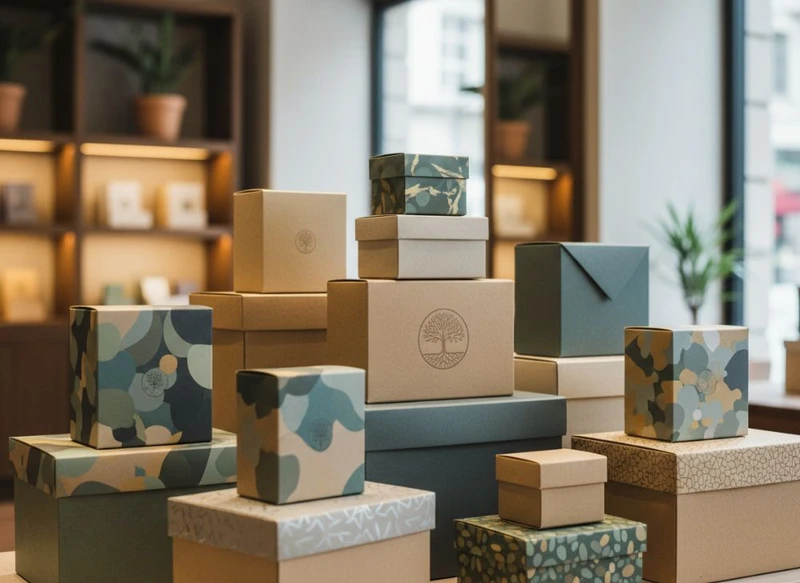
Custom paper box packaging should protect the product, communicate your brand clearly and work reliably through storage, handling and delivery. The right choice is rarely the most elaborate box: it is the format, board grade, print method and finish that fit your product’s weight, dimensions, sales channel and order volume.
This ultimate guide to custom paper box packaging in 2026 helps South African brands turn those choices into a practical brief. Start with product protection and pack-out requirements, then refine the visual design, sustainability approach and budget. Doing so reduces avoidable rework and helps you compare supplier quotations on like-for-like specifications.
Why Custom Boxes are Essential for Brand Growth
A custom box is both a protective pack and a brand touchpoint. Before a customer reads a leaflet or uses the product, they may see the packaging on a shop shelf, in a delivery parcel or when opening a gift. Clear, well-considered packaging makes the product easier to identify and presents key information consistently.
Custom boxes can support brand growth by helping you:
- Differentiate a product: Distinct colours, typography, illustrations and structural details make a product easier to recognise among similar options.
- Protect product quality: A properly sized box, suitable board and internal support can limit movement, crushing and scuffing during handling.
- Improve shelf presentation: Front-facing panels, readable product names and a logical information hierarchy help shoppers understand what they are buying.
- Create a better unboxing experience: A neat opening mechanism, tissue wrap, insert or printed interior can make premium and gift products feel more intentional.
- Support product ranges: Shared layout rules and colour systems can connect several variants while keeping each one distinguishable.
- Add useful information: Boxes can accommodate instructions, ingredients, product details, batch references, care guidance or required notices where applicable.
Custom packaging is most useful when it solves a clear commercial or operational need. A beautiful rigid box may not suit a low-cost, high-volume item, while a plain folding carton may not provide enough protection for a fragile product. Match the packaging to the product’s real journey rather than selecting a style purely from appearance.
For product-specific formats, explore custom packaging boxes once you have defined the required size, structure and quantity.
Choosing the Right Paper Stock and Material
Paper box packaging is not one material. Folding boxboard, kraft board, corrugated board and rigid board each offer different strengths, surfaces and construction options. The appropriate choice depends on the product weight, fragility, desired finish, packing process and whether the box is used for retail display, shipping or both.
Common paper-based materials
| Material | Best suited to | Key strengths | Points to check |
|---|---|---|---|
| Folding boxboard | Cosmetics, food-adjacent packs, small consumer products, retail cartons | Smooth printable surface, clean folds, relatively lightweight | Confirm board thickness, crease performance and whether added protection is needed |
| Kraft board | Natural-looking brands, accessories, dry goods and straightforward retail packs | Textured, earthy appearance; suits restrained print designs | Colours may print differently than on white board; pale inks can be less vivid |
| Corrugated board | E-commerce shippers, heavier items, transport protection | Better cushioning and stacking support than carton board | Flute type, outer print surface, size and void space all affect performance |
| Rigid board | Gift boxes, presentation boxes, premium sets | Strong structure and premium feel | Higher material use, more complex assembly and greater storage volume |
| Paper inserts and dividers | Bottles, sets, delicate products and multiple components | Helps hold items in position without relying on plastic | Test fit, removal ease and protection at the pack’s weak points |
Board thickness is often described in GSM or microns, but these figures alone do not determine whether a box is strong enough. Fibre composition, construction, fold direction, box dimensions, panel shape and product weight all influence results. Ask for the proposed material, thickness or weight, and any relevant structural details in writing.
Match the board to the product journey
Consider the full journey of the packed item:
- Packing: Will the box be assembled by hand or on a packing line? Is it easy to open, fill and close?
- Storage: Will it be stacked in a storeroom or warehouse? Could humidity or compression be a concern?
- Transport: Is the box a retail carton placed inside a separate shipping carton, or does it need to travel on its own?
- Display: Does the product need a hanging tab, window, shelf-ready tray or tamper-evident feature?
- Use and disposal: Can the customer reuse the box? Are materials and components easy to separate where relevant?
A common mistake is treating a retail carton as a postal shipper. Folding cartons can look excellent but are not automatically designed to withstand the same handling as corrugated transit packaging. If the customer will receive the branded carton directly, specify that requirement early and consider a protective outer pack or a more robust construction.
Material and finish compatibility
Not every finish behaves the same on every board. Uncoated kraft can suit black ink, line art and simple branding, whereas detailed photography and colour-critical artwork often benefit from a smoother white substrate. Foils, embossing, spot UV and lamination may also require particular surfaces or production approaches.
Before approval, confirm:
- Whether your selected artwork is suitable for the chosen board.
- How large solid colour areas may appear on that stock.
- Whether a window weakens the panel or affects product protection.
- Whether the adhesive, coating and any internal lining suit the product.
- Whether the box needs resistance to moisture, grease, abrasion or light.
- Any material, labelling or sector requirements applicable to your product and sales market.
Key Design Elements for Impactful Visuals
Impactful packaging design starts with hierarchy, not decoration. A customer should be able to identify the brand, product and key variant quickly. Everything else should support that message.
Build a clear front panel
For most retail boxes, prioritise these elements:
- Brand name or logo
- Product name
- Variant, flavour, colour or model
- A short, meaningful benefit or descriptor
- Product image or graphic, where useful
- Essential quantity or product information
Do not attempt to give every element equal importance. If the front panel contains several fonts, competing claims, large blocks of text and too many icons, the primary message can disappear.
Design for the box structure, not just a flat page
Packaging artwork is applied to a dieline: the flat layout that becomes the finished box after cutting and folding. Panels, flaps, glue areas, folds and bleed must all be accounted for. Artwork that looks balanced in a digital mock-up can become awkward once it wraps around a corner or falls across a crease.
Use these practical checks:
- Keep key text and logos away from cut lines, folds and glue flaps.
- Include bleed beyond trim edges as required by the printer.
- Use high-resolution images appropriate for the final printed size.
- Outline or supply font files according to the printer’s artwork requirements.
- Check barcode sizing, contrast and quiet zones if a barcode is needed.
- Read every panel in the box’s assembled orientation.
- Confirm that legal, ingredient, safety or recycling information is complete for the product category and market.
Use colour intentionally
Brand colours may appear differently across board types, finishes and print processes. Dark uncoated stock, kraft surfaces and metallic treatments can all affect the final result. Where colour consistency is especially important, provide recognised colour references where possible and request a proofing approach that suits the project.
Avoid assuming that a screen display is a final colour reference. Screens vary, and printed ink interacts with the stock beneath it. A physical sample, press proof or production-approved reference can be helpful for designs where colour is critical; confirm the available proofing options with your packaging supplier.
Choose finishes that reinforce the product position
Finishes should serve the brand and customer experience, rather than compensate for weak design. Consider:
- Matte lamination: A smooth, understated look that can suit premium brands.
- Gloss lamination: A brighter appearance that can make images and colour feel more vivid.
- Spot UV: A glossy highlight applied selectively to details such as a logo or pattern.
- Foil stamping: A reflective accent for selected elements, often used for premium presentation.
- Embossing or debossing: Raised or recessed detail that adds tactile interest.
- Window patching: A product view that may help customers assess colour, texture or contents.
Each treatment affects cost, lead planning, recyclability considerations and production complexity. Use it selectively. One purposeful feature can be more effective than applying several finishes at once.
Printing Techniques: Offset vs. Digital for Boxes
Offset and digital printing can both produce professional custom paper box packaging. The better option depends primarily on order quantity, artwork complexity, variation requirements, colour expectations and timing.
| Consideration | Offset printing | Digital printing |
|---|---|---|
| Best fit | Larger or repeat production runs | Smaller runs, trials and multiple artwork versions |
| Set-up | Requires plate and press set-up | No conventional printing plates |
| Colour approach | Can use process colours and specified spot colours | Usually process-colour based, depending on the system |
| Variable details | Less suited to frequent changes within a run | Useful for variable text, versions or limited editions |
| Unit cost pattern | Set-up can be spread over larger quantities | Can avoid some set-up cost on short runs |
| Finish options | Often compatible with a wide range of post-press treatments | Options vary by print provider, stock and process |
When offset printing makes sense
Offset printing is often considered for higher-volume orders and colour-sensitive branded packaging. It can accommodate detailed artwork, large solid areas and spot-colour requirements, depending on the specification. However, it involves preparation costs and may be less economical for a very small order.
Choose offset when you have a stable design, a confirmed dieline and enough volume to justify the set-up. It is also useful where brand colour control is a key part of the packaging brief, subject to agreed proofing and production conditions.
When digital printing makes sense
Digital printing is useful for short runs, product launches, market testing, seasonal designs or packs with several variants. It can make versioning more practical because artwork changes do not require new conventional printing plates.
Digital does not automatically mean “lower quality”, nor does offset automatically mean “better”. Results depend on the printer, stock, artwork, colour management and finishing method. Ask to review samples produced on a comparable material and process if the packaging appearance is central to your decision.
Prepare files for reliable printing
Provide final artwork only after the supplier confirms the dieline and technical requirements. A productive packaging brief usually includes:
- Finished box dimensions: length × width × height.
- Box style and opening direction.
- Board type and desired finish.
- Number of printed sides.
- Colour requirements, including any spot colours.
- Product weight and whether an insert is required.
- Quantity per design and number of variants.
- Artwork files and relevant brand assets.
- Required delivery date and delivery location.
- Any information that must be printed for market or product-category requirements.
Structuring Your Budget for Custom Packaging
The most useful packaging budget is based on the total specification, not only the price per box. A lower unit price can be misleading if the box is oversized, difficult to assemble, prone to damage or requires unnecessary finishes.
Main cost drivers
Custom paper box pricing typically changes according to:
- Quantity: Larger runs can spread fixed preparation costs across more units.
- Size and material use: Bigger boxes and heavier boards require more material.
- Box structure: Straightforward tuck-end cartons generally require less work than rigid boxes, magnetic closures or complex inserts.
- Print coverage: Full-colour printing, multiple sides and colour-critical requirements can affect cost.
- Finishing: Lamination, foil, embossing, windows and specialty coatings add processes.
- Number of designs: Several SKUs or versions can introduce more set-up and artwork handling.
- Packing requirements: Flat-packed, pre-assembled and specially packed boxes have different practical implications.
- Freight and storage: Bulky assembled boxes take up more space than flat-packed cartons.
Use a tiered specification
If the ideal pack stretches the budget, do not simply reduce board thickness without checking protection. Instead, separate the specification into three levels:
- Essential: Correct size, functional structure, suitable board, legible branding and required information.
- Preferred: Improved finish, an insert, enhanced interior printing or refined colour treatment.
- Optional: Foil, embossing, elaborate closures, specialty materials or multi-part presentation features.
This gives procurement teams a clearer basis for evaluating quotations. It also identifies which elements can be changed without undermining product protection or brand clarity.
Compare quotations fairly
Send the same detailed brief to each supplier. A quote should make it possible to compare:
- Finished dimensions and style.
- Material and board specification.
- Printing method and number of colours.
- Finish and add-on processes.
- Included insert, divider or window details.
- Quantity and number of artwork versions.
- Whether boxes are supplied flat or assembled.
- Proofing, artwork preparation and any set-up items.
- Delivery terms, taxes and any exclusions.
Avoid accepting a vague “custom box” quote when you need an accurate comparison. Small differences in material, size or finishing can materially change both the price and the final result.
Paper Box Styles: Which is Best for Your Product?
The best box style balances product protection, presentation, ease of packing and cost. The table below compares commonly specified paper box structures.
| Box style | Suitable products | Benefits | Watch-outs |
|---|---|---|---|
| Straight tuck-end carton | Cosmetics, small electronics, personal-care products | Familiar opening, efficient retail format, good printable area | Confirm closure security and product fit |
| Reverse tuck-end carton | Light consumer goods, small retail packs | Efficient use of material and easy assembly | May not suit heavy or loose products without an insert |
| Auto-lock bottom box | Bottles, jars, heavier small items | Stronger base and quicker set-up than some manual-lock styles | Requires accurate dimensions and suitable board |
| Sleeve and tray | Gifts, product sets, premium items | Layered reveal and flexible branding space | Uses more components and needs a close fit |
| Two-piece rigid box | Luxury gifts, presentation sets, keepsakes | Durable, premium opening experience | Higher material use, storage and assembly considerations |
| Mailer-style box | Subscription packs, online orders, curated kits | Strong presentation and practical packing format | Confirm transit needs and whether an outer shipper is required |
| Corrugated shipping box | Direct-to-customer orders, heavier goods | Protection and stacking support | May require internal void fill or dividers |
| Window carton | Products where visibility aids choice | Lets shoppers view the item before purchase | Window material and panel strength need consideration |
Choose by product behaviour
Start with the product, not the visual trend.
- Fragile products: Consider a fitted paper insert, divider or a box with adequate space around vulnerable points.
- Heavy products: Focus on base strength, closure integrity and whether corrugated protection is necessary.
- Multi-piece sets: Use compartments or inserts to stop pieces from colliding.
- Soft goods: Avoid excessive empty volume; a sleeve, folding carton or simple mailer may be sufficient.
- Gift products: A tray-and-sleeve or rigid construction may improve perceived value if it aligns with the product price point.
- Products with frequent returns or exchanges: Consider how easily the customer can reopen and repack the box.
Always test a representative packed sample before committing to a substantial order. Check fit, opening, closing, lifting, stacking and product removal. This basic evaluation often reveals issues that are not visible in a 3D render.
Sustainable Packaging Solutions for Modern Brands
Sustainable packaging is about making appropriate, evidence-based choices across materials, design, use and end-of-life handling. Paper-based packaging can support this approach, but a paper box is not automatically the most sustainable choice in every form.
The first step is to reduce unnecessary material while maintaining adequate product protection. An undersized or weak specification that leads to damaged products is not a successful outcome.
Practical ways to improve a paper box specification
- Right-size the box: Reduce unused space while ensuring the product can be packed and removed safely.
- Use paper-based inserts where appropriate: Dividers, folded inserts and pulp-based supports may reduce the need for mixed-material components.
- Avoid unnecessary layers: Consider whether a sleeve, wrap, insert and outer carton are all needed.
- Simplify materials: A box made from fewer material types may be easier for customers to understand and separate.
- Use finishes selectively: Heavy coatings, laminations and decorative additions can affect material recovery routes and should be assessed in context.
- Design for reuse: A strong, attractive gift box may have a second life if reuse is realistic for the customer.
- Communicate disposal carefully: Only make recycling or compostability claims that you can substantiate for the relevant material and market conditions.
There is often a trade-off between visual effects, protective performance and material simplicity. For example, a product window can help retail conversion, but it introduces an additional component. A premium rigid box can be reusable, but it uses more material than a light folding carton. Assess the product’s needs and make claims only after verifying them with the material supplier and relevant local requirements.
How to Order Custom Paper Boxes: A Step-by-Step Guide
A clear ordering process helps avoid mismatched expectations and reduces late artwork changes.
1. Define the product requirements
Record the product dimensions, weight, shape and vulnerable areas. Include any accessories, manuals, liners or inserts that must fit inside. Determine whether the box is for shelf display, gifting, shipping or a combination of these uses.
2. Select a provisional box style
Choose one or two suitable structures rather than locking into a complex design immediately. Identify whether you need a standard folding carton, corrugated mailer, rigid gift box, sleeve or internal insert.
For premium presentation formats, review custom gift packaging options alongside your protection and storage requirements.
3. Create a complete packaging brief
Include dimensions, quantity, material preferences, print coverage, finish, product images, required information and deadline. State what is fixed and what can be adjusted. For example, you may require a specific finished size but be flexible on the closure style or finish.
4. Confirm the dieline and artwork requirements
Use the supplier’s approved dieline, not a generic template found online. Place artwork carefully, observe safety areas and ensure all text is proofread. Ask which file format, colour setup and image resolution are required before submitting final files.
5. Review a proof or sample where appropriate
Review all visible copy, panel placement, colours, barcodes, folds, closures and fit. If the box includes an insert, test it with the actual product rather than an approximate substitute.
6. Approve the final specification
Before production, confirm the material, dimensions, print method, finishes, quantity, packing method and commercial terms. If any requirement is essential, ensure it is written into the approved specification.
7. Plan labelling and fulfilment
Consider how the completed boxes will be stored, labelled and packed for dispatch. Product stickers can be useful for batch identification, variant changes or short-run updates without redesigning the full carton; see custom printed stickers for compatible labelling ideas.
Common ordering mistakes to avoid
- Measuring only the product and forgetting inserts, protective wrap or tolerances.
- Choosing a box before considering its transit conditions.
- Sending artwork before the dieline is confirmed.
- Treating a screen preview as a final colour reference.
- Making sustainability claims without checking the full material specification.
- Using a complicated finish on a short-lived pack without considering cost and material impact.
- Ordering a large quantity before testing the assembled box with the real product.
A strong custom paper box specification is one that protects the product, supports the brand and remains practical to pack, store and distribute. Start with the essentials, test the physical format and add finishing details only where they bring a clear benefit.
For a supplier discussion, prepare your product dimensions, estimated quantity, intended box style and artwork direction. XGolden Print has 27 years of packaging and printing experience, which may be relevant when comparing production partners for a defined custom box brief.
