
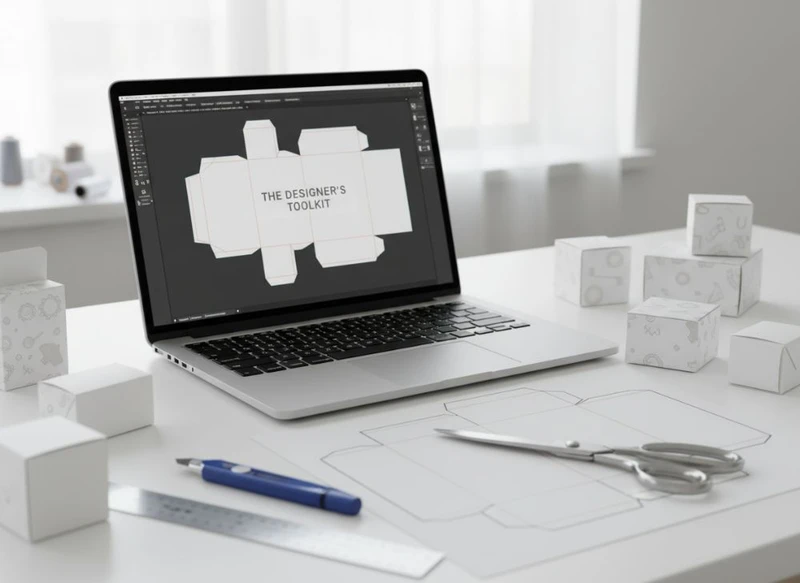
A dependable paper box layout starts with the correct structural template, then moves through artwork, proofing and print preparation without breaking the links between them. For most custom packaging projects, Adobe Illustrator is the core tool for die-lines and vector artwork, supported by 3D mock-up software, disciplined colour management and a clear version-control process.
The best toolkit is not necessarily the largest one. It is the combination that lets your team create accurate production files, review how the box will look in use and provide a printer with unambiguous instructions. This guide explains the practical software and file-preparation choices that matter when specifying custom boxes.
Using Adobe Illustrator for Die-Line Creation
Adobe Illustrator is widely used for paper box layouts because it works natively with vector paths. Vector artwork remains sharp when resized and gives production teams precise information for cutting, creasing and printing.
A die-line is the flat technical drawing of a box before it is cut, folded and glued. It commonly includes:
- Cut lines for the outer shape and openings
- Crease or fold lines where the board is folded
- Perforation lines, where required
- Glue areas that should not carry critical artwork
- Bleed areas beyond the trim edge
- Safe areas where text, barcodes and important graphics should remain
- Panels for the front, back, sides, top and base
Build artwork around an approved structure
Do not create a box structure from a visual sketch alone. Small differences in board thickness, folding direction, locking tabs and glue flaps can affect whether a layout works in production.
Ask for the relevant die-line before finalising artwork. If a structural template is supplied, preserve its dimensions, panel names and technical layers. Avoid moving, scaling or redrawing cut and crease paths unless the packaging supplier has approved the revision.
A practical Illustrator layer structure could be:
ARTWORKCUTCREASEPERFORATIONGLUE AREAWHITE INK, if applicableVARNISHorFOIL, if applicableNOTES – NON-PRINTING
Lock technical layers once positioned. This reduces the chance of accidental edits while the design team works on graphics.
Keep die-lines technically clean
For production-ready paths, check the following:
- Use closed paths for cut shapes where appropriate.
- Remove duplicate paths and stray anchor points.
- Keep die-lines on their own layer, separate from print artwork.
- Use clearly named spot colours for technical lines and special finishes.
- Set technical lines to overprint only when instructed by the printer.
- Keep the die-line visible in the working file, but follow the printer’s instruction on whether it should be visible in the final PDF.
- Do not use die-line paths as clipping masks unless this has been specifically agreed.
A common mistake is treating the die-line as a decorative outline. It is a manufacturing instruction. The visual design must fit the structure, rather than the other way around.
When Illustrator is not enough
Illustrator is excellent for artwork and flat layouts, but it is not a specialist structural packaging design system. Complex folding cartons, inserts, trays, corrugated packs or multi-part gift boxes may need CAD-based packaging software or a supplier-created structural drawing.
For these jobs, use Illustrator for graphic design and let the packaging development team manage the structural engineering. This division helps prevent a visually attractive concept from becoming difficult to assemble or unsuitable for the intended product.
3D Mockup Tools for Packaging Visualization
A flat die-line does not always reveal what a customer will see on shelf or when opening a delivery. 3D mock-up tools help designers and buyers assess panel alignment, logo position, opening experience and the relationship between labels and box artwork before physical samples are considered.
Useful tools may include packaging-specific 3D applications, CAD visualisation tools and general 3D software. The right choice depends on the complexity of the structure and how realistic the review needs to be.
| Tool type | Best used for | Main advantage | Important limitation |
|---|---|---|---|
| Illustrator 3D preview or simple mock-up | Early artwork review | Quick visual check of panel placement | May not show realistic folds, board edges or finishes |
| Packaging mock-up software | Folding cartons and standard box styles | Maps artwork onto a structured box model | Depends on an accurate structural file |
| CAD-linked visualisation | Complex structures and inserts | Connects structure and visual review | Can require specialist skills |
| General 3D software | Campaign imagery and detailed product scenes | Flexible materials, lighting and renders | Not a replacement for production proofing |
What to review in a box mock-up
Use a mock-up review to answer practical questions:
- Does the logo sit correctly on the main visible panel?
- Does artwork continue sensibly over edges and folds?
- Are small text and icons too close to a crease?
- Is a product name upside down or sideways when the pack is displayed?
- Does a barcode sit on a reasonably flat, scannable panel?
- Do lid, base and side-panel designs line up as intended?
- Will a label cover important printed information?
- Are premium details, such as foil or embossing, positioned where they will be noticed?
Mock-ups are especially useful for gift packaging, where unboxing, lid orientation and presentation often form part of the design brief.
Treat renders as design-review tools, not print proofs
A realistic 3D render can make a concept easier to approve, but it cannot confirm colour accuracy, material feel, fold tolerance or finishing results. Screen brightness, rendering settings and simulated textures can all create expectations that differ from the finished pack.
Use the mock-up to improve decisions early. Then use the printer’s proofing process to verify the production file, substrate, colour and finishing details.
Colour Management and Profile Settings
Colour management gives designers, brands and printers a shared method for interpreting colour values. Without it, a corporate colour that appears consistent on one screen may reproduce unexpectedly when printed on a different board or with a different process.
The essential principle is simple: design in a colour space appropriate to the intended print workflow, use profiles consistently, and confirm conversion requirements with the printer before supplying final files.
Start with the intended print process
Packaging can be printed using different processes, substrates and ink systems. The right colour settings therefore vary by project. Confirm these points before final export:
- Which colour mode the printer requires
- The preferred ICC profile or PDF preset
- Whether spot colours are permitted or required
- Whether brand colours will be matched as spot inks, process builds or both
- The expected substrate, such as uncoated board, coated board or textured paper
- Whether white ink, metallic ink or a special finish affects the artwork
- How black text and rich black areas should be built
Do not assume an online CMYK conversion is suitable for a box. The result can differ according to the paper or board, ink coverage and production method.
Use spot colours deliberately
Spot colours can support brand consistency and separate special printing instructions. They are often used for corporate colours, cutting guides, foil, varnish, embossing and white ink layers. Each should be clearly named and used consistently across the file.
However, a colour swatch called “Gold” does not automatically mean metallic gold ink or foil. It is only a naming label unless the print specification confirms otherwise. Clearly identify every special colour in the artwork and job notes.
Check colour before committing to a large run
Screen previews are useful but limited. Calibrated monitors improve consistency, yet they do not replace a physical proof when exact colour is important. If a colour is central to the brand, involves a large solid area or appears across multiple packaging items, ask what proofing options are available and what the proof represents.
Also remember that a printed colour may look different under retail lighting, office lighting and daylight. Review important packaging colours in conditions relevant to how the product will be seen.
Preparing Layers for Different Print Finishes
Print finishes add contrast, texture and emphasis, but they need their own production instructions. Building them into the regular CMYK artwork makes errors more likely and may prevent the printer from identifying where the treatment belongs.
Create a separate named layer and spot-colour swatch for each finish. Keep the finish artwork as vector paths where possible.
Common finishing layers
| Finish or treatment | Recommended file approach | Design consideration |
|---|---|---|
| Foil | Separate vector layer with a named spot colour | Avoid extremely fine details and confirm minimum line widths |
| Spot UV | Separate vector layer with a named spot colour | Consider registration tolerance around small text and borders |
| Embossing or debossing | Separate vector layer with clear instructions | Allow room near folds, edges and heavy ink coverage |
| Raised varnish | Separate named layer | Use it for defined graphic elements, not accidental overlaps |
| White ink | Separate named spot layer | Confirm whether it prints beneath, above or separately from CMYK |
| Window patch | Clearly marked area on structure | Keep important text and graphics away from the opening |
Design with tolerances in mind
Finishes and printed artwork can shift slightly during production. Very thin borders, tightly aligned foil outlines and tiny reverse text are more vulnerable to visible variation. Keep critical features away from cut edges, folds and glue areas.
Avoid creating an effect that depends on perfect alignment between two processes unless the printer has confirmed it is appropriate. For example, a narrow foil line exactly tracing the edge of a printed shape may be less forgiving than a bolder foil element with intentional spacing.
Make non-printing notes unmistakable
Production notes are useful, but they must not accidentally print. Put them on a clearly named non-printing layer where supported by the workflow, or place them outside the trim and final export area as instructed by the printer.
Include notes for items such as:
- Finish names and intended areas
- The side of the board to be printed
- Window locations
- Assembly direction
- Critical brand-colour references
- Whether technical layers should be retained in the supplied PDF
Working with Printer Templates and Specifications
A printer template is the bridge between a design concept and a manufacturable box. It gives the artwork team the boundaries they need, while the specification explains the materials, printing and finishing assumptions behind those boundaries.
Use the supplied template as the primary source of truth. If your team receives multiple versions, confirm which revision is current before artwork begins.
Information to request before final artwork
A useful packaging brief or specification should cover:
- Finished box style and dimensions
- Die-line version and scale
- Board or paper type, if already selected
- Print sides and panel orientation
- Bleed and safe-area requirements
- Colour process and spot-colour instructions
- Required file format and PDF standard
- Font, image and transparency requirements
- Finishing layers and their naming conventions
- Glue zones, no-print areas and structural restrictions
- Barcode placement requirements
- Proofing and approval stages
Specifications vary between suppliers and product types. Check rather than assume requirements for food-contact packaging, child-related products, cosmetic packs, labelling, recycling claims or any other regulated product category relevant to your South African market.
Never design critical content into risky areas
Keep legal text, ingredients, directions, barcodes, QR codes and customer-service information out of:
- Glue flaps
- Deep folds and creases
- Narrow side panels
- Areas likely to be covered by labels
- Open windows
- Edges close to trimming
- Locations where an outer sleeve or insert may conceal them
If the packaging carries mandatory product information, have the appropriate internal or professional reviewer check the final content. A packaging designer can organise hierarchy and placement, but should not be expected to determine legal or sector-specific compliance requirements.
Version Control for Packaging Revisions
Packaging projects often involve brand, product, marketing, procurement and print stakeholders. Without version control, it is easy to approve one PDF while another file is sent to production.
Use a simple system that identifies the product, pack format, revision and status. For example:
Brand_Product_BoxFormat_R03_ARTWORK-APPROVED_YYYY-MM-DD.pdf
Avoid vague labels such as final, final-final or new version. They become unreliable as soon as another change is made.
A practical approval workflow
- Create one controlled source file for the current die-line and artwork.
- Record changes in a short revision log.
- Export a review PDF with the revision number visible.
- Gather comments in one agreed channel where possible.
- Consolidate feedback before the next artwork update.
- Send the final production file only after the content, structure and finishes have been checked.
- Archive the approved PDF, source file, linked images, fonts where licensing permits, and specification together.
Separate content edits from structural changes
A revised ingredient list or campaign message is an artwork change. A different board thickness, box size or locking method may require a new structural file. Do not place new artwork onto an old die-line simply because the outside dimensions appear similar.
When a product range includes several sizes, create a master artwork system with clearly defined variables, but still check each size individually. Text wraps, panel widths and barcode space can change significantly across a range.
Typography Best Practices for Boxes
Typography on a box must survive more than a screen review. It needs to remain legible after printing, folding, finishing, handling and display. The most effective packaging typography prioritises hierarchy, contrast and available panel space.
Establish a clear reading order
Most boxes need to communicate several levels of information:
- Brand
- Product name or product type
- Main benefit or variant
- Key supporting details
- Mandatory or operational information
Place the most important information on the likely front-facing panel and make sure it is readable at the expected viewing distance. Side and back panels can carry secondary detail, but should still be logically organised.
Use sensible type sizes and spacing
There is no universal minimum type size because readability depends on the typeface, print method, board surface, ink colour and viewing conditions. Instead of relying on one number, review the actual text at final size.
Take particular care with:
- Fine type on uncoated or textured stocks
- Reversed-out text on dark backgrounds
- Light-weight fonts
- Small text over photographs or patterns
- Text placed across folds
- Metallic, foil or varnished text
- Condensed fonts used for required information
Convert fonts to outlines only if required by the printer and after retaining an editable source version. Outlining prevents missing-font issues but removes the ability to edit type easily.
Keep barcodes and QR codes functional
Do not stylise, crop or place a barcode over a fold. Maintain sufficient contrast and clear space, and use the size specified by the relevant barcode system or product requirements. QR codes likewise need adequate quiet space and should be tested from a printed proof or sample at intended size.
Integrating Label Sticker Design Files
Labels and stickers often work alongside printed boxes. They may provide variable product information, seal a pack, identify a variant or support a promotional campaign. Their artwork should be managed as a connected but separate file set.
For example, a label can be designed to sit on a plain carton, while a printed box can include a reserved panel for a label. In either case, the exact label size, placement and corner radius should be agreed before artwork is locked.
When producing custom sticker designs, keep the following aligned with the box artwork:
- Brand colours and typefaces
- Product names, variants and claims
- Barcode and QR code details
- Product information and version dates
- Label shape and finished size
- Application position and orientation
- Required bleed, safe area and cut path
- Material suitability for the intended use
Account for application tolerances
A label applied by hand or machine may not land in exactly the same position every time. Avoid using a label to complete a thin printed border or align precisely with a small element on the box. Instead, create comfortable visual spacing around the label zone.
If a sticker is used as a seal, check whether opening the pack will tear the label, damage printed artwork or obscure information. The answer depends on the box style, adhesive and intended customer experience.
A sensible software and file checklist
Before releasing custom paper box artwork, check that your project includes:
- An approved structural die-line
- Editable vector artwork in a suitable source file
- Linked or embedded images at appropriate resolution
- Correct colour mode, profiles and named spot colours
- Separate layers for die-lines and special finishes
- Bleed, safe area and glue-area checks
- Final-size typography review
- Confirmed barcode and QR code placement
- A 3D mock-up or folded review where useful
- A version-controlled approval PDF
- Clear printer specifications and production notes
- Separate but coordinated label files, where required
The most effective designer’s toolkit for custom paper box layouts combines capable software with disciplined checks. Illustrator handles the core vector layout; mock-up tools improve visual review; colour and layer controls make print instructions clearer; and version control protects approved work from avoidable mistakes.
For a new packaging project, begin by selecting the box format and obtaining the current structural template. Then build the artwork and related label files around that specification. XGolden Print provides custom packaging and printing solutions, and its company background may be useful when assessing a packaging supplier for your project.
