
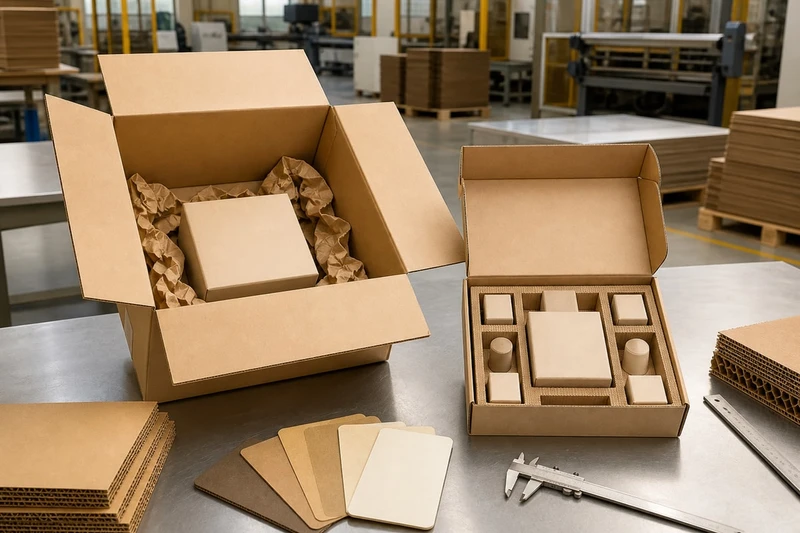
Reducing packaging void space means designing the box, insert and closure as one protective system rather than simply choosing a smaller carton. The best solution leaves only the clearance needed for the product, its protective components and efficient packing, while preventing damaging movement during storage, handling and delivery.
For South African brands and retailers, less empty space can lower material use, improve pallet utilisation and create a more considered unboxing experience. However, a tightly packed product is not automatically a safer one. Protection depends on how the item is retained, where impact energy is managed and whether the pack remains practical for the people who assemble it.
Measure the complete packed product
Start with the product in the condition in which the customer will receive it. Do not size a box from a product drawing or from the bare item if it will be wrapped, bagged, labelled, bundled or supplied with accessories.
Record the following dimensions:
- Length, width and height: Measure the largest points, including protrusions, handles, caps and feet.
- Weight: This influences the strength needed from the carton and insert.
- Product orientation: Identify whether the item must remain upright, flat or separated from another component.
- Existing product protection: Include sleeves, tissue, polybags, seals, manuals, cables, refill packs and promotional items.
- Dimensional variation: Allow for manufacturing tolerances, especially for handmade goods, apparel, food products or assembled kits.
- Packing method: Consider whether staff pack one item at a time, batch-pack orders or use a fulfilment process.
Measure a fully prepared sample rather than estimating. For example, a candle in a gift box may look compact on its own, but its packed dimensions can increase once a dust cover, care card, ribbon and protective wrap are included.
Calculate the usable internal space
The internal dimensions of the outer box should accommodate:
- The complete prepared product.
- The insert or retention feature.
- The intended protective clearance.
- Space required for the box to close without crushing the contents.
A useful early check is to compare the product volume with the usable internal box volume. This does not replace physical testing, because a product’s shape and weight distribution matter, but it quickly reveals whether a design contains excessive unused capacity.
Avoid treating every gap as waste. Some clearance may be deliberately needed to allow an insert to flex, protect corners, prevent scuffing or make removal comfortable for the customer. The aim is controlled space, not zero space.
Identify movement and impact risks
Before reducing the box size, establish how the product can be damaged. A fragile glass jar, a rigid electronics accessory, a folded garment and a premium gift set all need different forms of restraint.
Ask four questions:
- Can the product slide from side to side?
- Can it lift, bounce or rotate?
- Which edges, corners or surfaces are vulnerable?
- What happens if the packed box is dropped, compressed or inverted?
A heavy product with a small footprint can create a concentrated impact point inside a box. In that case, reducing side clearance alone may not solve the problem; the base and corners may need more support. Conversely, a lightweight apparel item may need little impact protection but benefit from a close-fitting mailer or folding carton that keeps the presentation neat.
Separate retention from cushioning
These two functions are often confused.
- Retention stops the product moving. It holds an item in a known position.
- Cushioning absorbs or spreads impact energy if the pack is knocked or dropped.
Loose material can provide some cushioning, but it often offers inconsistent retention. A die-cut insert may hold a product securely but provide limited cushioning if it is too rigid or leaves no protective buffer at the critical points. Good packaging combines the functions according to risk.
Map the likely handling journey
Think through the full journey from packing bench to customer, not only the shelf display. Include:
- Stacking in storage or during transport
- Loading and unloading
- Parcel handling for e-commerce orders
- Vibration during transit
- Repeated opening where products are displayed or replenished
- Seasonal heat or humidity where materials may change shape or stiffness
This exercise helps determine whether a close-fitting retail box is sufficient or whether it needs a separate shipping carton. Trying to make one decorative gift box perform every protective shipping function can lead to overbuilt, expensive packaging.
Right-size the outer structure
Right-sizing begins with the product’s real protective envelope. Reduce unnecessary length, width and height, but preserve the material and clearances needed to protect vulnerable areas.
The outer structure should be selected with the product weight, sales channel and opening experience in mind. Common options include folding cartons, rigid boxes, corrugated mailers and shipping cartons. Each can reduce packaging void space when correctly dimensioned, but none is universally suitable.
Use the smallest practical footprint
A smaller footprint can improve storage density and reduce the chance of contents shifting over long distances. It may also enable more efficient use of outer shipping cartons and pallet space. Yet an extremely close fit can create new operational problems:
- Products are difficult to insert consistently.
- Operators may crush or scratch products during packing.
- The box may bulge or fail to close properly.
- Customers may struggle to remove the item.
- Minor product variation can cause packing rejects.
Allow a deliberate packing tolerance. The amount depends on the product, surface sensitivity, insert style and whether assembly is manual or semi-automated. Confirm this using actual production samples, not just a digital dieline.
Reduce height before adding filler
Excess box height is a common cause of void space. If the product is stable and the top panel has no special clearance requirement, reducing height is often more effective than adding loose fill.
For a gift set, consider whether components can be arranged in a single layer rather than stacked. For an e-commerce product, assess whether a shallow mailer or low-profile carton can contain the product with an integrated retention insert. These changes can remove empty headspace and present the contents more clearly.
Choose the structure that suits the channel
| Packaging approach | Best suited to | Void-space control | Key consideration |
|---|---|---|---|
| Folding carton | Lightweight retail products, cosmetics, small accessories | Good when closely sized or fitted with an insert | May require added transit protection for fragile products |
| Corrugated mailer | Direct-to-consumer orders and compact goods | Good with locking tabs or a fitted internal feature | Confirm board grade and closure performance for product weight |
| Rigid box | Premium gifts, presentation sets and reusable packs | Excellent when paired with a tray or platform | Usually needs careful dimensional planning to avoid costly excess material |
| Outer shipping carton with inner pack | Fragile, premium or multi-item orders | Strong control when inner pack is restrained | Adds components, so assess material and packing time |
| Flexible mailer | Soft goods and low-breakage items | Can be very efficient for compressible products | Offers limited protection against crushing and sharp impacts |
For products needing both strong presentation and parcel protection, use a fitted inner box within an appropriately sized outer shipper. This can protect the retail presentation without forcing a single pack to do incompatible jobs.
If you are specifying a new format, review the available custom box options alongside the product’s dimensions, pack-out method and distribution channel.
Replace loose fill with engineered retention
Loose fill is sometimes appropriate, particularly for irregular products or variable order combinations. However, it can be inefficient when the same product is packed repeatedly. Engineered retention creates predictable positioning and can reduce the volume of material needed per pack.
The right insert should hold the product where it is safest, not simply fill every visible gap.
Options for engineered retention
Die-cut paperboard inserts Folded or die-cut paperboard can create platforms, partitions, collars and locking tabs. It works well for lightweight to moderately weighted items with regular shapes, such as cosmetics, small jars, kits and stationery. It can also support a clean printed presentation.
Corrugated inserts and partitions Corrugated dividers, pads and cradles provide more structural support than standard paperboard. They are useful for separating multiple items or stabilising heavier products. The insert design should prevent items from touching, particularly where glass, coated surfaces or metal components may scuff.
Moulded pulp trays Moulded pulp can cradle products with repeatable shapes and offer surface protection. It may suit items requiring more cushioning than a flat paperboard insert can provide. Product fit, finish quality and storage conditions should be reviewed before selecting it.
Paper wraps and shaped paper protection Paper-based wrapping may suit variable shapes or lower-volume operations. It is more controlled than random loose fill when a defined wrapping method is used, though packing consistency depends on staff training and available time.
Foam or other protective cushioning materials For highly fragile, heavy or precision items, protective foam or similar cushioning materials may be appropriate. The key is to specify the density, shape and contact points for the actual product risk. Consider material recovery options, customer expectations and disposal requirements before use.
Integrated box features Some cartons and mailers use locking flaps, internal shelves or fold-up cradles formed from the box itself. This can reduce component count and simplify replenishment, but the design must remain easy to fold and pack correctly.
Match the retention method to the product
Choose based on function, not appearance alone.
| Product characteristic | Suitable direction | What to check |
|---|---|---|
| Fragile glass or ceramic | Cradle insert plus spacing from box walls | Base support, corner protection and separation between items |
| Heavy, compact item | Reinforced base and close-fitting retention | Insert strength, bottom-panel support and lifting points |
| Premium gift set | Tray, platform or partitioned insert | Product presentation, removal experience and lid clearance |
| Apparel or fabric goods | Close-fitting carton or mailer, tissue where needed | Folding consistency, crease prevention and moisture considerations |
| Multiple small components | Partition, compartment tray or secured bundle | Missing-item risk, rattling and component-to-component contact |
| Irregular or variable product | Wrap-based method or adaptable insert | Packing time, repeatability and protection at exposed features |
A well-designed insert should not require staff to force the product into position. If it does, the fit is likely too tight, the material too rigid or the packing sequence unsuitable.
Review material and assembly trade-offs
Reducing empty space can save material in the outer box, but a more complex insert may offset some of that saving. Make decisions using the entire packed system: outer structure, internal components, assembly time, storage footprint and damage risk.
Consider the practical trade-offs
Material use versus protection A smaller carton with a fitted insert may use less material than a large carton filled with paper. For some products, however, a simple right-sized box plus minimal wrap is more efficient than a multi-part insert. Compare both options using actual pack-out samples.
Presentation versus packing speed Layered gift packaging can create a premium reveal, but each additional component adds handling steps. For high-volume packing, simplify folds, avoid loose parts and make the correct orientation obvious.
Tight tolerances versus product variation A precision-cut insert can look excellent with a consistent product. It becomes risky when product dimensions vary between batches. Measure several samples and plan tolerances around the realistic range, not an ideal sample.
Material stiffness versus product removal A rigid insert may retain a product very securely but make it awkward to remove. Add finger notches, pull tabs, ribbons or accessible edges where appropriate. Test removal with the intended user, including customers with limited hand strength.
Flat packing versus storage space Fold-flat boxes and inserts may reduce warehouse storage before assembly. Rigid trays and assembled dividers occupy more space but can improve packing speed. The best choice depends on your order profile and available packing area.
Avoid common void-space reduction mistakes
- Selecting a smaller box before defining the product’s impact risks.
- Measuring only the bare product and ignoring wraps, labels or accessories.
- Eliminating all clearance so the box becomes difficult to close or pack.
- Using loose fill to compensate for an oversized structure.
- Designing a visually attractive insert that does not restrain the product.
- Assuming a retail carton can withstand parcel distribution without additional protection.
- Forgetting that customers must be able to remove the product without damage.
- Approving a dieline without assembling and packing physical samples.
Validate the packed system before production
A packaging concept is only proven once it has been assembled, packed and handled in a way that reflects its real use. Digital previews and measurements are valuable, but they cannot fully show rattle, pressure points, assembly errors or how materials behave under load.
Run a practical validation process
- Create representative samples. Use the real product, all accessories and the intended packing materials.
- Check fit in every orientation. Confirm the product cannot move into a vulnerable position if the pack is turned upside down or on its side.
- Assess closure and compression. Make sure the carton closes naturally, without bowing, and that internal components do not press on delicate surfaces.
- Inspect the packed product after handling. Look for scuffs, cracking, denting, displaced labels and product movement.
- Test repeated assembly. Ask several packers to follow the proposed method. Identify confusing folds, difficult insertion points and inconsistent results.
- Review shipping configuration. Where the item will travel in an outer carton, test the complete packed arrangement rather than the inner box alone.
- Confirm the final specification. Record internal dimensions, board or material choices, insert layout, assembly sequence and permitted product tolerances.
For products with a meaningful damage risk, establish a test plan that matches the expected distribution conditions and product value. The exact test method should be agreed with the relevant packaging supplier, logistics partner or internal quality team. Do not assume that one successful hand-packed sample represents consistent production performance.
Make packer feedback part of approval
Packing teams often identify problems that are invisible in artwork reviews: a tab that catches, an insert that collapses, an unclear orientation or a component that takes too long to position. Their feedback can help remove wasteful steps while improving fit and protection.
Document the approved packing sequence with simple visual instructions where useful. This supports consistent results when staff change, demand peaks or packing moves between teams.
A practical specification checklist
Before approving packaging intended to reduce void space, confirm that you can answer these questions:
- What are the complete packed dimensions and weight of the product?
- Which surfaces, edges or components need protection?
- What movement is acceptable inside the pack?
- Is the box for retail display, parcel delivery or both?
- Does the outer size include planned protective clearance?
- Is retention provided by the structure, an insert, wrapping or a combination?
- Can the product be packed and removed without force?
- Do material choices suit the product weight and handling conditions?
- Can staff assemble the pack consistently at the intended volume?
- Has the full packed system been physically checked before production?
Reducing packaging void space works best when it is treated as a design and validation task, not a box-sizing exercise. Begin with complete product measurements, control movement with the right retention method, and test the final pack in its real configuration. For a new custom packaging project, prepare those measurements and handling requirements before requesting a structural proposal from XGolden Print or another packaging supplier.
