
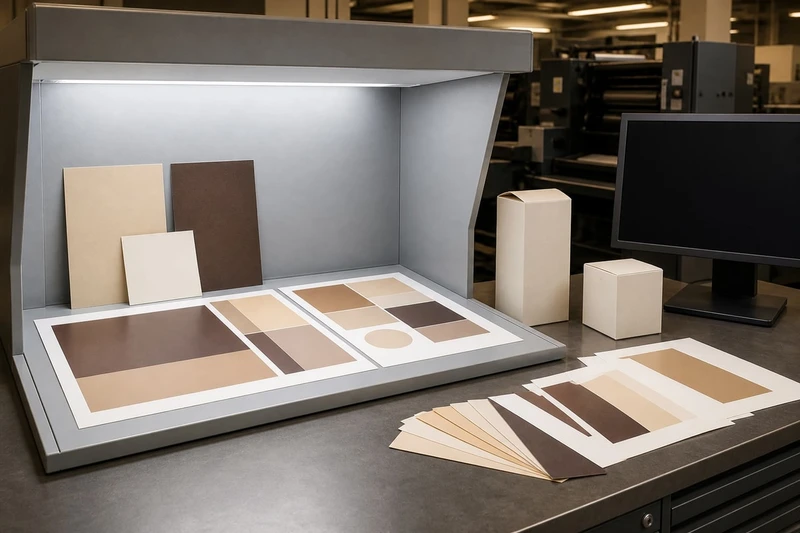
Packaging colour proofing is the process of agreeing what your printed packaging should look like before full production starts. It brings together the artwork, colour specification, printing method, packaging material, finish and viewing conditions so that “blue”, “gold” or “brand red” means something measurable and achievable.
The key is to approve a realistic reference, not an idealised screen image. A colour can look different on a laptop, a coated carton, a kraft box and a glossy label—even where the same artwork file is used. Good proofing makes those differences visible early, when changes are easier and less costly to manage.
Define the colour reference
A colour reference is the agreed target against which the printer, buyer and brand team assess the finished packaging. Without one, approval becomes subjective: one person may compare the carton to a phone screen while another expects it to match an older product pack viewed under shop lighting.
Set the reference before approving artwork or requesting a proof. It should state which colours matter most, how they are specified and what item takes priority if references conflict.
Common packaging colour references
| Reference type | What it is useful for | Main limitation |
|---|---|---|
| Brand colour standard | Defines key brand colours, often as named spot colours or documented colour values | May not account for the chosen board, ink set or print process |
| Physical approved sample | A printed item accepted by the buyer and supplier | Can fade, yellow or vary from the current material and process |
| Spot-colour guide | A printed swatch book showing a named ink on selected paper types | The swatch may not match your packaging substrate or finish |
| CMYK values | Digital colour build used for process printing | The same CMYK numbers can produce different results on different presses and materials |
| Lab values | Device-independent numerical target used for colour measurement | A number alone does not describe gloss, texture, opacity or metallic effect |
| Digital artwork on screen | Useful for checking layout, text and image content | Not a reliable final colour reference |
For most projects, use a hierarchy rather than relying on one source alone. For example:
- Specify the brand’s key colour using a named spot colour or approved Lab target.
- Identify the packaging substrate and finish.
- Approve a physical proof or production-representative sample.
- Record that approved item as the reference for future repeat orders.
If an existing package is your reference, identify its age, material and finish. A carton taken from a shelf may have changed after exposure to daylight, retail lighting, handling or storage. It remains useful as a visual guide, but it may not be the best master standard.
Separate critical colours from non-critical colours
Not every element needs the same level of control. Identify the colours that affect purchase recognition or product consistency, such as:
- A logo colour
- A signature brand background
- A hero product image
- A skin tone or food image
- A colour-coded product variant
- Regulatory symbols that must remain clear and legible
Less critical elements, such as small decorative patterns or low-priority background imagery, can usually accept a broader visual variation. This focus prevents a proofing discussion from becoming unnecessarily difficult while protecting the colours customers notice first.
Understand screen proof and physical proof limits
A screen proof is excellent for checking content. A physical proof is better for judging print appearance. Neither should be treated as a promise that ignores the realities of final production.
What a screen proof can confirm
A PDF viewed on a calibrated monitor can help reviewers check:
- Text, spelling and product information
- Barcode placement and clear space
- Die-line position and panel layout
- Image selection and cropping
- Overprint settings, where displayed correctly
- General colour relationships within the design
However, screens create colour with light, using RGB. Packaging is usually printed using inks that reflect light, commonly CMYK process inks, spot inks or a combination. A luminous blue on screen may print duller, darker or less saturated, particularly on uncoated or brown material.
Screens also differ widely. Phone brightness, night mode, display profiles and ambient light can all change what reviewers see. For this reason, “approved on screen” should normally mean that the artwork content and layout are approved—not that screen colour is the final print standard.
What a digital physical proof can confirm
A professionally produced physical proof can provide a more useful indication of colour, image balance and tonal detail than a screen. It may be suitable for approving the visual direction of a design, particularly when produced with an appropriate colour-managed workflow.
Yet a digital proof can still differ from production packaging because it may use:
- A different print technology from the final run
- Different inks or colourants
- Proofing paper rather than the actual carton board, film or label stock
- A different coating or no finishing process
- Different trapping, screening or ink coverage conditions
Ask what the proof represents. Is it a colour-managed contract proof on proofing stock, a proof produced on the intended material, or a sample from the actual production method? These are not interchangeable.
What a production-representative sample can confirm
A sample made on the intended substrate and with the proposed print process is often the strongest approval tool for packaging colour. It can show how the chosen board, ink opacity, varnish, lamination, foil or texture affects the result.
It is particularly valuable where packaging includes:
- Large areas of solid colour
- Dark or highly saturated brand shades
- Metallic or fluorescent inks
- White ink on clear, metallic or coloured stock
- Uncoated, recycled, kraft or textured papers
- Complex finishes such as matte lamination with spot gloss
- Product photography where colour realism matters
Even a production-representative sample has limits. Small differences can occur between runs due to normal process variation, material batches and operating conditions. The approval should therefore define an acceptable match, rather than assume every carton will be visually identical in every light.
Account for paper and finish effects
Packaging colour is the result of ink plus surface. The same ink formula can appear very different when printed on different papers, boards, films or finishes.
A proof on bright white coated stock cannot reliably predict the appearance of the same artwork on natural kraft board. Likewise, a matte laminate can make colours look softer than a gloss coating, while a high-gloss finish can increase perceived contrast and saturation.
How common packaging materials affect colour
Bright white coated board generally provides a clean, vivid base for process images and solid colours. Fine detail and tonal transitions are often easier to reproduce, although the final result still depends on the printing process and coating.
Uncoated board tends to absorb more ink. Colours may look less intense, finer details can soften, and large solids may show more texture. This can be a deliberate premium or natural look, but it should be expected during approval.
Kraft and recycled materials have a naturally variable base colour. Process inks are influenced by the brown, grey or warm undertone beneath them. A white underprint may be needed when a bright colour is required, but that changes the print construction and should be specified from the start.
Coloured, metallic or transparent stock does not behave like white paper. Inks can appear translucent or take on the colour of the material underneath. White ink, opaque spot colours or a special print sequence may be required to achieve the intended result.
For carton projects, material selection and proofing should happen together. If you are specifying custom printed boxes, do not approve a colour proof without confirming the actual board or an equivalent substrate.
How finishing changes the visual result
Finishing is not only a tactile or decorative decision. It can alter how colour is perceived.
- Gloss lamination or varnish can make colours appear deeper and more reflective.
- Matte lamination can reduce glare but may make dark solids appear softer or lighter.
- Soft-touch finishes create a muted, tactile effect that can change perceived saturation.
- Spot UV or spot gloss introduces contrast between shiny and matte areas.
- Foil stamping is reflective rather than printed ink; its appearance changes dramatically with the viewing angle and lighting.
- Embossing and debossing create shadows and highlights that affect visual colour balance.
Approve colour with the intended finish whenever colour accuracy is important. A printed sheet before lamination is not always an adequate final reference.
Compare spot and process colour decisions
The choice between spot colour and process colour is one of the most important decisions in packaging colour proofing. It affects predictability, cost structure, artwork preparation and the range of colours that can be achieved.
Process colour: CMYK
CMYK uses cyan, magenta, yellow and black dots to reproduce photographs and many colours. It is practical for full-colour artwork, product images, gradients and designs with numerous shades.
Process printing can be an efficient option when the packaging already needs photographic images or varied colour graphics. However, some intense brand colours—especially bright oranges, greens, blues and deep purples—may sit outside the achievable CMYK range on a specific substrate.
A CMYK build should be prepared for the intended print condition. Copying CMYK values from an office document, website artwork or social media asset can lead to unexpected results.
Spot colour
A spot colour is a separately mixed ink, often specified with a recognised colour name or a documented ink formula. It can provide stronger control for a critical brand colour, particularly where that shade would be difficult to reproduce consistently in CMYK.
Spot colours can also improve opacity on darker materials and create special effects, depending on the ink and material. But a spot-colour guide is still a guide. The final appearance can change with board shade, ink coverage, coating and finish.
Choosing between them
| Consideration | Process colour (CMYK) | Spot colour |
|---|---|---|
| Product photography | Well suited | Usually used alongside CMYK if needed |
| Multiple colours and gradients | Well suited | May require several separate inks |
| Signature brand shade | Can be suitable if within achievable range | Often offers stronger control |
| Uncoated or kraft material | Colour shifts can be more noticeable | May improve solidity, but substrate still affects appearance |
| Metallic, fluorescent or special effects | Limited | May be possible with a specialist ink choice |
| Artwork complexity | Four process separations are standard | Each additional spot colour must be clearly specified |
| Proofing focus | Check image balance and overall conversion | Check the spot ink on the actual substrate and finish |
Do not assume that a named spot colour will match an RGB logo exactly. Nor should you assume that converting a spot colour to CMYK will preserve its appearance. Ask for the proposed print method and proof critical colours on the selected packaging material.
For premium presentation products, such as custom gift packaging, it is worth reviewing how spot ink, foil and lamination work together before final approval. A refined colour palette can lose its intended effect when finishing choices are considered only after artwork sign-off.
Review samples under consistent lighting
Lighting can make a well-matched package look wrong—or make a poor match appear acceptable. Review proofs and samples under consistent, neutral lighting whenever possible.
Daylight changes throughout the day, and retail environments can use warm, cool or mixed light sources. A warm indoor lamp may make cream board appear yellower and alter the apparent shade of reds and browns. Cool lighting can make blues and greys seem stronger.
A practical review method
- Use a controlled light source where available. D50 viewing conditions are commonly used in print evaluation because they provide a consistent daylight-style reference.
- Place the sample on a neutral grey or white background. Strong coloured desks, walls or clothing can influence perception.
- View the proof and reference side by side. Avoid comparing them from memory.
- Look at the package at normal handling distance. Then inspect close up for detail, type and registration.
- Check more than one angle for gloss, foil and metallic elements.
- Review under the intended selling environment if that is relevant. For example, assess a retail-ready carton under typical store lighting after first checking it in controlled conditions.
- Use the same lighting for every reviewer where possible.
Avoid making final colour decisions from photographs sent through messaging platforms. Cameras automatically adjust exposure, white balance and contrast; each recipient’s display adds another variable.
Be alert to metamerism
Metamerism occurs when two colours look alike under one light source but different under another. It can occur when colours are made with different pigments or printing methods.
This matters when matching a printed carton to a label, cap, fabric ribbon or previously produced pack. If the components are created differently, assess them together under more than one relevant light source. A match that is acceptable in controlled viewing may shift noticeably under warm shop lighting.
Record an achievable approved reference
A proof approval is useful only if future buyers, suppliers and production teams can understand what was approved. Record the approval in a form that is specific enough to guide repeat work but realistic enough to reflect packaging production.
The best approved reference is usually a retained, dated physical sample produced as close as possible to the intended material, print process and finish. Store it away from sunlight, moisture and unnecessary handling.
What to include in an approval record
Include the following information with the approved sample or digital job record:
- Project name, SKU and artwork version
- Approval date and approving person or team
- Packaging material, board grade or label stock description
- Printing process and number of colours, where known
- Spot-colour names or agreed CMYK/Lab targets
- White ink, underprint or special ink requirements
- Lamination, varnish, foil and other finishes
- The physical sample or proof type approved
- Viewing conditions used for approval
- The priority colours or image areas
- Any accepted variation or known limitation
For labels, retain a finished reference rather than only the flat artwork. Adhesive label material, varnish, film transparency and the colour of the container beneath can all affect the result. This is particularly relevant when developing printed stickers and labels for bottles, jars, e-commerce parcels or promotional products.
Set tolerances carefully
Some projects use numerical colour tolerances, often based on colour difference measurements such as Delta E. These can be helpful for critical brand colours, but they are not a complete substitute for visual approval.
A measurement approach needs clear agreement on:
- The target value being measured
- The instrument and measurement conditions
- The substrate and area to be measured
- The acceptable tolerance
- Whether gloss, texture or opacity affect the result
For a textured board, metallic foil or glossy varnish, numerical readings may not fully describe what the eye sees. Use measurement targets alongside an approved physical reference where the packaging has special materials or finishes.
Common packaging colour proofing mistakes
The following mistakes create avoidable disagreement during approval:
- Approving colour only from an uncalibrated screen.
- Using RGB artwork for print without confirming the required conversion.
- Expecting a CMYK build to reproduce every vivid screen colour.
- Comparing a new proof with an aged or sun-faded pack.
- Approving a proof on white coated paper for a kraft or uncoated production job.
- Ignoring the effect of matte, gloss, foil or white underprint.
- Leaving spot colours unnamed or allowing automatic conversion without review.
- Asking multiple reviewers to assess samples in different lighting.
- Changing material or finishing after colour approval.
- Keeping no physical approved sample for repeat orders.
A practical approval checklist
Before releasing custom packaging for production, confirm that:
- The latest artwork version is clearly identified.
- Critical brand colours have a defined reference.
- The selected substrate is confirmed.
- The proposed print process is understood.
- Spot colours, CMYK builds and special inks are correctly specified.
- The proof type matches the risk level of the project.
- Finishes are included in the approval where they affect colour.
- Samples have been reviewed under consistent lighting.
- Any acceptable limitations are written down.
- An approved reference sample and approval record are retained.
FAQ
Is a PDF proof enough for packaging colour approval?
A PDF is normally enough to approve copy, layout, die-lines and general artwork intent. It is not enough on its own for final colour approval, because displays use light and may not represent the substrate, ink, printing process or finish.
Can a printer match any colour exactly?
Not always. Achievable colour depends on the ink system, print method, substrate, finish and whether the shade falls within the available colour range. Bright screen colours, metallic effects and colours printed on kraft or coloured stock often need a realistic proof and agreed target.
Should I choose CMYK or spot colours for my logo?
Use CMYK when the logo is part of full-colour artwork and the intended shade can be reproduced satisfactorily through process printing. Consider a spot colour when the logo shade is critical, difficult to build in CMYK or needs stronger consistency across packaging.
Why does my colour look different after matte lamination?
Matte lamination changes surface reflection, which can make colours appear softer or less saturated than they did on an unlaminated proof. Review a finished sample where possible rather than approving the printed sheet alone.
A reliable packaging colour proofing process starts with clear priorities: define the critical colours, select the real material and finish, review an appropriate physical sample under consistent lighting, and retain an achievable approved reference. When planning a new packaging format, apply that same sequence before finalising the artwork and production specification with XGolden Print or another packaging supplier.
