
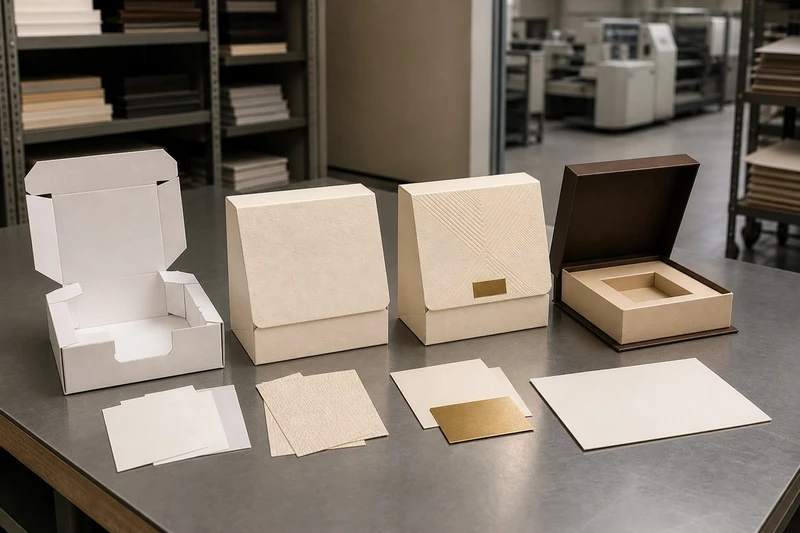
A packaging prototype sample approval should answer one question clearly: is this exact version ready to manufacture? To reach that point, use the right sample for the decision at hand, test it with the actual product and packing process, and document every approved detail in a controlled reference.
A digital layout may confirm artwork placement, while a plain white prototype can prove dimensions and opening action. Neither automatically proves final print colour, board feel or production assembly. Treat each sample stage as evidence with limits, rather than a blanket approval of the whole pack.
For custom cartons, gift boxes, labels and retail-ready packs, a disciplined approval process prevents costly misunderstandings between the design file, sample and production order.
Choose digital, white and printed sample stages
Different sample types answer different questions. Selecting the cheapest or fastest option without identifying the risk first can leave critical details untested.
| Sample stage | What it is useful for | What it cannot reliably prove | Best time to use it |
|---|---|---|---|
| Digital artwork proof | Copy, barcodes, logo position, image placement, dieline alignment and general layout | Final substrate colour, ink density, foil appearance, texture or construction strength | Before making a physical sample |
| Digital 3D mock-up | Visualising panels, shelf presence and the unboxing sequence | Actual fit, folding tolerance, material rigidity or print finish | Early concept and internal sign-off |
| Plain white structural prototype | Dimensions, product fit, folds, closures, inserts and opening experience | Final graphics, ink colour, coating, foil, embossing or production consistency | Before finalising the dieline |
| Printed prototype | Relationship between structure, artwork and a selected material | Exact results from every production run, unless the production method and specification are confirmed | Final pre-production review |
| Press or production drawdown | Print colour and finish against agreed production conditions | Structural performance if it is not converted into the finished pack | Colour-critical designs and brand sign-off |
| Pre-production or first-off sample | A close reference for the intended manufactured item | Future batches where materials, artwork or process settings change | Higher-risk or repeat programmes |
Start with the decision, not the sample format
Write down what approval must establish. For example:
- “Confirm that the 250 ml bottle and leaflet fit without crushing.”
- “Confirm that the tuck flap stays closed during handling.”
- “Confirm the QR code scans after varnish is applied.”
- “Confirm that the brand green is acceptable on the chosen uncoated board.”
- “Confirm the rigid box insert holds the product in the correct orientation.”
This list determines the sample route. A new product with an unfamiliar shape usually needs a physical structural prototype before print investment. A repeat carton with changed artwork may need a digital proof and colour review, provided the dieline and material stay unchanged.
Do not call a render a production sample
A photorealistic render can help stakeholders picture a pack, but it is not evidence of practical performance. Screen displays differ, as do lighting conditions and material surfaces. Similarly, a PDF approved on a laptop does not confirm the colour or behaviour of a finished box.
When a pack uses special finishes such as foil, embossing, spot UV, soft-touch laminate or textured stock, ask for a sample or process reference that demonstrates the relevant finish. The visual effect can change considerably with board shade, artwork coverage and lighting.
Check structure fit and opening experience
Structure approval is about more than confirming that the product fits inside the box. The pack must also protect, present and release the product as intended through packing, transport, shelf handling and customer use.
Use actual products wherever possible. A substitute may differ in size, weight, surface friction, cap shape or flexibility enough to give a misleading result.
Test the complete product set
Place every intended component inside the prototype, including:
- the product itself;
- instruction leaflets, warranty cards or promotional inserts;
- accessories, cables, lids or refill items;
- protective sleeves, tissue, dividers or trays;
- tamper seals where relevant;
- any label or outer wrap that changes final product dimensions.
Check the pack both with a single item and with any permitted product variation. If the product has supplier tolerances, obtain the minimum and maximum dimensions and test both extremes. A design that fits only the nominal size may fail in normal production.
Assess the opening sequence as a customer would
Open and close the prototype repeatedly. Review the experience in the order a recipient will encounter it:
- Is the opening point obvious without damaging the pack?
- Does the closure feel secure but manageable?
- Does the product remain in place when the lid or flap is opened?
- Can fingers reach the product or pull-tab easily?
- Does the insert retain its shape after removal and replacement?
- Are there sharp corners, snag points or awkward folds?
- Can the pack be closed again if the product is returned to it?
For premium gift packaging, small structural details often have an outsized effect. A magnetic flap that snaps shut too aggressively, a ribbon pull that is difficult to grip, or a tight lid that scuffs during opening can undermine an otherwise polished presentation. A custom gift packaging format should therefore be reviewed as a physical interaction, not merely as a visual object.
Check the dieline against the artwork
Confirm that all essential artwork stays within the appropriate zones:
- keep text, logos and codes clear of cuts, creases, glue areas and panel edges;
- keep critical design elements out of expected fold variation;
- ensure images continue correctly across panel joins where intended;
- confirm the barcode has enough clear space and is not placed on a curved, heavily textured or distorted area;
- identify the front, back, top and base panels unambiguously.
The structural file should have a version identifier. Never approve an artwork PDF in isolation if the structure is still subject to change; a small alteration to a flap or glue area can shift a logo, legal copy or barcode.
Review material, colour and finish limits
The same artwork can look different on coated white board, natural kraft board, recycled-content stock, uncoated paper or corrugated material. Colour and finish approval needs to account for the substrate, print process and finishing combination selected for the actual pack.
Judge colour on the intended material
A brand colour viewed on a bright screen or smooth proofing sheet may not match its appearance on the final box board. Uncoated materials tend to absorb more ink, while natural or kraft surfaces influence the printed result because the base is not white.
For colour-sensitive packaging, specify:
- the approved artwork version;
- the intended material name, grade or description;
- whether the board is white, natural, coloured, coated or uncoated;
- the required colour reference, where one is available;
- the print method and any special ink requirement;
- acceptable treatment of colour variation, especially on textured or natural substrates.
Avoid assuming that a Pantone reference guarantees an identical result across every stock and process. It is a useful target, but the material, ink coverage, coating and viewing light all affect perceived colour. Review physical samples under consistent, neutral lighting where possible, rather than relying on warehouse lighting, direct sunlight or a phone camera.
Inspect finishes in realistic conditions
Finishes can improve durability, tactile quality and visual contrast, but they introduce their own constraints.
| Feature | Check during approval | Common limitation to note |
|---|---|---|
| Matte or gloss lamination | Surface appearance, scuff visibility, fold performance and adhesion | Colour and sheen can shift; cracking may show on tight folds |
| Spot UV | Registration, edge sharpness and contrast with the base finish | Fine details and tight registration require careful artwork setup |
| Foil | Position, coverage, readability and edge quality | Very fine type or intricate elements may not reproduce cleanly |
| Embossing or debossing | Depth, alignment and effect on reverse side | Deep impressions may alter the reverse panel or weaken fine detail |
| Soft-touch finish | Tactile feel, marking and fingerprint visibility | Dark, solid areas may show handling marks more readily |
| Kraft or natural board | Legibility, colour behaviour and surface consistency | White ink and light colours may require a different treatment to achieve contrast |
Where a finish crosses a crease, ask whether it may crack, lift or show a visual break after folding. This is particularly important on cartons with dark solid coverage, laminated surfaces and sharply creased panels.
Make text and codes functional, not just attractive
Read small text at normal viewing distance. Check whether reverse type remains crisp, whether fine lines fill in, and whether important instructions have sufficient contrast.
Scan every barcode and QR code from the finished or closest available sample. Test with more than one device where practical. For barcodes, check the quiet zone, orientation and contrast. If a code is essential for retail scanning, traceability or customer activation, include it explicitly in the approval checklist rather than assuming it will work.
Test assembly and pack-out
A pack that looks correct when hand-made may be unsuitable for regular packing. The approval stage should test the realistic assembly sequence, especially for designs with inserts, multiple components or tight tolerances.
Rehearse the actual packing process
Ask the people responsible for packing to assemble the prototype, or simulate their steps as closely as possible. Observe:
- the number and order of assembly actions;
- whether folds are intuitive and lock correctly;
- whether glue tabs, self-locking bases or inserts align;
- how easily the product enters the pack;
- whether the product catches on internal edges;
- whether an insert needs to be pre-folded or held in place;
- whether a label can be applied straight and consistently;
- whether the completed pack stacks securely.
Time is not the only issue. A design that allows several plausible folding sequences can produce inconsistent cartons. If a particular fold order matters, document it with annotated images or a short packing instruction.
Test real-world handling, proportionately
Not every project needs formal laboratory testing, but every project benefits from sensible handling checks. Fill several samples, close them, stack them and move them as they are likely to be handled.
Look for:
- tabs opening under the product’s weight;
- bowing panels or bulging sides;
- crushed corners;
- insert movement;
- rubbing, scuffing or transfer between surfaces;
- a lid that loosens after repeated use;
- fragile features damaged during normal closure.
For e-commerce orders, consider the journey beyond the primary package. A beautiful presentation box may still need an appropriately sized outer shipper and void protection. Test the complete pack-out: product inside primary packaging, then inside its despatch packaging. The aim is to identify friction, movement and unnecessary empty space before committing to volume production.
If packaging will carry food, cosmetics, pharmaceuticals, chemicals or other regulated products, do not treat a visual prototype as proof of compliance or suitability. Confirm the applicable requirements, material suitability and required documentation with the appropriate specialists and supplier before release.
Record changes and approved references
A verbal “looks good” is not a production approval. It leaves too much room for different interpretations, particularly when several people have reviewed samples at different times.
Create a concise approval record that links the physical sample, artwork and purchase requirement.
Include these details in the approval record
- project and product name;
- packaging format and size;
- purchase order or internal reference;
- artwork file name, date and revision number;
- dieline file name, date and revision number;
- material and finish description;
- print colours and special processes;
- sample type reviewed;
- photographs of the approved sample, including key details;
- agreed tolerances or known limitations;
- list of changes requested, with clear responsibility;
- decision status: approved, approved subject to listed changes, or not approved;
- approver name, role and date.
Photographs are useful supporting evidence, especially when they show closure details, inserts and finish placement. They should not replace a retained physical sample where colour, texture or structure matters.
Separate approval from change requests
Use a simple status system:
- Approved: Production may proceed exactly to the listed specification.
- Approved subject to change: Production may proceed only after the stated minor changes are incorporated and confirmed. Define how confirmation will happen.
- Not approved: The sample must be revised and re-reviewed before release.
Avoid ambiguous notes such as “please make it a little darker”, “tighten the fit” or “move the logo slightly”. State the requested result in measurable or visible terms: “move the logo 3 mm away from the fold line”, “increase insert clearance to accommodate the maximum product width”, or “supply a revised printed sample for colour review on the selected uncoated board”.
Retain a “golden sample” carefully
A retained approved sample can provide a useful comparison point for future runs. Label it with the project reference, revision, material and approval date. Store it away from direct sunlight, moisture and handling that could alter its appearance.
Remember that a physical sample ages. Paper can yellow, coatings can mark and adhesive performance can change over time. Use the golden sample together with the documented specification and approved files, not as the only instruction.
Release production with clear version control
Production release should happen only when there is one unambiguous set of approved instructions. The most common avoidable error is allowing an old dieline, uncorrected PDF or earlier sample to remain in circulation.
Build a controlled production pack
The release pack should contain, or point clearly to:
- the final approved artwork file;
- the final dieline and structural drawing;
- the written packaging specification;
- the approval record and sample photographs;
- any colour, finish or assembly references;
- packing instructions where the product has inserts or multiple components;
- the controlled revision number and release date.
Name files consistently. For example, use a project code followed by the component, revision and date. Do not rely on vague labels such as “FINAL”, “FINAL 2” or “USE THIS ONE”. A file called BrandX_Carton_Rev03_2025-04-18.pdf is much easier to trace than carton-final-new.pdf.
Confirm what changes trigger a new approval
A new sample or formal review is usually appropriate when any of these change:
- dimensions or dieline;
- material, board thickness or supplier-provided substrate;
- print process or colour treatment;
- coating, lamination or decorative finish;
- insert design;
- barcode, legal text or mandatory product information;
- assembly method;
- product dimensions, weight or component count.
For a repeat order with no changes, retain the previous approval reference in the order documentation. If a supplier proposes an alternative material or process, treat that as a change rather than an administrative substitution until it has been evaluated.
Common approval mistakes to avoid
- Approving artwork before the final dieline is locked.
- Testing with an empty pack rather than the actual product and inserts.
- Assuming a plain white prototype confirms final board strength or print colour.
- Approving colour from a screen photograph.
- Leaving special finishes, glue areas or fold direction unspecified.
- Sending multiple “final” files without a revision register.
- Treating a sample approval as proof of regulatory compliance.
- Forgetting to test the pack inside the shipping configuration.
For new ranges, begin by comparing suitable custom box options against the product’s dimensions, handling needs and intended retail or delivery journey. A packaging supplier can then quote and sample against a specification that is clear enough to reduce revisions.
FAQ
Is a packaging prototype the same as a production sample?
No. A prototype is primarily used to evaluate a concept, structure, fit or visual direction. A production sample is intended to represent the agreed manufacturing specification more closely. The exact distinction depends on the project, so confirm the material, printing method, finishes and assembly method used for each sample.
How many prototype rounds should a packaging project need?
There is no fixed number. A simple repeat carton may need only a proof and a focused review, while a new gift box with an insert, decorative finish and variable product set may require several stages. The best approach is to identify risks early so each round answers a defined question.
Who should approve packaging samples?
Include people who can assess the relevant risks: brand or marketing for artwork, product development for fit, procurement for the agreed specification, operations for packing, and quality or compliance stakeholders where applicable. One nominated final approver should issue the formal release.
What is the difference between “approved” and “approved with changes”?
“Approved” means the listed sample and files may go to production unchanged. “Approved with changes” should only be used when each change is documented clearly and there is an agreed method for confirming it. If the changes affect fit, colour, finish, required information or assembly, request another review rather than relying on an informal amendment.
A well-run packaging prototype sample approval process turns opinions into controlled decisions. Define what each sample must prove, test the completed pack in real conditions, record the exact approved references, and release only one current production version. For background on a potential packaging partner’s scale and approach, see about XGolden Print.
