
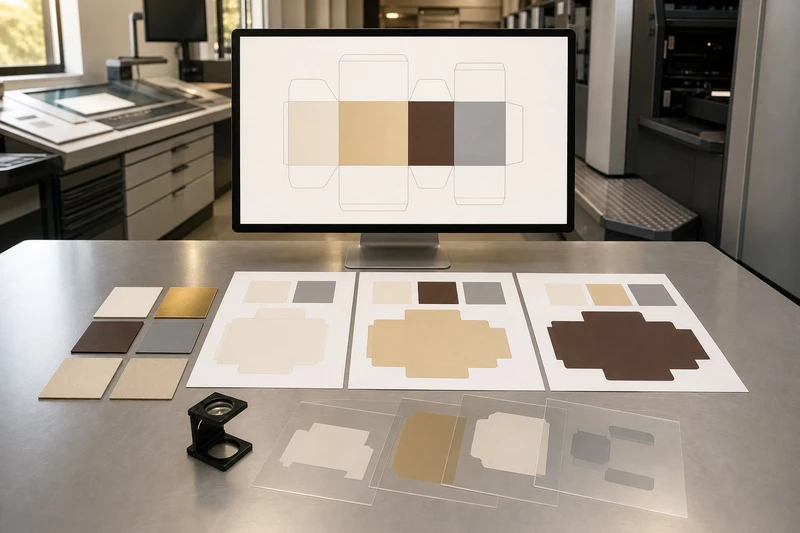
A packaging artwork preflight checklist is the final review of every technical and visual detail before your box, label or gift packaging is released to print. It confirms that the file matches the approved structural design, contains usable artwork and will separate correctly for inks, cutting and special finishes.
Complete the review before approving production—not after sending a PDF. A print-ready-looking file can still contain an outdated dieline, missing image link, unintended overprint setting or foil artwork placed on the wrong layer. These issues can result in delays, extra artwork work or packaging that does not perform as intended.
Use this checklist with the printer’s supplied specification, dieline and proofing process. Requirements such as bleed, colour profile, spot-colour naming and minimum line weight can differ between packaging formats and production methods.
Quick packaging artwork preflight checklist
Before releasing artwork, confirm the following:
- The artwork uses the latest approved dieline and correct product dimensions.
- Bleed, safe areas, folds, glue areas and cut lines are respected.
- All linked images are present, high enough in resolution and correctly placed.
- Fonts are embedded, outlined where requested, or included in the packaged source files.
- Colours are deliberately set as CMYK, spot colours or both, according to the print specification.
- Black text, rich black areas and overprint settings have been checked.
- Foil, embossing, debossing, varnish, white ink and cutting paths are on separate, clearly named layers.
- Small text, legal copy, barcodes, QR codes and their quiet zones remain readable and unobstructed.
- The final PDF is exported using the agreed settings and compared against the approved proof.
- One controlled final version is packaged, named and approved by the correct stakeholders.
The most useful habit is to review the job in two ways: first as a customer would see it, then as production would interpret it. A polished visual design is not automatically a technically complete packaging file.
Confirm the approved dieline version
The dieline is the structural map for the packaging. It indicates cut edges, folds, crease lines, glue flaps, panels, bleed and sometimes no-print areas. Using the correct dieline version is the first and most important preflight check.
Ask for the approved dieline from the packaging supplier rather than rebuilding one from an old box, a screenshot or a design template. Small structural changes can affect panel sizes, flap positions, artwork alignment and the usable area for barcodes or product information.
Check these points:
- Version and dimensions: Confirm the dieline file name, revision date and stated dimensions against the purchase specification.
- Finished versus flat size: A flat layout can be much larger than the assembled box. Check the finished length, width and height rather than judging only by the open artwork.
- Bleed: Extend background colour, photographs and edge-to-edge graphics beyond the cut line by the amount specified for the job.
- Safe area: Keep text, logos, barcodes and essential graphics within the supplier’s safe area, away from cuts, creases and folds.
- Glue areas: Do not place key text, fine detail, foil or varnish in glue zones unless the structural specification explicitly allows it.
- Panel orientation: Check the front, back, side and base panels after imagining the carton folded. A panel may appear correct on the flat layout but read upside down on the assembled pack.
- Dieline integrity: Keep the dieline on a separate non-printing technical layer unless the printer asks for another setup. Do not accidentally include it as a printed colour.
A common mistake is scaling artwork to fit a revised dieline. Scaling may alter font sizes, barcode dimensions and line weights. Where possible, place the approved artwork into the new structural file and re-check all critical elements.
For custom cartons, start with the exact structure required for your custom packaging box format. The artwork review is far more reliable when the structural design is settled before creative sign-off.
Check folds, seams and visual continuity
Packaging graphics often cross folds or wrap around corners. Alignment can shift slightly in normal converting and finishing, so avoid making fine lines, faces, type or precise colour boundaries depend on an exact fold position.
Treat these areas cautiously:
- A thin border running across several panels
- A logo centred directly over a crease
- A face, product image or pattern meeting at a corner
- Small reversed text close to a fold
- A continuous varnish or foil feature crossing a seam
Where continuity matters, ask for a physical mock-up or production proof option where available. A flat digital PDF cannot fully show how a design will look once folded and glued.
Check linked images, fonts and resolution
Artwork files can look complete on one designer’s computer while containing missing links, substituted fonts or low-resolution images. Preflight must check the actual assets embedded in or linked to the final file—not only what is visible on screen.
Inspect images at effective resolution
Use the image’s effective resolution, not merely its original file resolution. Enlarging an image in a layout reduces its effective resolution. As general guidance, imagery intended for commercial print is commonly prepared at about 300 ppi at final placed size, but the right requirement depends on the printing process, substrate and image content.
Check every raster image for:
- Adequate effective resolution at final output size
- No obvious pixelation, compression artefacts or unintended softness
- Correct crop and placement
- Correct colour conversion
- No unlicensed or temporary placeholder images
- Transparency effects that export correctly in the final PDF
Vector artwork is usually preferable for logos, icons, line drawings and text-based graphics because it remains sharp when scaled. However, vector files still need review for strokes, transparency, clipping paths and unintended spot colours.
Do not assume that a high-resolution image will print well if it is poorly edited. Sharpening halos, noisy shadows and compressed JPEG gradients may become more visible in print than on a phone or laptop screen.
Make fonts production-safe
Fonts can reflow when a file is opened on a system that does not have the same typeface installed. This can change line breaks, text spacing, symbols and even the size of a text box.
Before sending final files:
- Check that all text is final and proofread.
- Embed fonts in the production PDF where the workflow supports it.
- Convert fonts to outlines only when requested or when the team has retained an editable source file.
- Keep an editable version with live text for future changes.
- Inspect special characters, registered marks, accents, currency symbols and product variant names after export.
Outlining protects appearance but removes easy editability and can make very small text harder to inspect. Keep a controlled source file before creating outlined production artwork.
Package source files when requested
A packaged artwork folder normally includes the layout file, linked images, fonts where licensing permits, and a final PDF. It helps a prepress team identify assets if changes are needed, but it does not replace a print-ready PDF.
Use clear folders such as:
01_Source02_Links03_Fonts04_Production_PDF05_Approved_Proof
Avoid sending several unrelated “final” PDFs in one folder. That makes it too easy for an obsolete version to be used.
Review colour and overprint settings
Colour decisions should be intentional at preflight stage. A brand colour may be reproduced using process CMYK inks, a dedicated spot colour, or a combination that includes speciality printing. The correct approach depends on the material, print method, run requirements and approved colour expectation.
Confirm with the print specification:
| Item to check | What to review | Why it matters |
|---|---|---|
| Colour mode | CMYK, spot colour or a specified combination | RGB artwork may convert unpredictably for print |
| Spot colour names | Consistent, clearly named swatches | Duplicate or incorrectly named swatches may produce extra separations |
| Brand colours | Approved values and intended ink method | Screen appearance is not a reliable print colour reference |
| Black text | Set to a suitable single black where required | Registration movement can affect small multi-colour text |
| Large black areas | Use the agreed rich black build | A large solid area may need a different build from small text |
| Total ink coverage | Meet the supplied production limit | Excess ink can affect drying, appearance or carton performance |
| Overprint | Deliberate use only, checked in preview | Unintended overprint can make objects disappear or change colour |
Use overprint preview before approval
Overprint is a printing instruction, not simply a visual style. It tells one ink to print over another rather than knock out the ink below it. It is often useful for black text or specific production effects, but accidental overprint can cause serious errors.
Review the exported PDF with overprint preview enabled. Look especially for:
- White objects set to overprint, which may disappear on press
- Light text over dark backgrounds
- Logos made from multiple colour objects
- Drop shadows and transparent effects
- Artwork imported from other design applications
- Black elements unintentionally set to overprint
Do not rely on normal PDF viewing alone. A standard viewer may not display overprint behaviour accurately.
Screen colour is a guide, not a contract
Monitors vary, and uncalibrated screens can make colours appear more saturated or brighter than their printed result. Paperboard, uncoated labels, metallic substrates and different varnishes can also change perceived colour.
For colour-critical packaging, agree the proofing method and approval standard before production. A digital proof is valuable for copy, layout and general colour assessment, but its ability to predict the final result depends on the proofing process and substrate simulation. Confirm what the proof represents.
Separate foil, emboss, varnish and cut layers
Special finishes need their own production instructions. A metallic foil area is not simply a gold-looking CMYK object; embossing is not just a shadow effect; and a cut line should never be left as ordinary visible artwork.
Create separate layers or named spot-colour swatches for each special process, following the supplier’s naming convention. Keep these elements as vector shapes where possible.
Typical production layers include:
CUTorDIE CUTCREASEFOILEMBOSSDEBOSSSPOT UVVARNISHWHITE INKWINDOWARTWORK
The exact names, colours and overprint instructions should come from the printer. Do not assume a generic naming convention will be recognised automatically.
Set up finishing artwork correctly
For each finish, confirm:
- The finish is on its own layer or dedicated spot colour.
- The layer is set to print or not print as instructed.
- The finish shape is vector-based, closed where needed and free from accidental clipping.
- The finish aligns to the correct panel after folding.
- Minimum line widths, gaps and detail levels meet the supplier’s limits.
- Small text and fine details are suitable for the finish.
- The finish does not extend into glue, fold or cut-risk areas unless approved.
- Any required trapping or spread has been applied according to the specification.
Foil, embossing and spot varnish can register differently from printed ink. Avoid placing a hairline foil border exactly against a printed colour boundary unless the production team confirms suitable tolerances.
Check cut paths and sticker contours
For labels and stickers, inspect the cut contour as carefully as the printed design. The cut path should be a separate technical line, clearly named and configured according to the production requirement.
Ensure that:
- The cut path follows the intended shape.
- Bleed extends beyond the cut contour.
- Important text and graphics sit inside the safe margin.
- Rounded corners, internal cuts and narrow points are practical for the material.
- There are no duplicate cut lines or open vector paths.
This is particularly important for shaped promotional labels and custom printed stickers, where a small contour error can alter the finished shape.
Inspect small text, codes and quiet zones
Small content is often the highest-risk part of a packaging file. Ingredients, directions, warnings, batch fields, barcode numbers, QR codes and contact details may be legally or commercially important, but are easily compromised by low contrast, folds, varnish or poor placement.
Review small type at actual size
Inspect the PDF at 100% view and, ideally, print a test at final scale. Check:
- Font size and weight are appropriate for the substrate and print method.
- Reversed text is not too thin.
- Text over images has sufficient contrast.
- Fine type does not sit on a crease, fold, cut edge or glue flap.
- Registration marks, dieline strokes and technical notes are not accidentally visible.
- All copy is readable after applying any varnish, foil or emboss effect.
Do not judge legibility by zooming in to 400% on screen. It can conceal problems that become obvious at actual size.
Protect barcode and QR code quiet zones
A barcode needs a clear area around it—the quiet zone—so scanners can distinguish the code from surrounding graphics. A QR code likewise needs a clean border and enough contrast for reliable scanning.
Before approval:
- Use the correct code data and check the human-readable number.
- Keep graphics, borders, varnish effects and folds out of the quiet zone.
- Do not stretch, crop or distort the code.
- Maintain adequate contrast between code and background.
- Test-scan the final exported artwork at realistic size.
- Consider the scanning environment: glossy varnish, curved surfaces, metallic effects and dark substrates can affect readability.
A barcode that scans from a desktop screen may not behave the same way once printed on a textured, reflective or folded pack. For important codes, confirm the printer’s verification approach and any required specification from your retailer, distributor or product-data system.
Package and approve the final production files
The final stage is not merely emailing a PDF. It is a controlled release process that prevents the wrong file, wrong dieline or unapproved revision from entering production.
Build one final release package
A practical release package can include:
- The final print-ready PDF
- The approved dieline reference
- Clearly labelled special-finish files, if supplied separately
- A low-resolution approval PDF for easy stakeholder review
- A written job summary stating quantity, substrate or board where relevant, size, finishes and version number
- The signed or recorded proof approval required by your organisation
- Editable source files only if requested
Use a file name that identifies the product, format, revision and date without ambiguity. For example:
Brand_ProductName_350ml_Carton_REV03_2025-03-08_PRINT.pdf
Avoid names such as final.pdf, final-final.pdf, new version.pdf or use this one.pdf. These names create avoidable version-control risk.
Run a final visual and technical comparison
Compare the final production PDF against the approved artwork and job brief. Check that the PDF has not changed during export, especially where it contains transparency, spot colours, overprint, dieline layers or special finishes.
A final approver should confirm:
- Correct product name, variant, size and language content
- Correct pricing or promotional information, where applicable
- Correct barcode or QR data
- Correct dimensions and latest dieline
- Correct finishing layers
- Correct contact details and mandatory pack information supplied by the business
- No old logos, claims, photographs or ingredients
- No placeholder text, comments or hidden design notes
Keep an approval record that identifies the exact file name and revision. If any change is made after approval—even a single punctuation correction—issue a new revision and repeat the relevant checks. Do not alter a production PDF silently.
Common preflight mistakes and how to avoid them
| Mistake | Likely consequence | Better approach |
|---|---|---|
| Using an old dieline | Artwork may not fit the final structure | Match file revision and dimensions before design sign-off |
| Leaving RGB images in the file | Unexpected colour conversion | Convert and review colours according to the print specification |
| Sending a PDF without checking separations | Extra inks or missing effects | Inspect output preview and separations before release |
| Putting foil on the artwork layer | Foil may be missed or misinterpreted | Use a separate named spot-colour layer |
| Adding text too close to a cut or fold | Text may feel cramped, distort or be trimmed | Follow the supplied safe area |
| Treating a digital proof as a physical mock-up | Fold, substrate and finish effects may be missed | Use the proof type appropriate to the risk |
| Approving multiple versions by email | Incorrect artwork may be produced | Nominate one controlled file and revision |
| Flattening everything without review | Transparency or special-colour issues can be hidden | Export using agreed settings and inspect the final PDF |
FAQ
Should packaging artwork be supplied as PDF or editable files?
A print-ready PDF is commonly used for production because it preserves layout and is easier to preflight consistently. The supplier may also request editable source files for amendments or technical setup. Confirm the required PDF standard, bleed, marks, fonts and layer setup before export.
Should crop marks be included on packaging artwork?
Follow the printer’s file specification. Some workflows prefer artwork supplied at the dieline size with bleed and no crop marks, particularly where technical cut paths are included. Crop marks can interfere with automated workflows if they are not requested.
Can I use one file for print, foil and spot varnish?
You can often include the artwork and finishing instructions in one layered production file, provided each process is clearly separated and named as required. Do not merge finishing shapes into the normal CMYK artwork layer.
Who should approve packaging artwork?
The right approvers depend on the product, but typically include the brand owner, product or marketing lead, and a person responsible for product information, codes and compliance content. Procurement teams should also ensure that the approved artwork matches the ordered packaging specification.
Final check before release
A careful packaging artwork preflight protects both the design intent and the production process. Start with the approved dieline, verify assets and colours, separate every special finish, test critical codes, then release one clearly named and approved production package.
If you are preparing a new packaging job, use this checklist alongside the printer’s technical template and keep the final approval record with the exact production PDF. XGolden Print can then receive a more complete, easier-to-review file for custom packaging production.
