
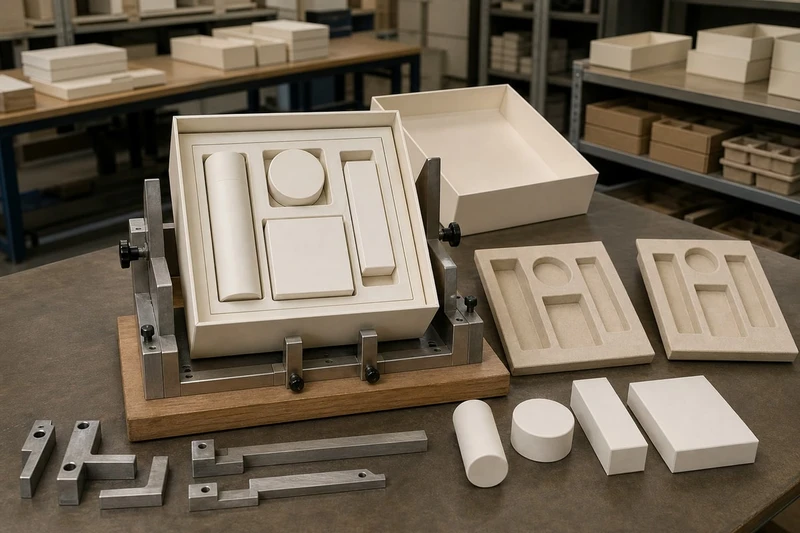
Successful multi item gift box insert planning starts with the complete set, not the outer box. List every item, measure its real packed size, decide what customers should see first, and design retention around how the set will be packed, transported and opened.
For gift sets containing products, accessories, literature and samples, the insert must do three jobs at once: protect every component, make the arrangement intuitive, and allow a packing team to assemble the set consistently. A neat-looking layout that is awkward to fill or difficult to remove from can create avoidable damage, delays and customer frustration.
List every component and variation
Create a set bill of materials before specifying cavities or choosing insert material. Include items that may seem too small to affect the layout, such as charging cables, sachets, instruction cards, spare parts, ribbons, seals and promotional inserts.
For each component, record:
- Product name and SKU
- Quantity per gift box
- Finished dimensions: length, width and height
- Weight
- Shape and fragile features, such as pumps, lids, glass edges or protruding handles
- Primary packaging already around the item, such as a carton, pouch, bottle label or sleeve
- Orientation requirements: upright, face-up, flat or flexible
- Whether it is supplied in multiple colours, sizes, scents or models
- Whether it is optional, seasonal or market-specific
- Whether it needs a separate tamper-evident seal or protective wrap
Do not use only supplier catalogue dimensions. Measure actual production samples, including closures, labels, shrink sleeves and any retail-ready packaging. A bottle that is nominally 50 mm wide may have a 54 mm cap; a carton with a folded tab can also need more clearance than its stated dimensions suggest.
Plan for the largest credible variation
An insert designed around one sample can fail when product variation is introduced. Identify the “design maximum” for each cavity: the widest, tallest or least regular version likely to be packed during the insert’s working life.
This is especially important when one gift box may contain:
- Different garment sizes or folded textile bundles
- Assorted cosmetic jars with varying lid profiles
- Product colours with different labels or sleeves
- Seasonal products replacing a standard item
- Imported accessories with a revised retail carton
- Hand-finished products that vary slightly in shape
If variations are frequent, a fully cut-to-shape insert may be less practical than adjustable partitions, a flexible paper fill system, or a modular tray with interchangeable cavity sections.
Separate fixed items from variable items
Classify components into two groups:
| Component type | Typical examples | Insert approach |
|---|---|---|
| Fixed-format item | A standard candle jar, boxed fragrance, branded mug | Dedicated cavity or precisely sized partition |
| Variable-format item | Apparel, mixed snacks, assorted samples, seasonal accessories | Adjustable compartment, wrap, pouch or flexible retention |
| Loose supporting item | Card, leaflet, ribbon, cable, voucher | Flat pocket, top layer, envelope or small accessory bay |
| Delicate item | Glass bottle, ceramic, electronics | Stable cavity plus protective spacing and controlled orientation |
This step prevents an expensive insert from becoming obsolete after a routine product update.
Set the reveal sequence
The reveal sequence is the order in which a recipient encounters the contents after opening the gift box. It affects perceived value, usability and the likelihood that small components remain in place.
Start by deciding what should be visible immediately. For many retail gift sets, this is the hero product, a branded message card, or an arranged selection of products. For corporate gifting, the welcome message or recipient card may need to sit on top. For e-commerce gift boxes, a protective top layer may be necessary before the presentation layer.
A practical reveal sequence often follows this order:
- Outer presentation: lid, sleeve, seal or opening mechanism.
- Welcome layer: message card, tissue, printed insert or a branded reveal panel.
- Hero item: the product with the strongest visual or commercial role.
- Supporting products: complementary items arranged around or beneath the hero item.
- Accessories and instructions: smaller pieces that should not distract from the main reveal.
- Replacement or replenishment information: care cards, refill notes or QR-linked instructions where relevant.
Match the sequence to how the set is bought
The best reveal order depends on the buying context.
- Retail shelf sets need the box to communicate value quickly when opened for inspection. Keep products orderly and easy to return to position.
- Online orders need more transport protection. The opening experience still matters, but components should not shift if the parcel is handled roughly.
- Corporate or event gifting often places the recipient message first, followed by clearly presented branded items.
- Premium product launches may use a staged reveal, with a lift-out card, ribbon pull or secondary tray. Only use these features if they do not make packing or removal unnecessarily difficult.
Avoid placing the heaviest object on top of delicate items merely to make it the first reveal. The visual hierarchy must work with the protection hierarchy.
Decide what can be hidden
Not every component needs an individual cavity in the first layer. Small items can sit beneath a tray, inside a dedicated envelope, or in a paper pouch if they are secured and easy to find. This can improve the presentation of the main products while reducing the visual clutter of cables, refill parts or loose samples.
However, hidden items must be documented clearly. If a customer could mistake the set as incomplete, use a card or printed message such as “Accessory pouch beneath tray” rather than relying on the recipient to discover it.
Map product footprints and clearances
Once the contents and reveal order are confirmed, map the insert from the base upward. A two-dimensional layout is not enough: each component needs a footprint, a height allowance and a removal method.
For each product, define:
- Footprint: the area occupied when placed in the intended orientation.
- Cavity depth: how far the product sits into the insert.
- Top clearance: the gap between the highest point of the product and the closed lid.
- Side clearance: space allowing for insertion, removal and normal product variation.
- Separation distance: material or empty space between items that could collide.
- Finger access: room to grip or lift the item out.
- Support points: where the insert actually holds the product’s weight.
Work from the critical item outward
Place the most restrictive component first. This is usually the heaviest, tallest, most fragile or least regular item. Build other cavities around it rather than trying to force it into leftover space.
For example, a gift set containing a glass bottle, a candle, a card deck and a small accessory should generally be mapped around the bottle or candle. The card deck and accessory are easier to accommodate in secondary spaces than the larger, more vulnerable product.
Where products have lids, pumps or embossed tops, ensure those features do not touch the lid when the box is closed. Contact points may scuff finishes, loosen caps or transfer pressure to fragile areas.
Build in usable clearance, not empty space
Clearance is necessary, but excessive space causes movement. The goal is controlled fit:
- A cavity should accept the product without forcing it into place.
- The item should not rattle or rotate significantly during ordinary handling.
- The product should be removable without pulling, digging or turning the box upside down.
- Adjacent products should not touch if either one could mark, crack or crush the other.
The exact allowance depends on the product, insert material and manufacturing tolerances. Confirm the final fit with physical samples rather than assuming a drawing alone will predict compression, flex or product variation.
Plan the vertical stack
The total internal depth must accommodate every layer:
- Base support or lower tray
- Product depth
- Top protective layer, where used
- Cards, tissue or a lid-mounted message
- Safe lid clearance
A common mistake is to calculate the box depth around product height only. A card on top of a raised product, a ribbon tie, or a folded tissue layer can create lid pressure. If the outer box bows or does not close cleanly, the presentation and protective function are both compromised.
Include removal features early
A tight cavity without a removal feature is rarely customer-friendly. Depending on the item and insert type, consider:
- Finger notches
- Semi-circular cut-outs
- Ribbon pulls
- A lift-out tray
- A recessed lower edge
- A pull tab for a paperboard platform
- A protected accessory pocket
Removal features should not weaken the areas supporting heavy products. Test them with the actual intended user, including people with larger hands or limited grip strength where the product category makes accessibility important.
Choose insert materials and retention
Insert selection should follow the product’s weight, fragility, presentation target, expected reuse and assembly process. There is no universally best insert material.
Compare common insert options
| Insert type | Best suited to | Strengths | Considerations |
|---|---|---|---|
| Folded paperboard partitions | Boxed goods, bottles, jars and multi-product assortments | Efficient, adaptable, recyclable in many constructions, suitable for hand packing | Less suitable for irregular shapes unless combined with wrap or additional retention |
| Die-cut paperboard tray | Consistent product shapes and retail presentation | Neat compartments, printable surfaces, repeatable layout | Needs accurate dimensions and may require redesign if products change |
| Moulded pulp | Products needing cushioning with a lower-gloss presentation | Good support for some shapes, textured appearance, useful for heavier items | Surface finish and dimensional detail may not suit every premium presentation |
| Foam insert | Fragile, premium or tightly controlled products | Strong retention and cushioning for selected designs | Material choice, appearance and end-of-life expectations need careful consideration |
| Corrugated insert | Heavier goods and transport-focused gift sets | Robust, economical, useful for layered protection | May appear more utilitarian unless covered or integrated thoughtfully |
| Tissue, shredded paper or paper wrap | Lightweight, flexible or variable-size items | Flexible, easy to adapt, supports an unboxing look | Does not provide precise positioning on its own; items can move if under-filled |
| Fabric or paper pouches | Accessories, small parts and soft goods | Hides visual clutter and groups loose items | Needs clear labelling and a secure closure where components could escape |
Select retention by risk, not appearance alone
Retention refers to how the insert keeps each component in place. Use the least complex method that reliably controls movement.
- Gravity retention works where products sit deeply enough in stable compartments and the box stays upright.
- Friction fit suits repeatable product shapes but must allow for normal variation and easy removal.
- Partitions stop lateral movement and are useful for multiple boxed products.
- Tabs or straps help secure lightweight products that could lift out of a cavity.
- Pouches or envelopes contain loose accessories.
- Top pads or cover cards reduce upward movement and can protect printed surfaces.
- Wraps and bands can group related items but should not leave adhesive residue or damage finishes.
For a set that may be sent by courier, consider the full distribution route, including stacking, vibration and a box being turned on its side. A display-ready layout often needs added top retention or secondary protection for e-commerce fulfilment.
Avoid material compatibility problems
Test insert materials against the actual product packaging. Potential issues include:
- Abrasion on gloss cartons, metallic foils or soft-touch coatings
- Fibre transfer from rough paper or tissue
- Pressure marks on labels and shrink sleeves
- Odour transfer to fragrance, food or personal-care products
- Static attraction around small electronic accessories
- Adhesive contact with printed or coated surfaces
- Moisture sensitivity during storage or transit
Where products have specific storage, food-contact, cosmetic or regulatory requirements, confirm material suitability with the relevant product and packaging specialists. An attractive insert should never interfere with the product’s own requirements.
Trial kitting and removal
A prototype is essential because multi-item gift box insert planning involves human handling, not only dimensions on a drawing. Trial the complete set with real or representative samples before approving a production layout.
Run the trial in the intended assembly order. Record how long each step takes, which parts require adjustment, and where mistakes are likely.
Test the packing process
Ask a packer to assemble the gift box using only the proposed instructions. Check whether they can:
- Identify all required components quickly
- Place each item in the correct orientation
- Recognise front, back, top and bottom of the insert
- Pack small components without losing them
- Close the box without compressing contents
- Apply any tissue, ribbon, seal or outer sleeve consistently
- Detect when an item is missing or incorrectly placed
If packing relies on memory, the layout is vulnerable to errors. Use visual cues, labelled sections, colour coding where appropriate, or a clear pack-out guide.
Test customer removal separately
A box can be easy to pack but unpleasant to open. Test removal with a person who did not help develop the set. Ask them to open the box without instructions and observe:
- Can they identify every item?
- Do they know where to start?
- Can they lift each product out without damaging the box or insert?
- Do small accessories remain secure until intentionally removed?
- Does the reveal still look organised after one item has been taken out?
- Can the customer reuse the box, if that is part of the intended experience?
Do not rely on a single opening test. Repeat it after the box has been closed, moved and handled. Where the set will be distributed through e-commerce, trial the fully packed box within its shipping configuration as well.
Use realistic product conditions
Test with full product weight, actual closures and finished labels. Empty bottles, prototype cartons without coatings, or substitute products can give misleading results. If final samples are unavailable, flag the unconfirmed fit points and schedule a final validation before production.
Document set configuration and pack-out
A gift box insert becomes repeatable only when its configuration is documented. This is important for internal teams, contract packers, retailers and future product revisions.
Your pack-out specification should include:
- Gift set name, version and date
- Outer box dimensions and internal usable dimensions
- Insert material, construction and orientation
- A top-view layout diagram
- Component list with SKU, quantity and product orientation
- Cavity or compartment reference numbers
- Placement order
- Tissue, cards, pouches, ribbons and seals required
- Product-facing direction, where presentation matters
- Closure method for the finished box
- Final quality checks
- Notes for variable products or approved substitutions
- Photograph or illustration of the completed open and closed set
Define practical quality checks
Keep checks specific enough to catch meaningful errors. For example:
- Correct number of products in each compartment
- No missing accessory pouch or message card
- Labels and branding face the intended direction
- Glass, lids and cartons show no visible damage
- Products do not protrude above the allowed height
- Box closes squarely without bulging
- Insert is seated correctly and has not collapsed
- Outer presentation components are clean and aligned
Avoid vague instructions such as “pack neatly”. A visual reference and a short checklist provide a more consistent result.
Control changes after approval
Any change to product size, primary packaging, label thickness, accessory count or card format can affect fit. Maintain a revision process so that the insert drawing and pack-out document are reviewed whenever a component changes.
This is particularly useful for promotional sets, where a sample or limited-edition product may be added at short notice. Rather than forcing a new item into an existing cavity, assess whether it needs a revised insert, a pouch, a secondary layer or a different outer box depth.
Common multi-item gift insert mistakes
The most frequent problems are avoidable during planning:
- Designing around product artwork rather than actual packed dimensions
- Giving every item a rigid cavity despite regular product variation
- Forgetting the thickness of cards, tissue, ribbons and top pads
- Making the insert look full but leaving no finger access
- Securing a product so tightly that removal damages its carton or label
- Using loose fill as the only protection for fragile products
- Hiding accessories without telling the recipient they are included
- Choosing a material for appearance without checking product compatibility
- Testing the display layout but not the completed shipping configuration
- Providing no assembly sequence or visual pack-out reference
- Treating an insert as permanent when the set contents change seasonally
A practical planning checklist
Before approving a multi-item gift box insert, confirm that you can answer “yes” to the following:
- Have all products, accessories and printed pieces been listed?
- Have actual samples been measured, including closures and secondary packaging?
- Is the largest likely product variation accommodated?
- Is the opening and reveal sequence intentional?
- Does every item have sufficient support, clearance and removal access?
- Are heavier and fragile components protected from one another?
- Is the insert material suitable for the product surfaces and intended use?
- Can a packer assemble the set using documented instructions?
- Can a recipient find and remove every component comfortably?
- Has the fully packed box been checked for clean closure and controlled movement?
- Is there a current pack-out specification for production and fulfilment teams?
A well-planned insert turns a collection of products into a coherent gift set while reducing movement, packing uncertainty and presentation errors. If you are defining the outer box alongside the insert, review suitable custom gift packaging options early so that the internal layout and box construction are developed together.
For a production-ready brief, prepare your component list, measured samples, preferred reveal sequence and pack-out reference before requesting an insert layout or prototype.
