
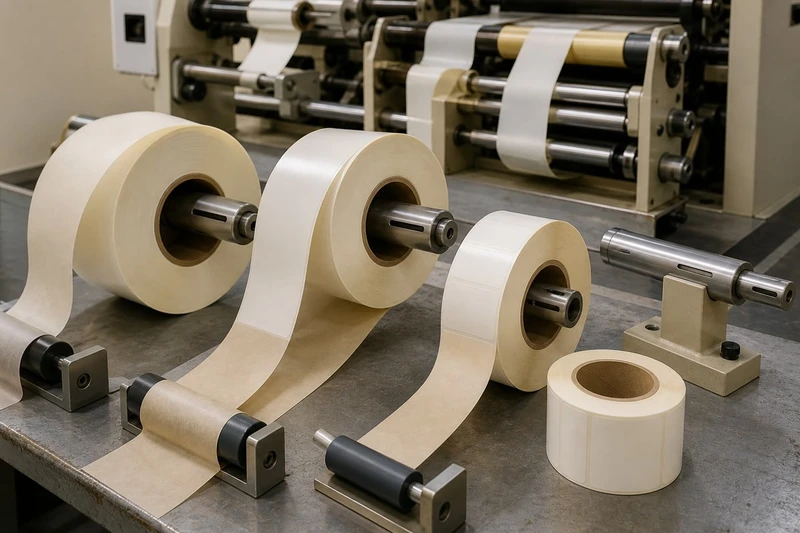
Label roll unwind direction tells the printer and your applicator how labels must come off the roll. It is not a universal “top” or “bottom” setting: the correct direction depends on whether labels are applied by hand or by a specific labelling machine, plus how the product moves through that process.
To avoid unusable rolls, provide a complete roll specification: application method, unwind direction referenced to a clear diagram, core internal diameter, maximum outside roll diameter, label orientation, gap, splice allowance and packing requirements. A sample roll or the machine manufacturer’s roll specification is the safest reference when available.
Confirm hand or machine application
Start with the application method because it determines how precise the roll configuration must be.
Hand-applied labels
For manual application, the unwind direction is usually more flexible. A person can turn the roll around, change hands or pull labels from a dispenser as needed. However, the roll format still affects speed and usability.
For hand application, confirm:
- Whether labels will be applied directly from the roll or through a bench dispenser
- Whether the applicator is right- or left-handed
- Whether labels need to peel towards the operator or away from them
- The preferred roll width and weight for comfortable handling
- Whether labels are used individually, in short runs or at a packing bench
- Whether the label must be presented upright as it is removed
Small products, gift packaging and e-commerce parcels may be labelled manually even where production volumes are substantial. In these cases, a smaller roll diameter can be easier to manage, while a larger roll may reduce the frequency of roll changes.
Machine-applied labels
For automatic or semi-automatic labelling, both unwind direction and roll dimensions are critical. The label stock passes through guides, sensors, a peel plate and often a driven applicator mechanism. Loading a roll in the wrong direction can result in labels facing the wrong way, peeling from the liner incorrectly, failing to trigger a sensor or being applied upside down.
Before ordering machine-applied roll labels, obtain the labelling machine’s requirements for:
- Core internal diameter
- Maximum roll outside diameter
- Maximum web width
- Required unwind direction
- Label sensor type and any gap, mark or clear-liner requirements
- Minimum and maximum label pitch
- Face-in or face-out winding
- Leading edge orientation
- Roll mounting position and shaft or chuck arrangement
- Maximum roll weight, if stated by the equipment supplier
Do not assume that two machines with similar functions use the same unwind direction. A front-and-back bottle labeller, wrap-around labeller, print-and-apply system and flat-surface tamp applicator can all have different requirements.
Identify unwind direction
The label roll unwind direction describes the way the web leaves the roll as it feeds into a dispenser or labelling machine. It is normally shown using a numbered diagram or a custom drawing. The number alone can be ambiguous unless the reference convention is clear.
A reliable specification should show:
- The label face and backing liner.
- The side of the roll from which the web exits.
- The label’s top edge or leading edge.
- The direction of web travel.
- Whether the viewer is looking at the labels from the adhesive side, printed face or outside of the roll.
Why unwind numbers can cause mistakes
Many suppliers use labels such as “unwind 1”, “unwind 2”, “unwind 3” and “unwind 4”. These numbers are useful only within the supplier’s own documented convention. One supplier’s unwind 1 may not match another supplier’s diagram.
For that reason, avoid specifying only a number in a purchase order unless you have also attached the printer’s unwind chart and marked the required option. A simple visual reference is more dependable than terminology alone.
The best way to specify label roll direction
Use a labelled drawing, artwork proof or marked sample roll. Show the finished label as it should appear when the liner enters the machine.
Your specification can state, for example:
Labels to dispense with the top edge leading. Printed face outward. Web exits from the bottom of the roll when viewed from the printed face. Roll must match the attached machine unwind diagram.
This is more useful than simply saying “top unwind” or “clockwise unwind”, both of which may be interpreted differently depending on viewing position.
Leading edge versus label orientation
The leading edge is the part of the label that reaches the peel plate or application point first. This matters particularly for labels with directional graphics, barcodes, variable data or a shape that is not symmetrical.
For a rectangular label, ask:
- Does the top of the design need to lead first?
- Does the bottom edge need to lead first?
- Is the label applied portrait or landscape?
- Does a barcode need to run in a particular direction for scanning?
- Does the product travel upright, on its side or around a conveyor curve?
A label can be correctly printed yet still be operationally wrong if its leading edge does not suit the application process.
Face-out and face-in winding
Face-out means the printed label face is visible on the outside of the wound roll. Face-in means the liner is visible on the outside. Neither is automatically better; the correct choice depends on the machine’s web path and loading arrangement.
Do not use face-out or face-in as a substitute for an unwind direction. These describe the roll’s outer surface, while unwind direction defines how the labels feed off the roll.
Specify core size and maximum roll diameter
The core is the cardboard or plastic centre around which the labels are wound. Core size is generally stated as the internal diameter, commonly in millimetres. The maximum roll diameter is the outside diameter (OD) of the fully wound roll.
Both dimensions must fit the applicator.
Core size: what to check
The core needs to fit the labelling machine’s spindle, mandrel or expanding chuck. If the core is too small, it cannot be loaded. If it is too large, it may not sit securely or may not engage with the machine’s roll holder.
Typical cores are available in several sizes, but do not select one based on what is “standard” in another operation. Confirm the machine requirement and specify the core’s internal diameter, not merely “large core” or “small core”.
Also check whether your equipment requires:
- A plain cardboard core
- A particular core width
- A core that is flush with the label web
- A core that extends beyond the web for locating guides
- A plastic core or a specific hub design
Maximum roll diameter
A roll’s outside diameter determines whether it fits within the machine’s roll compartment and whether it clears guards, sensors and guide arms. Larger rolls hold more labels, which can reduce changeovers, but only if the equipment accepts them.
The maximum OD should account for the actual space available, not just the nominal width of the machine. Ask the machine supplier for the maximum permissible roll diameter and, where relevant, maximum roll weight.
| Roll specification | Why it matters | What to confirm |
|---|---|---|
| Core internal diameter | Must fit the spindle or chuck | Required ID in mm |
| Core width | Affects lateral positioning | Whether the core must be flush or extended |
| Maximum outside diameter | Must fit the roll holder and guards | Maximum OD in mm |
| Web width | Must pass through guides and sensors | Total liner width, not label width only |
| Roll weight | Can affect braking and drive performance | Machine limit, if applicable |
| Labels per roll | Determines changeover frequency | Preferred count or practical maximum |
Balancing labels per roll with machine compatibility
More labels per roll do not always mean a better choice. A larger roll can be awkward to lift, may exceed the machine’s diameter limit or create excessive tension where the unwind brake is not set correctly.
Conversely, very small rolls may require frequent stoppages and increase the number of roll changes during a production run. The practical balance depends on label size, material thickness, liner thickness, adhesive construction and the equipment’s capacity.
If the machine documentation gives a maximum OD but no preferred label count, specify the maximum OD and allow the final labels-per-roll count to vary within a reasonable agreed range. The exact count can change with production tolerances and the finished label construction.
Set label gap and orientation
The label gap is the unprinted space between one label and the next on the liner. It is also called the pitch gap, inter-label gap or web gap. Labelling equipment uses this space, or another registration feature, to identify each label position.
A correct gap is essential for accurate dispensing.
Specify the full label pitch
The pitch is the distance from the same point on one label to the same point on the next. It includes the label length in the machine direction plus the gap.
For example, if a label is 80 mm long in the feed direction and the gap is 3 mm, the pitch is 83 mm. A machine may need this information for sensor setup or synchronisation.
State:
- Label width across the web
- Label length in the direction of travel
- Gap between labels
- Total pitch
- Corner radius or label shape where relevant
- Whether labels are butt-cut, die-cut or supplied with a specified gap
- Liner type and colour if the sensor is sensitive to it
Orientation: across-web and machine direction
A label’s dimensions are not enough on their own. The printer needs to know which edge is across the roll and which edge travels along the web.
Use wording such as:
- “100 mm wide across web × 50 mm long in feed direction”
- “Landscape label; 50 mm edge leads first”
- “Barcode positioned parallel to web travel”
- “Artwork top edge leads at the peel plate”
This prevents a common production issue: labels supplied in the right finished size but rotated 90 degrees on the roll.
Sensor compatibility is a separate check
Many label applicators use a gap sensor, but some may use reflective marks, contrast sensing or other methods. Clear labels, metallic materials, dark liners and unusually shaped labels can affect detection.
If labels are transparent, highly reflective or supplied on a non-standard liner, ask the machine supplier which sensing method is used. You may need a different gap, a printed registration mark or a material combination that the sensor can reliably detect. This should be resolved before full production rather than after rolls have been delivered.
Check splice roll count and carton needs
A splice joins two webs of label material within one roll. Splices are often a practical part of roll manufacturing, especially for longer runs, but the acceptable quantity and placement should be agreed in advance.
Specify acceptable splices
If a machine cannot run through a splice, operators may need to stop, remove labels around the join and restart the process. For sensitive automated work, this can be disruptive.
Confirm:
- Whether splices are allowed
- Maximum splices per roll
- Whether splice locations must be marked
- Whether splice labels must be removed or flagged
- Whether short rolls are acceptable
- The minimum acceptable number of labels per roll
- Whether the last roll of an order may contain a lower count
There is no universal splice rule. A hand-labelled project may tolerate a splice with little difficulty, while a high-speed line or uninterrupted print-and-apply operation may require stricter controls.
Decide how many labels per roll
Specify either an exact count or a target count with allowable variation. Exact counts can be useful for inventory control, kitting and production planning. A target count may be more practical where label construction and roll diameter constraints govern how much material fits on the roll.
When calculating requirements, include sensible allowance for:
- Machine setup
- Start-up and changeover waste
- Labels removed at splices, where applicable
- Quality checks during application
- Separate product variants or artwork versions
Avoid basing the order quantity solely on finished units if your process has known setup losses.
Carton and packing requirements
Roll labels can be damaged by crushed carton corners, loose winding, excessive heat or moisture exposure during storage. Carton requirements should protect the product while remaining practical for receiving and stock control.
Confirm:
- Rolls per inner pack and rolls per carton
- Carton weight limits for warehouse handling
- Whether rolls need dividers, shrink wrapping or individual bags
- Carton labelling requirements, such as artwork code, batch reference, quantity and roll number
- Whether different artwork versions must be packed separately
- Storage orientation, where relevant
For multi-SKU operations, clear carton identification reduces the risk of a visually similar label being loaded onto the wrong product line.
Validate the final roll specification
Before approving a full label order, combine every requirement in one final specification. The aim is to ensure that artwork, material, adhesive and roll format all work together.
Use this final checklist
- Application method: Hand, semi-automatic or automatic
- Machine make and model: Where available
- Core internal diameter: Stated in mm
- Maximum roll outside diameter: Stated in mm
- Maximum web width: Including liner
- Label size: Width across web × length in feed direction
- Label shape: Rectangle, circle, custom die-cut shape or other format
- Gap and pitch: Stated in mm
- Unwind direction: Referenced to an attached diagram or sample
- Face orientation: Face-out or face-in, if required
- Leading edge: Top, bottom, left or right edge of artwork
- Sensor requirement: Gap, mark or other method
- Labels per roll: Exact count or target range
- Splice rule: Maximum permitted and marking requirement
- Material and adhesive: Suitable for the pack surface and application environment
- Artwork version: Confirmed file name, revision or job reference
- Packing: Rolls per carton, carton identification and separation of variants
Request a practical pre-production check
For a new product, unusual material, complex shape or machine application, test a sample roll on the actual applicator before committing to the full run. This is particularly useful where the product container has curves, seams, recessed panels or variable surface finishes.
The check should confirm that:
- The roll loads correctly on the machine.
- Labels dispense smoothly at the intended speed.
- The sensor detects each label consistently.
- The label reaches the product in the intended orientation.
- The adhesive performs appropriately on the actual packaging surface.
- The finished label is readable, aligned and free of wrinkling or lifting.
A printed proof confirms artwork; it does not necessarily confirm machine compatibility. A roll trial addresses the operational side of the specification.
Common label roll specification mistakes
The most avoidable errors are usually gaps in communication rather than printing faults.
- Giving only the label width and height, without feed direction.
- Using an unwind number without the matching supplier diagram.
- Assuming a hand-applied roll format will work on a machine.
- Specifying the core outer diameter instead of the internal diameter.
- Omitting the maximum roll OD.
- Forgetting that liner width is wider than the finished label.
- Ordering labels with the artwork rotated incorrectly for the applicator.
- Not checking sensor compatibility with clear, reflective or dark materials.
- Failing to state a splice requirement.
- Mixing similar-looking artwork variants in the same carton.
FAQ
Can I reverse a label roll if the unwind direction is wrong?
Usually not in a practical production sense. Turning the roll around may make the liner feed in the wrong direction, place the labels against the peel plate incorrectly or reverse the artwork orientation. Rewinding may be possible in some circumstances, but it should not be assumed as a simple corrective action.
What core size should I choose for roll labels?
Choose the core internal diameter required by your dispenser or labelling machine. For hand application, choose a core and roll size that suit the dispenser or handling method. Do not select a core based only on what another supplier used previously without checking the current equipment.
Is a larger label roll always more economical?
Not necessarily. A larger roll may reduce changeovers, but it can exceed the machine’s capacity, be heavier to handle or create tension problems. The right option is the largest roll that your equipment and process can reliably accommodate.
Do I need to specify unwind direction for hand-applied stickers?
It is still helpful, especially for labels used at packing stations or on dispensers. Although manual users can often adapt, the correct direction improves workflow and reduces the chance of labels being presented upside down.
What information should I send when requesting custom labels?
Send the label artwork, finished dimensions, application method, product surface, quantity, required roll format, core size, maximum roll diameter, unwind direction diagram, gap, labels per roll and packing preferences. For suitable product options, see XGolden Print’s custom sticker and label printing information.
A complete roll specification gives your printer a clear production brief and gives your team a better chance of trouble-free application. If any machine requirement is uncertain, confirm it with the equipment documentation or run a sample roll before approving the final label order.
