
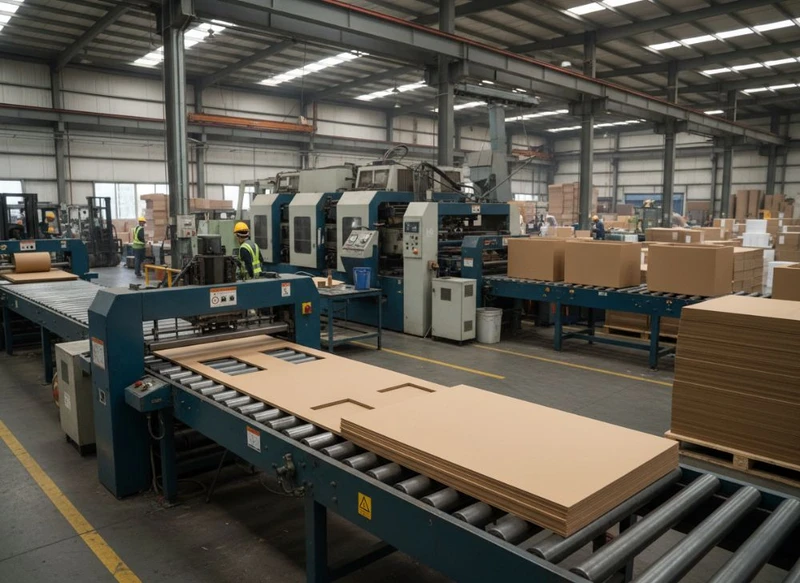
Custom paper boxes are made by turning paperboard sheets into accurately printed, cut, creased and assembled packaging. For a straightforward folding carton, the process may run from print sheet to flat-packed box with little manual handling. Rigid gift boxes, unusual shapes and detailed finishes require more stages and more hands-on assembly.
For South African buyers, the most useful way to assess a packaging project is to follow the production route: choose a board that suits the product, finalise artwork and structure, approve a sample where needed, then confirm how printing, finishing, packing and transport will affect the finished box. A beautiful design can still fail if the board cracks on folds, the barcode is unreadable, or the box does not suit the way it will be packed and displayed.
The Paperboard Manufacturing Process
Paperboard is the foundation of a paper box. It provides stiffness, print surface, foldability and protection, so the choice affects both appearance and performance.
Strictly speaking, paperboard is made at a paper mill before it reaches a box-converting factory. Fibres are processed into a web, dried and formed into board with a particular thickness, surface and stiffness. Box manufacturers generally receive this material as sheets or reels, then convert it into packaging.
For custom box production, the first practical decisions are usually:
- Board grade: selected for strength, folding behaviour and surface appearance.
- Board thickness and stiffness: matched to the product weight and box construction.
- Surface: coated board can support detailed colour printing, while uncoated stock gives a more natural tactile feel.
- Colour: white board is common for bright printed designs; coloured or kraft-style materials may support a particular brand direction.
- Fibre and recycled-content requirements: these should be specified if they matter to your packaging policy, then confirmed with the supplier.
- End use: packaging for dry goods, cosmetics, electronics, gifts and food-related applications may have different material requirements.
A folding carton for lightweight retail goods is normally made from a single printable paperboard sheet. A rigid presentation box has a different construction: thicker board is cut into panels, then wrapped with printed paper or another covering material. This creates a more substantial box but adds production steps, material use and assembly complexity.
Start with the product, not the artwork
A common mistake is to approve the graphic design before defining the box structure. Instead, provide the product dimensions, weight, fragility, packing orientation and how the item will be removed from the box. These details determine whether the pack needs an auto-lock base, tuck-end closure, inner insert, sleeve, divider or another structural feature.
When requesting custom printed boxes, it helps to state whether the box must arrive flat for self-assembly, be supplied ready formed, or be packed around the product during fulfilment. Each option changes the converting process and the practical cost of packing.
The Die-Cutting and Creasing Phase
After printing and any sheet-level finishing, the board moves to die-cutting. A die is a shaped cutting tool that cuts the outline of the carton and creates functional features such as tabs, windows, handles and locking points.
At the same stage, creasing rules press fold lines into the board. These controlled impressions make the carton fold neatly rather than crack or buckle. Perforations, tear strips and score lines can also be incorporated where the pack design calls for them.
The output is a flat blank: it has the final outer shape, but it is not yet folded and glued.
What die-cutting needs to achieve
A well-designed die-cut blank should:
- Cut cleanly without loose fibres or poorly separated edges.
- Place creases in the correct direction for the grain and board type.
- Allow flaps and locking tabs to engage without excessive force.
- Keep panels square so printed graphics align across folds.
- Leave sufficient clearance around windows, cut-outs and delicate details.
- Stack efficiently for the following folding and gluing stage.
Die-cutting is not just a decorative step. Poorly positioned creases can weaken a carton, cause colour cracking at folds or make automated packing difficult. A small structural change can improve usability far more than an additional decorative finish.
Tooling and change control
Custom shapes usually require dedicated cutting and creasing tooling. Before approving it, check the dieline carefully against the artwork and the physical product. Confirm the finished internal dimensions rather than relying only on outside measurements, especially if inserts, wrapped products or multiple components must fit inside.
If artwork changes after the dieline is approved, inspect areas around folds, glue tabs, barcodes and legal copy. Moving a logo or text block by a few millimetres can place it over a crease or hide it beneath a glued panel.
Printing and Finishing Techniques
Printing turns plain board into branded packaging. The right method depends on run size, artwork complexity, board type, colour expectations and the finish you want.
For repeat packaging ranges and larger quantities, offset lithographic printing is commonly used for sharp detail and consistent reproduction across sheets. Digital printing can be appropriate where quantities are lower, artwork changes frequently or versions need to be tested. Other production methods may suit particular board types or large-volume requirements, but suitability should be discussed against the actual design and order quantity.
Colour is usually specified through process colours, spot colours or a combination of both. If a specific brand colour is important, supply the correct brand reference and ask what proofing method will be used. Colour can appear different under warehouse lighting, retail lighting and daylight, as well as on glossy versus uncoated board.
Common finishing options
Finishing adds protection, texture or visual contrast after printing. It should serve a purpose rather than be chosen only because it looks premium.
| Finish | What it does | Best checked before approval |
|---|---|---|
| Gloss coating or lamination | Adds shine and can make colours appear more vivid | Reflection, scuff visibility and barcode readability |
| Matt coating or lamination | Creates a softer, lower-shine appearance | Potential marking, rub resistance and the desired tactile feel |
| Soft-touch film | Gives a velvety feel often used for presentation packs | Marks from handling and compatibility with later processes |
| Foil stamping | Applies metallic detail to selected areas | Fine-line detail, placement and possible cracking across folds |
| Embossing or debossing | Raises or recesses parts of the design | Whether the board thickness supports a clean impression |
| Spot varnish | Adds selective shine or texture | Accurate registration with the printed image |
| Window patching | Adds a transparent viewing panel | Product visibility, glue placement and recycling considerations |
Finishes can interact with each other. Foil, varnish, lamination, embossing and adhesive all need to be planned as a sequence. For example, a surface that looks striking may be unsuitable for a label, or a heavy finish may interfere with a glue flap.
For products requiring identification labels, allow a smooth, accessible application area and test adhesion on the actual finished surface. Custom stickers and labels can be useful for variable information, seasonal changes or smaller product runs, but the label material and adhesive should be chosen for the packaging surface and storage conditions.
Automatic Gluing and Folding Machines
Most regular folding cartons are completed using automatic folder-gluer equipment. The die-cut blank travels through guides that fold panels along the creases and apply adhesive to designated glue areas. The carton is then compressed long enough for the bond to set before being packed flat.
This process is particularly suitable for standard carton constructions such as straight-tuck boxes, reverse-tuck boxes, sleeves and some locking-base designs. Flat-packed cartons use less volume in storage and transport than pre-erected boxes, but the recipient must be able to assemble them efficiently.
What to confirm for machine-glued cartons
Before placing an order, ask for clarity on:
- Glue flap position: It should not obscure essential artwork, instructions or codes.
- Carton orientation: The box must fold in the intended direction and open correctly.
- Closure design: Tuck tabs, locks and tear features must work repeatedly without damaging the board.
- Packing format: Confirm whether cartons are supplied flat, partially formed or fully erected.
- Assembly responsibility: Decide whether the brand, co-packer, retailer or fulfilment team will erect the cartons.
- Tolerance needs: Products with tight fits may need a physical sample before full production.
An intricate design is not always the best design. If staff need to construct hundreds of boxes by hand, a simple and intuitive closure can reduce packing errors. If the box is erected by machinery, compatibility must be assessed with the relevant packing equipment rather than assumed from the carton’s appearance.
Manual Assembly for Complex Gift Boxes
Not every box can be made efficiently on an automatic folder-gluer. Rigid boxes, magnetic closures, drawer-style packs, wrapped lids, ribbon details and multi-part presentation sets often need manual or semi-manual assembly.
A rigid gift box usually begins with cut board panels. Those panels are formed into a base or lid, then covered with printed wrap paper. Separate components may be made for an inner tray, shoulder, sleeve, divider or insert. Finishing elements are added at suitable points in the workflow so they remain aligned and protected.
Manual assembly is valuable for complex packaging because it allows attention to details that are difficult to automate, including:
- Alignment of wrap paper at corners and edges.
- Clean application of magnets, ribbons or elastic closures.
- Placement of inserts and dividers.
- Assembly of separate lids, bases and sleeves.
- Inspection of delicate embellishments before final packing.
However, more manual steps also create more variables. The design should allow realistic tolerances and avoid relying on extremely fine alignment across several separately made parts. Specify which visual details are critical, such as centred foil, consistent ribbon length or a flush lid fit, and which minor variations are acceptable.
For presentation-led products, browse the structural options available for gift packaging while keeping the unboxing experience grounded in practical questions: Can the product be removed easily? Will the box survive normal handling? Is the insert secure? Can the pack be stored and replenished efficiently?
Quality Checks and Inspection Points
Quality control in box production is not a single final inspection. It should occur at points where a problem can still be corrected or contained: material receipt, printing, die-cutting, gluing, assembly and final packing.
The exact inspection plan should reflect the product and commercial requirements. A box carrying critical product information, a scannable barcode or a premium finish needs checks that match those risks.
Useful inspection points
Before production
- Confirm approved artwork, dieline version, board choice and finishing schedule.
- Check spelling, contact details, ingredients or instructions supplied by the brand, barcode placement and mandatory information relevant to the intended market.
- Review a physical dummy or proof where size, construction or colour is important.
During printing
- Check that imagery, text and colours match the approved reference.
- Inspect registration, where multiple colours and finishes need to align.
- Look for unintended marks, streaks, uneven coating or damage to the print surface.
After die-cutting and creasing
- Check cut accuracy, crease placement, tabs, slots and windows.
- Fold sample blanks to identify cracking, poor locks or panels that do not sit square.
During gluing and assembly
- Check adhesive placement and bond integrity.
- Ensure glue does not seep into visible areas or interfere with closures.
- Confirm that multi-part boxes, inserts and accessories are complete and aligned.
Before dispatch
- Check carton count, pack configuration, protection against scuffing and clear outer identification.
- Verify that final samples match the agreed construction and finish.
- Confirm whether cartons are delivered flat or erected, and whether this matches the receiving team’s needs.
No generic checklist can replace product-specific verification. If packaging will contact food, hold cosmetics, carry safety information or be used for a regulated product category, establish the applicable material, migration, labelling and market requirements before production. Do not assume that a board, ink, coating or adhesive is suitable merely because it is commonly used for packaging.
Global Sourcing and Logistics Challenges
Packaging buyers in South Africa may source locally, regionally or internationally. The best route depends on the product, order volume, lead-time tolerance, design complexity, landed cost and the level of coordination required. A lower unit price does not necessarily mean a lower total cost once samples, tooling, packing volume, shipping, duties, damage risk and stockholding are considered.
Paper boxes are especially sensitive to logistics because they can be light but bulky. Rigid boxes consume more space than flat folding cartons, while flat-packed cartons require assembly closer to the point of packing.
Risks to plan for
- Longer approval cycles: Samples, colour references and structural changes can take time to resolve when teams are far apart.
- Communication gaps: Artwork versions, dielines and finish specifications need strict version control.
- Transit damage: Corners, foil and coated surfaces can be affected by compression, rubbing or moisture.
- Variable supply conditions: Board, films, adhesives and other inputs may be subject to availability changes.
- Customs and commercial documentation: Requirements and costs depend on the specific transaction and should be checked with appropriate specialists.
- Storage constraints: Bulky ready-formed packaging can place pressure on warehouse space.
Reduce uncertainty by issuing a clear packaging specification. Include dimensions, board and finish requirements, dieline version, artwork files, colour references, assembly expectations, pack quantities and acceptance criteria. Keep an approved physical sample where appearance and fit are critical.
For repeat orders, record any changes made during the first production run. This provides a better basis for consistency than relying on memory or an old email thread.
Innovation in Paper Box Production Technology
Innovation in paper box production is most useful when it improves design accuracy, reduces avoidable waste, supports version control or makes packaging easier to use. It is not limited to adding visual effects.
Digital workflows can help teams review artwork, manage dielines and track revisions before material is committed. Digital print methods can support shorter runs and artwork variation where appropriate. Automated inspection systems may assist with detecting visible production defects, while improved finishing and converting processes can expand what is possible with texture, metallic detail and intricate structures.
Material innovation is also relevant, but it requires careful assessment. A new substrate, coating or adhesive may change fold behaviour, print appearance, label adhesion, recyclability considerations or product compatibility. Ask for samples and assess the complete pack, not only a loose sheet of material.
Practical ways to use production innovation
- Use a plain structural sample to confirm size and usability before investing in premium finishes.
- Build an artwork checklist that locks dieline, barcode, copy and colour references before release.
- Consider digital print for limited editions or design testing where it fits the order requirement.
- Simplify structures where a complex mechanism does not improve protection or customer experience.
- Specify variable elements, such as batch information or campaign labels, separately when this reduces obsolete packaging stock.
- Reassess outer packaging and storage format alongside the consumer-facing box.
The best production technology is the option that fits the packaging’s actual purpose. A durable, easy-to-pack carton with clear printing can be more valuable than a complicated design that slows fulfilment or creates avoidable waste.
FAQ
What is the difference between a folding carton and a rigid box?
A folding carton is generally die-cut from a single sheet of paperboard and supplied flat for folding and gluing. A rigid box is made from thicker board components that are assembled and often wrapped with printed paper. Rigid boxes usually offer a more substantial presentation but involve more material and assembly.
When should a packaging buyer request a sample?
Request a sample when fit, closure function, colour, finish, inserts or product protection are important. A physical sample is particularly helpful for new box structures, premium gift packs and products with tight dimensional tolerances.
Can every printed design be used on every box style?
No. Creases, glue flaps, cut-outs, board grain and finishing steps can affect where graphics may safely sit. Artwork should be reviewed on the final dieline, not only as a flat visual design.
What should be included in a box specification?
Include finished dimensions, product details, board preference, print colours, finishes, dieline, artwork version, packing format, quantity, required delivery condition and any product-specific compliance requirements to be verified.
A well-specified custom box is easier to print, assemble, pack and use. Start by defining the product and structure, then review material, artwork, finishing and logistics as one connected production plan. For an overview of a packaging supplier’s production background, visit XGolden Print’s company profile.
