
The reliable way to measure a product for a custom box is to measure its largest packed state—not just the bare item—then add space for protection, inserts, manufacturing tolerances and easy removal. The resulting dimensions should be specified as the internal dimensions of the box: length × width × height.
Start with the product in its intended selling condition. Include lids, cords, handles, caps, folded parts and any protective material that will remain in the box. Then test your proposed dimensions with a physical sample before committing to production.
A box that is too tight can damage the product, slow down packing and frustrate customers. One that is unnecessarily large can increase material use, allow movement and make the product presentation feel less considered.
Choose the correct measurement tools
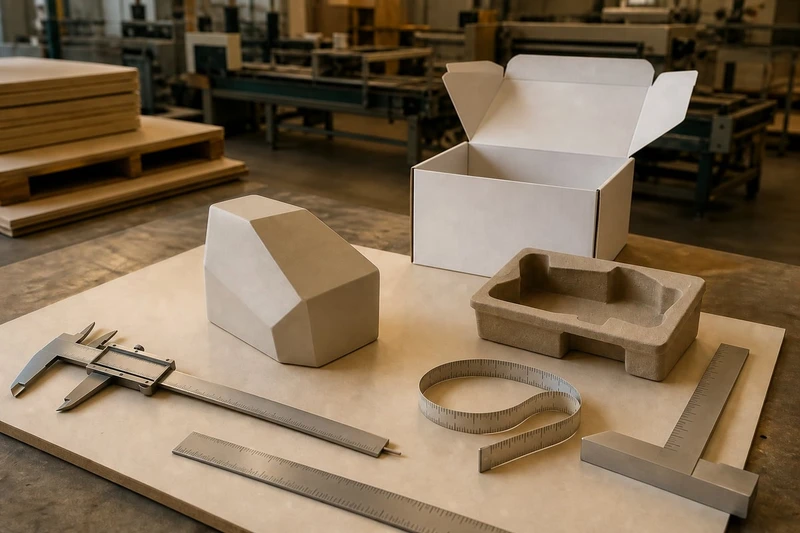
Use tools that suit the size, shape and precision required by the product. A flexible tape measure is useful for large or curved items, but it is rarely the best option for defining a close-fitting box.
For most packaging projects, use the following:
- Steel ruler: Suitable for flat, straight-edged products and simple cartons.
- Vernier callipers: Best for small products, components and details where millimetres matter.
- Tape measure: Useful for bulky items, soft goods and large-format packaging.
- Profile gauge or contour tool: Helpful for curved or unusually shaped products.
- Scale: Important when the insert, board grade or box style must support the product’s weight.
- Notebook, measurement sheet or spreadsheet: Record every dimension, orientation and packing component consistently.
Measure in millimetres (mm) wherever possible. Millimetres reduce ambiguity and are the usual practical unit for packaging specifications. For example, write 185 × 120 × 65 mm rather than 18.5 × 12 × 6.5 cm.
Before measuring, decide how the product will sit in the box:
- Which side will face upward when opened?
- Which dimension is the front-facing length?
- Will the product lie flat, stand upright or be packed on its side?
- Is there a branded label, logo, screen or delicate surface that should face a particular direction?
Keep this orientation fixed throughout the project. Swapping length, width and height halfway through is a common cause of incorrect custom box specifications.
Record maximum dimensions and irregular features
Measure the product at its widest, longest and tallest points. Do not measure only the main body if another feature extends beyond it.
A practical convention is:
- Length: The longest horizontal side when the product is positioned for packing.
- Width: The shorter horizontal side.
- Height: The vertical measurement from the base to the highest point.
Record the dimensions in this order every time: L × W × H.
For a rectangular item, take at least two readings per dimension. This helps identify slight variations between units, seams, rounded corners or assembled components. Use the largest repeatable measurement rather than an average if the box needs to fit every unit.
Features that are easy to overlook
Many fit problems come from small details that were excluded from the original measurements. Check for:
- Raised logos, buttons, feet or rubber bumpers
- Lids that sit proud of the base
- Hinges, clasps, handles or pull tabs
- Charging cables, plugs and adapters
- Tags, labels, sleeves or instruction cards
- Curved shoulders, tapered sides and rounded corners
- Soft materials that expand after folding or wrapping
- Products with moving parts, such as jewellery clasps or appliance controls
- Multiple items that are sold as a set
For irregular products, sketch the item and mark the maximum dimensions at the points where they occur. A bottle, for example, may have its greatest width at the shoulder rather than the base. A gift set may be widest once all components are arranged together, not when each item is measured separately.
Measure the assembled product, not individual components
If the customer receives a product bundle, measure the fully packed bundle. This could include:
- A skincare jar with a spatula and leaflet
- A shirt folded with tissue paper and a belly band
- A candle with a dust cover
- An electronics item with a cable, plug and instruction booklet
- A premium gift set with several products in an insert
Measuring each component separately and adding the figures later often produces an unrealistic result. Items nest, overlap and require separation differently inside a finished package.
Allow for protective wrapping and inserts
The bare product dimensions are only the starting point. The box must accommodate the full packing system, including wrapping, inserts and any space needed to protect vulnerable areas.
Measure the product again after applying the same protection intended for the final pack. This is especially important for products wrapped in bubble wrap, tissue, foam, corrugated sleeves, pouches or shrink film.
Packaging components that affect box size
Consider whether the final box includes any of the following:
- Tissue paper or glassine paper
- Bubble wrap or foam sheeting
- Protective corner pieces
- A fabric pouch or drawstring bag
- A cardboard divider
- A folded carton insert
- EVA foam, paper pulp or corrugated insert
- A paperboard platform or raised tray
- Product literature, vouchers or care cards
- Seals, ribbons or magnetic closures
A fitted insert changes the calculation substantially. The insert itself occupies internal volume, while its cut-out must hold the product securely without compressing it excessively.
For example, a product measuring 150 × 80 × 40 mm may not fit a 155 × 85 × 45 mm box once it is wrapped and placed in a 2 mm folded-board insert. The correct approach is to measure:
- The wrapped product.
- The outer dimensions of the assembled insert.
- The insert plus any literature or top padding.
- The combined pack inside the box.
Choose protection according to the product’s risk
Not every product requires the same clearance or insert style.
| Product type | Main packaging concern | Typical approach |
|---|---|---|
| Glass, ceramics and fragrance bottles | Impact and breakage | Protective wrap, dividers, moulded or fitted insert |
| Cosmetics and small gift items | Presentation and product movement | Folded insert, tray or tissue wrap |
| Electronics and accessories | Component separation and surface protection | Compartments, die-cut insert, cable space |
| Apparel and soft goods | Bulk variation and neat folding | Tissue paper, sleeve or slightly flexible clearance |
| Food packaging | Product containment and presentation | Confirm product, liner and handling requirements before finalising dimensions |
| Heavy products | Support and structural performance | Suitable board construction and a secure internal fit |
The best protection is not always the thickest material. A well-designed insert that prevents movement can be more effective than adding empty space and loose fill. If you are comparing options, review available custom packaging box formats alongside the product’s fragility, weight and unpacking experience.
Plan tolerances without guessing
A tolerance is the deliberate allowance between the product or insert and the inside of the box. It prevents an overly tight fit while avoiding excessive movement.
Do not choose clearance by habit alone. The right tolerance depends on the product variation, packaging material, box construction, insert type and packing method.
Start with a practical clearance range
The figures below are starting points for planning, not fixed production rules. Confirm the final allowance with the packaging supplier and a physical sample.
| Fit requirement | Planning allowance per side | When it may suit |
|---|---|---|
| Close presentation fit with a precise insert | About 1–2 mm | Rigid items held by a well-tested insert |
| Standard hand-packed product | About 2–4 mm | Most regular products with light wrapping |
| Soft, variable or wrapped product | About 4–8 mm | Apparel, padded products or items with dimension variation |
| Product requiring loose protective fill | Greater allowance as needed | Fragile items where void fill must surround the product |
These allowances should be applied thoughtfully. If the product needs 3 mm clearance on both the left and right, add 6 mm to that internal box dimension—not 3 mm in total.
For a rectangular packed product, the basic planning calculation is:
Internal box length = packed product length + clearance on both ends
Internal box width = packed product width + clearance on both sides
Internal box height = packed product height + clearance above and below
If a product measures 200 × 100 × 50 mm after wrapping and needs approximately 3 mm clearance on each side, an initial internal box size could be:
206 × 106 × 56 mm
That is only a preliminary specification. If the box includes an insert, top card, lid structure or additional paperwork, those elements must be included in the calculation.
Factors that change the tolerance needed
Increase or refine the allowance when:
- Product dimensions differ from one production unit to another.
- The item is hand-packed rather than machine-packed.
- The product has a soft, compressible or irregular surface.
- The packaging includes tissue, a pouch or a wrap that can shift.
- The product must be removed by fingers rather than tipped out.
- Humidity or folding affects the thickness of paper-based materials.
- Several products must fit into separate compartments.
- A lid must close over a raised product or insert.
Avoid allowing too much extra height. A box may appear to fit when empty but leave the product loose enough to move, rattle or become damaged during handling.
Check opening, assembly and removal
A box can have correct internal dimensions and still be impractical. Check how it opens, how it is packed and how the customer removes the product.
The box style affects usable space. A tuck-end carton, sleeve, drawer box, mailer, hinged lid box and two-piece lid-and-base box do not all use the same internal volume in the same way.
Questions to test before choosing the final size
Ask the following:
- Can the product pass through the opening without snagging?
- Does the product need to be angled to enter the box?
- Is the opening narrower than the internal cavity?
- Will fingers fit beside or beneath the product for easy removal?
- Does the insert have a finger notch, ribbon lift or pull tab where needed?
- Does the lid close without pressing on the product?
- Does the carton still assemble easily at the planned dimensions?
- Can packing staff place the product consistently in the correct orientation?
For example, a drawer-style gift box may need room for a pull ribbon and a finger gap. A tight-fitting tray may need a thumb notch. A tall item in a tuck-end carton may need more headroom so that the top flap does not scrape the product during closing.
Account for box construction
Specify whether your dimensions refer to the internal or external size. For fitting a product, internal dimensions are usually the key requirement. External dimensions vary according to board thickness, folds, construction and any outer finishing.
This distinction matters for products that must fit into another package, a shelf-ready tray, a courier carton or a display fixture. In that situation, record both:
- Required internal dimensions for the product fit
- Maximum external dimensions for storage, transport or display compatibility
Do not assume that external box dimensions can be converted to internal dimensions by subtracting one universal board thickness. The result depends on the box structure.
Validate dimensions with a physical sample
A physical sample is the most dependable way to confirm whether a made-to-measure box works in practice. Drawings and digital measurements are valuable, but they cannot fully show folding behaviour, insertion force, lid clearance or how the pack feels in the hand.
Make a simple mock-up before approving final artwork or a larger order. It can be made from plain paperboard, sample material or even cut-and-taped card for an early fit check.
A useful sample-testing process
- Pack the real product. Use the intended wrap, insert, literature and accessories.
- Close the box normally. Do not force flaps, lids or closures into place.
- Check all edges and corners. Look for crushing, rubbing, visible gaps or pressure points.
- Open and remove the product. Confirm that it can be removed without damaging the box or product.
- Test multiple units. One product may fit while another at the upper end of normal size variation does not.
- Check presentation. Review alignment, orientation, visible branding and the opening experience.
- Record changes clearly. If the box needs adjustment, note exactly which internal dimension must change and why.
Where products are fragile or heavy, also assess whether the chosen packaging system holds the item securely during normal handling. A fit test is not a substitute for any product-specific transit testing or compliance requirement that may apply to your category.
Common measurement mistakes to avoid
The most frequent errors are avoidable:
- Measuring the product before, rather than after, protective wrapping
- Using average dimensions instead of maximum dimensions
- Forgetting accessories, manuals, lids or cables
- Mixing centimetres and millimetres
- Reversing length, width and height
- Specifying external dimensions when internal dimensions are needed
- Allowing room for the product but not the insert
- Designing a tight fit with no finger access
- Approving a size from a digital layout without testing a sample
- Measuring one prototype but not checking normal production variation
A simple measurement worksheet
Use this checklist when preparing a packaging brief:
- Product name and SKU:
- Packing orientation:
- Bare product dimensions, L × W × H:
- Maximum points or irregular features:
- Packed product dimensions:
- Accessories and printed materials included:
- Insert type and assembled outside dimensions:
- Required clearance on each side:
- Target internal box dimensions:
- Maximum permitted external dimensions, if applicable:
- Opening style and removal method:
- Product weight:
- Sample approval notes:
Providing this information at the start makes it easier to compare packaging options and reduces the risk of revisions later. For more context on the business behind the packaging process, see XGolden Print’s company overview. XGolden Print has 27 years of experience in custom packaging and printing, but the final specification should always be based on your product, packing method and approved sample.
FAQ
Should a custom box be exactly the same size as the product?
No. A box should be sized for the product in its final packed state, with suitable clearance for wrapping, inserts, tolerances and removal. An exact-size cavity can cause friction, slow packing and damage the product or box.
How much larger should a box be than the product?
There is no single correct amount. A close-fitting inserted product may need only a few millimetres of clearance, while a soft or protected product needs more. Add the allowance to both sides of each relevant dimension, then validate the result with a sample.
Do I measure the inside or outside of a custom box?
Measure and specify the inside dimensions when the purpose is fitting a product. Also provide maximum external dimensions if the box must fit a shelf, outer carton, display or storage space.
What if the product is an unusual shape?
Measure its maximum length, width and height in the intended packing orientation. Then assess whether a standard rectangular box with an insert, a shaped insert or a different box structure offers the most secure and presentable result.
A clear measurement sheet and a packed product sample are the best starting points for selecting a custom box. Once both are ready, compare box constructions, insert options and opening styles against the actual fit rather than dimensions alone.
