
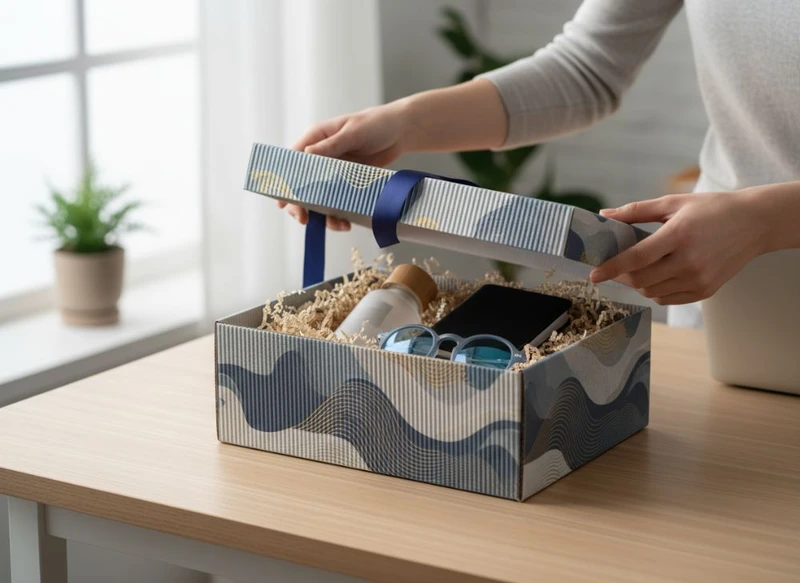
Custom packaging can support ecommerce sales when it protects the product, makes the order easy to open, communicates your brand clearly and gives customers a reason to remember the purchase. The best design is not necessarily the most elaborate one: it is the one that balances presentation, shipping durability, packing efficiency and cost for your specific product.
To design custom packaging that boosts your ecommerce sales, start with the customer and the product journey. Define who is buying, how the item will travel, what must be communicated on the pack and which details make the unboxing feel considered. Then test a physical sample before approving production.
Understanding Your Target Audience & Unboxing Expectations
Your packaging should reflect the expectations attached to your product category and price position. A customer buying a practical household item may value clear instructions and easy resealing, while a gift buyer may care more about presentation, a neat reveal and a card-ready finish.
Before choosing materials or artwork, answer these questions:
- Who is the buyer, and who will receive or use the product?
- Is the purchase for everyday use, a gift, a subscription or a special occasion?
- Will customers see the packaging before purchase, or only after delivery?
- Does the product need privacy, tamper evidence, moisture protection or extra cushioning?
- Which brand details must be instantly recognisable when the box arrives?
- Is the outer shipping carton also the presentation box, or will there be an inner retail box?
Design for the complete delivery journey
An ecommerce pack has several jobs. It needs to survive handling, make fulfilment straightforward, present the product well and provide essential information. Treat these as connected requirements rather than separate design tasks.
For many brands, a layered approach works well:
- Shipping layer: A plain or lightly branded outer carton that protects the parcel.
- Product layer: A custom-printed box that presents the item and carries product information.
- Finishing layer: Tissue, an insert, a card, a seal or a label that completes the experience.
Not every order needs all three layers. Adding unnecessary components can increase packing time, material use and the number of things that can go wrong. Use a premium presentation only where it supports the product, margin and customer expectation.
Make opening intuitive
A memorable unboxing experience should not mean a frustrating one. Avoid closures that are difficult to find, excessive tape or inserts that leave the customer unsure where to begin. If the product is fragile, explain how to remove it safely. If parts, accessories or instructions are included, organise them so the customer can identify them immediately.
Useful details can include:
- A clear opening flap or pull tab
- A printed “open here” cue where appropriate
- A short welcome message inside the lid
- A packing insert that explains care, setup or returns
- A dedicated space for accessories rather than loose items
- A resealable closure when repeat storage is useful
Use printed messages sparingly. The first glance should make the brand and product feel clear, not busy.
Integrating Label Sticker Design with Your Box
Labels and stickers can add flexibility to a packaging system. They are especially useful for variable details such as flavours, shades, sizes, batch information, barcodes, handling instructions or campaign-specific artwork. Rather than redesigning and printing a new box for every product variation, a consistent box combined with a well-planned label system may simplify your range.
Explore custom printed stickers when you need a separate element for product identification, seals or promotional messaging.
Decide what belongs on the box and what belongs on the label
Put stable, core brand elements on the box: logo, brand colours, product family styling and consistent messaging. Use labels for information that changes regularly or needs to be applied after the main box is produced.
| Information type | Usually best on the box | Often suitable for a label |
|---|---|---|
| Brand identity and visual system | Yes | Only for short runs or temporary use |
| Product name | Yes, if consistent | Yes, if variations change often |
| Barcode or SKU | Possible | Useful for variable products |
| Variant, shade or flavour | Possible | Often practical |
| Opening or handling cues | Yes | Only when added later |
| Tamper-evident seal | No | Yes, with the right format |
| Seasonal campaign message | Sometimes | Often practical |
A sticker should look intentional, not like an afterthought. Build its shape, size, colour and placement into the original box layout. Leave a clean label area that is flat, visible and large enough for legible type.
Check label and surface compatibility
The success of a label depends on more than its design. The adhesive and face material need to suit the carton surface, product environment and expected handling. A textured, coated or uncoated box can behave differently from a smooth surface. Labels may also need extra consideration if the pack faces heat, cold, moisture, rubbing or contact with oils.
Confirm the following with your packaging supplier before ordering:
- Whether the label adhesive suits the box finish
- Whether a label will remain secure through normal handling
- Whether the sticker can be applied by hand or needs an application process
- Whether labels will cover important artwork, folds or legal information
- Whether the label finish matches the visual quality of the box
Where product labelling requirements apply to your category, verify the content and formatting needed for the intended South African market before print approval.
Technical Specs: Sizing and Durability for Shipping
Correct dimensions are one of the most important packaging decisions. A box that is too tight can damage the product during packing or removal. One that is too large can allow movement, require more void fill and take up unnecessary storage space.
Start with the finished product, including any cap, accessories, protective wrap and instruction leaflet. Then allow for the protection required around it.
Specify dimensions clearly
Packaging dimensions are commonly communicated as length × width × height. However, conventions can vary between suppliers and box styles. State what each measurement means and include a drawing or dieline reference where possible.
Your specification should define:
- Internal or external dimensions
- Unit of measurement, usually millimetres
- Box style and opening direction
- Product orientation inside the box
- Whether dimensions include inserts, dividers or padding
- Permitted tolerance, where this matters to product fit
- The number of products per box
Do not rely on a product photograph or a rough verbal description. A measured sample product is safer, particularly for irregular shapes, flexible items and handmade goods.
Match the material to the shipping risk
Paper-based packaging can range from lightweight folding carton to more robust corrugated board. The right choice depends on product weight, shape, fragility, stacking exposure and whether the pack is an inner presentation box or the main mailer.
| Packaging need | Common design direction | Points to check |
|---|---|---|
| Lightweight, non-fragile item | Folding carton or slim mailer | Scuffing, crush resistance and closure security |
| Giftable product needing presentation | Rigid-style gift box or quality folding carton | Fit, finish, insert design and outer shipping protection |
| Fragile product | Protective inner packaging plus a shipping carton | Movement, corner protection and separation between units |
| Multiple items in one order | Sized shipper with dividers or void fill | Item movement, packing speed and returns handling |
| Heavy or unusually shaped item | Stronger structural design | Weight distribution, handles and base support |
Avoid selecting a board only because it feels thick. Structural performance depends on board type, box construction, folds, glue areas, product weight and the conditions it will encounter. Ask for material and construction guidance based on your actual product and fulfilment method.
Account for real packing conditions
A box can look perfect when empty but fail during daily fulfilment. Consider whether staff need to build it quickly, whether it must be closed with tape, whether inserts stay in place and whether the product can be packed consistently.
If you intend to use a presentation box as the shipping box, check that its corners, closure and printed surfaces are appropriate for that role. Often, placing a premium inner box inside a protective outer carton is the more controlled option.
5 Common Paper Box Design Mistakes to Avoid
1. Designing artwork before confirming the dieline
A dieline shows cut lines, folds, glue areas and safe zones. Designing without an approved dieline can place essential text over a fold, put a logo on the wrong panel or create artwork that does not align when assembled.
Use the exact dieline supplied for the chosen box style. Keep key type, barcodes and logos away from edges, folds and glue flaps.
2. Choosing a box based on appearance alone
A dramatic opening mechanism or unusual shape may look appealing but can increase assembly complexity and create weak points. Choose structures that meet the product’s practical needs first, then refine the visual experience.
3. Forgetting the shipping layer
A beautiful product box can still arrive scuffed or crushed if it is used without adequate outer protection. Plan the presentation box, cushioning and mailer together. Test the complete packed order, not only the inner box.
4. Using too much small text
Small text can become hard to read on textured stock, dark backgrounds or busy patterns. Keep important instructions and product information legible at the intended viewing distance. Where details are essential, prioritise contrast and clear type over decorative effects.
5. Treating finishes as risk-free
Foils, embossing, coatings, dark solid colours and intricate artwork can produce striking results, but they require suitable artwork preparation and realistic expectations. Fine detail may be less visible than expected, large dark areas can show marks more easily, and some finishes can affect recyclability or label adhesion.
Ask to review a physical sample or finish swatch before committing to a high-visibility design.
Measuring the ROI of Premium Gift Packaging
Premium gift packaging should be treated as a commercial decision, not just a design upgrade. It may be appropriate when the presentation helps justify a higher-value purchase, supports a gifting occasion, improves perceived consistency or reduces the need for separate wrapping.
Browse custom gift packaging options when comparing structures, inserts and finishing ideas for gift-focused products.
Build a simple evaluation framework
Calculate the incremental cost of the upgraded packaging, including the box, insert, additional packing materials, assembly labour, storage implications and any additional outer protection. Compare this with the outcomes you expect it to influence.
Possible indicators include:
- Average order value for gift-packaged products
- Take-up of a paid gift-wrap or presentation option
- Repeat purchase behaviour among the relevant product line
- Customer feedback mentioning packaging or gifting
- Damage and return reasons connected to packaging
- Packing time per order
- Product reviews or user-generated content that references the unboxing
Do not assume premium packaging automatically produces a return. A more expensive box may add little value for a low-consideration product, while a modest upgrade such as a fitted insert or branded seal may be enough for another range.
Test one variable at a time
If practical, introduce a packaging improvement to one product line, campaign or order type first. Keep the product, price and offer as consistent as possible so you can assess the packaging change more clearly. Record the costs and feedback before applying the design across the whole range.
This approach also helps procurement and product teams identify whether the higher specification is genuinely needed for every SKU or only for selected gift sets and flagship products.
Sourcing Sustainable and Recyclable Materials
Sustainable packaging design starts with using only the material and space needed to protect the product. A right-sized, well-designed paper box can be preferable to an oversized pack filled with unnecessary components, but environmental suitability depends on the full design and local waste-stream realities.
When assessing recyclable materials, ask what happens after use in the market where the pack will be disposed of. Material claims, recycling labels and compostability statements should be verified for the relevant product, inks, coatings, adhesives and local collection systems.
Practical material-selection questions
Ask suppliers about:
- The paper or board composition and available material options
- Whether the chosen coating, laminate, foil or adhesive affects recycling pathways
- Whether the box can be designed with fewer mixed materials
- Whether plastic windows, magnets or foam inserts are essential
- Whether a single-material paper-based solution can meet the protection need
- How to communicate disposal guidance accurately without making broad claims
A simple, uncoated or lightly finished carton can be easier for customers to identify as paper-based, but it may not offer the moisture resistance, scuff resistance or visual effect required by every product. Balance environmental goals with product protection; damaged goods and replacement shipments also carry a material cost.
Tips for Mockups and Prototyping Your Design
Digital mockups are useful for checking layout, but they cannot fully show fit, board feel, folding accuracy or real-world opening. Use mockups early, then progress to a physical prototype before final production.
Create a useful prototype brief
Your prototype should answer specific questions, such as:
- Does the product fit without force or excess movement?
- Are the opening and closing steps easy to understand?
- Does the insert hold the product in the intended position?
- Are the main logo, product name and key information visible from the right panels?
- Is text readable on the selected stock and finish?
- Can the box be packed consistently?
- Does the complete order fit the intended shipping configuration?
For an early structural review, a plain sample can be enough. For final visual approval, request a prototype that represents the intended material, printing and finish as closely as the available process allows. Confirm what the sample does and does not represent; a prototype is not always identical to a full production run.
Involve the people who will use it
Include product, marketing, procurement and fulfilment stakeholders in the review. Each sees a different risk: marketing checks brand expression, procurement checks specification clarity, and fulfilment checks whether the pack works at speed.
If you are developing a new structure, a custom box project can be scoped more effectively when you provide product dimensions, weight, photographs, intended order quantities, desired finish and an example of the packed order.
Final Checklist Before Sending to Print
Use this checklist before giving final approval for custom packaging artwork and production.
Structure and product fit
- [ ] The box style matches the product weight, shape and protection needs.
- [ ] Internal dimensions have been confirmed using a physical product sample.
- [ ] Inserts, dividers, accessories and instructions fit inside the approved structure.
- [ ] The opening, closure and packing process have been reviewed.
- [ ] The full shipping configuration has been considered, including outer protection.
Artwork and brand detail
- [ ] The latest approved dieline is being used.
- [ ] Artwork is placed on the correct panels and clear of folds, cuts and glue areas.
- [ ] Logos, colours, typefaces and product names match the approved brand assets.
- [ ] Text is legible at final size and has sufficient contrast.
- [ ] Barcodes, QR codes and variable information have been checked for placement and readability.
- [ ] Any label area is flat, clear and large enough for the intended sticker.
Materials, finishing and compliance
- [ ] The board, finish and construction suit the intended use.
- [ ] The selected coating, foil, laminate or adhesive has been considered alongside recycling goals.
- [ ] Required product, safety, disposal or labelling information has been verified for the relevant South African market.
- [ ] Any environmental claim is specific, supportable and appropriate to the final materials.
- [ ] A physical sample or prototype has been reviewed where the project risk justifies it.
Order readiness
- [ ] Quantities, version control and SKU variations are clearly listed.
- [ ] The print-ready files and approval version are clearly identified.
- [ ] Packing instructions are documented for the fulfilment team.
- [ ] Storage space and handling requirements have been considered.
- [ ] A final stakeholder has authority to sign off the specification.
Thoughtful packaging is built through clear decisions: who it is for, how it will travel, what it must communicate and how it will be packed every day. For brands ready to turn that brief into a production specification, learn more about XGolden Print and prepare your product dimensions, artwork requirements and sample needs before requesting options.
