
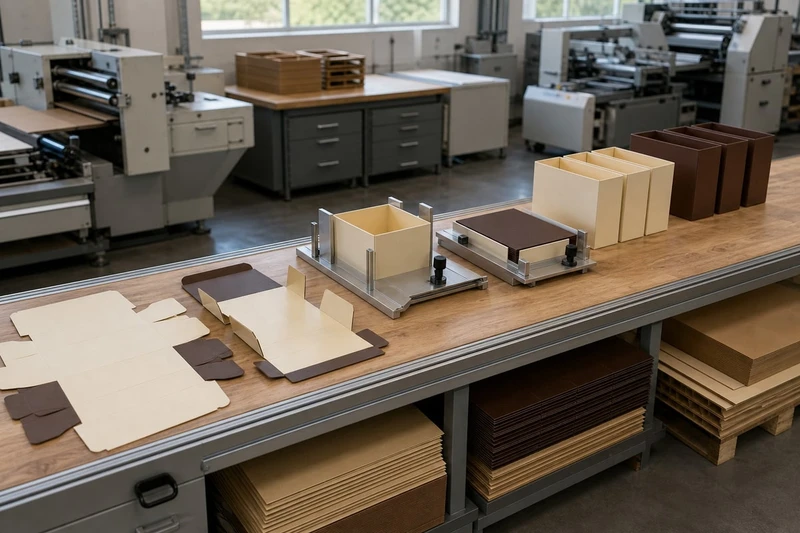
Efficient packaging is designed around the real packing process, not only how the finished box looks on shelf or at a customer’s door. The best packaging design for assembly uses few parts, intuitive folds, practical closures, easy product access and a defined packing sequence that different operators can repeat reliably.
For South African brands and retailers, this matters wherever products are packed in volume: factory lines, fulfilment operations, promotional campaigns, retail replenishment and gift set preparation. A box that saves a few handling motions per unit can make pack-out more consistent, reduce avoidable errors and make training simpler. It must, however, still protect the product, support the brand presentation and fit the realities of storage and transport.
Map the packing sequence before finalising the box
Start with the actual steps required to turn flat packaging and loose components into a finished saleable unit. Do this before approving dielines, artwork or inserts. A visually impressive structure can be slow to assemble if the packer has to manipulate several panels, turn the box repeatedly or place the product through a narrow opening.
Write the intended sequence in the order an operator will follow it:
- Collect the flat box, sleeve or tray.
- Form the structure and secure its base, if needed.
- Add tissue, a leaflet, an insert or protective material.
- Place the product in its required orientation.
- Add accessories, samples or secondary items.
- Close and secure the package.
- Check the finished pack for orientation, completeness and appearance.
- Place completed units into an outer carton or dispatch container.
This exercise identifies hidden delays. For example, an insert that must be placed before the product may be sensible, but only if it stays open and does not collapse while the item is being loaded. Similarly, a box requiring both double-sided tape and a separate seal can add unnecessary handling, especially for a high-volume pack-out.
Design for a logical one-way flow
A good assembly sequence moves forward. The packer should not need to reopen a closure, remove a product to correct its orientation, or turn the package over several times.
Where possible:
- Form the box from one direction.
- Keep the main product opening on the same side as the closure.
- Place inserts so they are naturally held in position.
- Make product orientation obvious before the item enters the box.
- Leave inspection points accessible until the final closure.
- Avoid steps that require excessive force, precision or two sets of hands.
For products with multiple components, decide whether each item should be packed separately into the main box or grouped first in a pouch, carton or band. Grouping can simplify assembly, but it adds material and may increase the risk of components being missed if the sub-pack is not properly controlled.
Account for how packaging arrives and is stored
Packing efficiency starts before the line begins. Flat-packed boxes that stack neatly and are easy to separate can be faster to use than structures whose panels catch or lock together. If boxes are bundled, the bundle quantity should suit the replenishment method at the packing station.
Confirm these practical points with the packaging supplier:
- How the packaging will be supplied: flat, pre-glued, nested or partly assembled.
- Whether it can be stacked without crushing or warping.
- Which side faces up in a bundle.
- Whether printed surfaces may scuff during storage or handling.
- How much space formed boxes occupy beside the packing station.
- Whether temperature, humidity or extended storage could affect adhesive performance or board shape.
A compact flat design may save warehouse space but take longer to erect. A pre-glued or self-locking alternative may improve assembly speed, but should be assessed against unit cost, storage volume and the packing volume planned.
Reduce unnecessary components
Each additional piece adds a handling action, a stock item to manage and another chance for an incomplete pack. The aim is not to remove all components; it is to keep only those that serve a clear protective, functional or presentation purpose.
Review every part of the pack and ask:
- Does it protect the product from movement, impact or scratching?
- Does it separate products that could damage one another?
- Does it provide information the customer genuinely needs?
- Does it improve the opening experience enough to justify the added step?
- Could its job be done by the box structure itself?
A premium gift box may need a rigid tray, lid, tissue and a shaped insert to achieve the intended presentation. A standard e-commerce order may instead need a single robust mailer, protective fill only where needed and a simple closure. The appropriate answer depends on the product and selling channel rather than a universal idea of “better” packaging.
Consolidate functions where possible
Efficient packaging often combines functions. Examples include:
- A tuck flap that closes the carton without a separate sticker.
- A printed interior panel that replaces a loose instruction card.
- A partition integrated into the box rather than assembled as a separate divider.
- A structural lock that removes the need for glue during pack-out.
- A sleeve that both holds the product group together and carries key branding.
Consolidation must not create a difficult structure. An integrated divider with many folds may be slower than a simple separate insert. Compare the total handling effort, not just the number of physical pieces.
| Packaging choice | Assembly advantage | Potential drawback | Best checked before approval |
|---|---|---|---|
| One-piece folding carton | Fewer parts to pick and match | May offer limited protection for fragile items | Product fit and compression resistance |
| Self-locking base | Usually faster than taping a base | Can be harder to fold if poorly designed | Ease of forming with representative board |
| Separate insert | Can give precise product location | Adds picking and placement time | Whether it stays in position during closure |
| Integrated divider | Reduces component count | May add folding complexity | Number of folds and operator access |
| Sleeve and tray | Strong presentation and easy product loading | Requires two components | Alignment and storage of both parts |
| Rigid lid-and-base box | Simple opening and premium appearance | May need tissue or an insert to prevent movement | Product stability in transport |
Avoid decorative elements that interrupt the line
Ribbons, magnets, loose cards, seals, belly bands and layered tissue can be appropriate for special launches, gifting or high-value products. They are rarely free from an assembly perspective. If a decorative feature is essential, make its application repeatable.
For instance, a pre-cut belly band with a clear overlap position is usually easier to apply consistently than wrapping and tying ribbon. A printed closure tab may remove the need for a hand-applied branded seal. If hand finishing remains necessary, allow enough working clearance so that the packaging does not get dented or marked during the process.
Choose practical closures and inserts
Closures and inserts largely determine whether a package can be assembled quickly and consistently. The correct option balances assembly time, product security, opening experience, tamper requirements and the possibility of reuse.
Select a closure that suits the packing environment
A closure should be easy to identify, easy to engage and suitably secure for the distribution route. A closure that looks straightforward in a render can become awkward when operators are wearing gloves, working at speed or packing products with variable dimensions.
Common options include:
- Tuck-in flaps: economical and familiar for folding cartons. They work well for many light to medium products but may need additional sealing where the pack must resist opening in transit.
- Auto-lock or crash-lock bases: reduce base-forming time for cartons, particularly where product weight makes a standard tuck base less suitable. Test that the base locks fully every time.
- Peel-and-seal adhesive strips: useful for mailers and some e-commerce packs. Confirm the adhesive is suitable for the intended board, storage period and conditions.
- Tabs and slots: can eliminate tape or glue and make a pack reusable. They require accurate folding and enough board strength around the slot.
- Sleeves: give clean presentation and can secure a tray or inner carton without a complex closure, although alignment adds a handling step.
- Lids: suitable for gift and presentation packaging, especially when loading from above. Check whether the lid is tight enough to remain closed during ordinary handling.
Do not assume a stronger closure is always better. Excessive force can damage the box, frustrate customers and slow assembly. The best closure is secure enough for the journey the pack will make, while remaining dependable in the hands of packers and end users.
Use inserts only when they make the pack more reliable
Inserts are useful when a product needs to be centred, separated, protected or presented in a particular position. They are especially valuable for fragile, irregularly shaped or multi-item products. But an insert should make pack-out easier, not become an obstacle.
An effective insert:
- Has a product cavity that gives a positive, obvious fit.
- Allows the product to be placed without snagging.
- Does not require the packer to bend, stretch or force the item.
- Supports the product during closing and transport.
- Can be loaded from the intended direction.
- Does not hide required labels, instructions or inspection points.
- Is practical to stack, separate and handle at the packing station.
For products with small variations in size, test the largest and smallest acceptable product dimensions. A very tight insert may look neat but can slow assembly or lead to damaged edges. A loose insert may speed loading but allow movement that causes scuffing or breakage.
When specifying custom boxes, share the product dimensions, weight, orientation, accessory list and intended pack-out sequence. These details are as important as the external box size when choosing a structure.
Design clear orientation and access
Packer uncertainty is a common source of inconsistent presentation. If an operator must pause to decide which way the product, insert or outer box should face, the design needs clearer orientation cues.
Build guidance into the packaging itself rather than relying only on memory or verbal instruction.
Make the correct position obvious
Useful orientation aids include:
- A clearly shaped cavity that accepts the product in only one direction.
- A thumb cut-out or finger clearance showing where the product should be lifted or placed.
- Small, unobtrusive arrows or “front” markings on non-customer-facing panels.
- Colour blocks, printed icons or matching registration marks on components.
- A front-facing product window or panel that makes alignment immediately visible.
- Different flap shapes where there is a risk of assembling the box upside down.
For premium packaging, internal orientation marks can be kept discreetly on a concealed flap, under an insert or on an uncoated internal panel. The goal is to guide assembly without undermining the customer experience.
Provide enough access for hands and products
The opening must accommodate the product and the packer’s hands. A box can be dimensionally large enough while still being difficult to load because the opening is too narrow, the walls flex inward, or an insert blocks access.
Check access with the real product, including any protective pouch, cap, label or accessory fitted during packing. Also consider the removal process. If customers must struggle to remove the item, they may tear the carton or damage the presentation.
For packs containing glass, ceramics, cosmetics, electronics or other damage-sensitive goods, leave enough clearance to load safely while ensuring the product cannot shift excessively once closed. This balance is usually achieved through thoughtful cavity design rather than simply making the box tighter.
Trial assembly with representative products
A sample is necessary, but a visual sample alone does not prove assembly efficiency. Trial the packaging with representative products, materials and the people who will handle it. This is the point at which awkward folds, unclear orientation and poor fit become apparent.
Test with products that reflect normal variation. Use the actual primary pack where possible, not only a substitute object with matching dimensions. Surface texture, flexible pouches, caps, labels and product weight can all change how easily an item loads into an insert or carton.
Run a practical pack-out trial
A useful trial involves assembling several units from flat packaging, rather than making one carefully prepared sample. Ask participants to follow the intended method and record what happens.
Observe:
- Time to form, load and close each unit.
- Whether the sequence is intuitive without repeated explanation.
- Any steps where the packer pauses, reworks or uses excessive force.
- Whether components are easy to pick individually.
- Whether inserts collapse, shift or catch on the product.
- Whether the finished pack looks consistent across different operators.
- Whether product orientation remains correct after closing.
- How the packs stack in an outer carton and whether corners or closures are vulnerable.
If the packaging will be assembled manually, include people with differing levels of familiarity in the test. A structure that only works smoothly for the person who designed it is not ready for routine pack-out.
Test the complete packing context
Assembly is only one part of the process. After the pack-out trial, assess how completed units behave during normal handling. Stack them, place them in the intended outer packaging and inspect for movement, crushing, scuffing or closure failure.
The trial should also reflect the sales channel. Retail-ready packaging may need to withstand shelf handling and repeated customer interaction. A direct-to-consumer order may need extra consideration for parcel movement and the addition of shipping documentation. Gift presentation packaging may require a more exact product orientation and cleaner finishing standard.
This does not mean every design needs an elaborate test programme. It means the approval decision should be based on a realistic use case rather than appearance alone.
Document the approved pack-out method
Once the structure has passed a practical trial, document the approved method. Consistency depends on repeatable instructions, particularly when packing is spread across shifts, seasonal teams, contract packers or different product lines.
A pack-out instruction should be visual, short and specific. It is not merely a general description of the packaging.
Include:
- Component list: every box, insert, leaflet, label, protective element and accessory required per unit.
- Product identification: the correct product variation, size, colour or SKU where relevant.
- Step-by-step sequence: numbered actions from forming the box to final inspection.
- Orientation images: clear illustrations or photographs showing front, top and product position.
- Closure method: how tabs, adhesive strips, seals or sleeves must be applied.
- Quality checkpoints: what to inspect before the pack is released.
- Finished-pack reference: an image or approved physical sample showing the required outcome.
- Outer-carton method: quantity per carton, orientation and any separation required, where applicable.
Keep version control on the document. If artwork, insert dimensions, product configuration or closure details change, review the pack-out method too. A small change to a carton panel or product label can alter how easily the line operates.
Define acceptance checks that operators can use
The most useful checks are visible and practical. Rather than vague instructions such as “ensure high quality”, specify what a packer should confirm:
- Correct product and accessory count.
- Product facing the correct direction.
- Insert seated correctly.
- All flaps fully engaged.
- No visible damage, marks or exposed adhesive.
- Required leaflet, label or seal present.
- Finished box closes squarely and stacks correctly.
Avoid creating a checklist so long that it becomes unrealistic under normal working conditions. Focus on the errors that are most likely, most costly or most visible to the customer.
Common packaging design mistakes that slow assembly
Several issues repeatedly create unnecessary labour and rework:
- Approving a design from a flat artwork proof only. Artwork approval cannot confirm folds, access, fit or closure performance.
- Designing around nominal product dimensions. Allow for normal production variation and any primary packaging.
- Adding components without mapping their handling step. Every card, ribbon or insert needs picking, positioning and checking.
- Using closures that need precise alignment. A closure may fail or look untidy if there is little tolerance for variation.
- Making cavities too tight for a premium appearance. This can lead to forced loading, bent corners and damaged product labels.
- Ignoring packer access. Deep or narrow boxes can make loading slow even when the product fits.
- Leaving orientation to judgement. Different operators will make different decisions without visual cues.
- Treating the outer carton as an afterthought. A well-presented retail box can still be unsuitable for the way completed units are packed and moved.
A practical selection checklist
Before placing a production order, confirm that the packaging design can answer “yes” to most of the following:
- Can one person assemble the pack without specialist tools?
- Is the packing sequence clear and mostly one-directional?
- Are all components necessary?
- Can each component be picked and placed easily?
- Does the product fit without excessive force or unwanted movement?
- Is the closure quick to use and appropriate for the distribution route?
- Is product orientation obvious?
- Can the completed pack be inspected before it is closed?
- Has the design been trialled with representative products?
- Is there an approved, visual pack-out instruction?
- Does the finished pack work within the intended outer-carton arrangement?
FAQ
Should faster assembly always be the main packaging priority?
No. Packaging must first meet the product’s protection, presentation and functional needs. Faster assembly is achieved by removing avoidable complexity, not by eliminating necessary protection or making a closure too weak for its intended use.
Are self-locking boxes always better than taped boxes?
Not always. Self-locking designs can reduce assembly steps, but they may cost differently, require specific folding actions or be unsuitable for certain weights and dimensions. Compare the total pack-out process, product requirements and storage implications.
How many samples should be assembled during a trial?
Assemble enough units to expose repetition-related issues. One carefully made sample is rarely enough. Include more than one operator where possible and test the normal range of product sizes or configurations.
Can gift packaging still be efficient to assemble?
Yes. The key is to make premium details repeatable. Choose inserts that hold their shape, use clear alignment cues, and avoid decorative elements that need excessive manual adjustment. Explore gift packaging options alongside the intended pack-out method, not as a separate design decision.
Efficient assembly begins with a packaging structure that works in real hands, with real products and a documented process. Review the packing sequence before approving the design, then use a representative trial to refine closures, inserts and orientation details. XGolden Print can support brands that need custom printed packaging developed with both presentation and practical pack-out in mind.
