
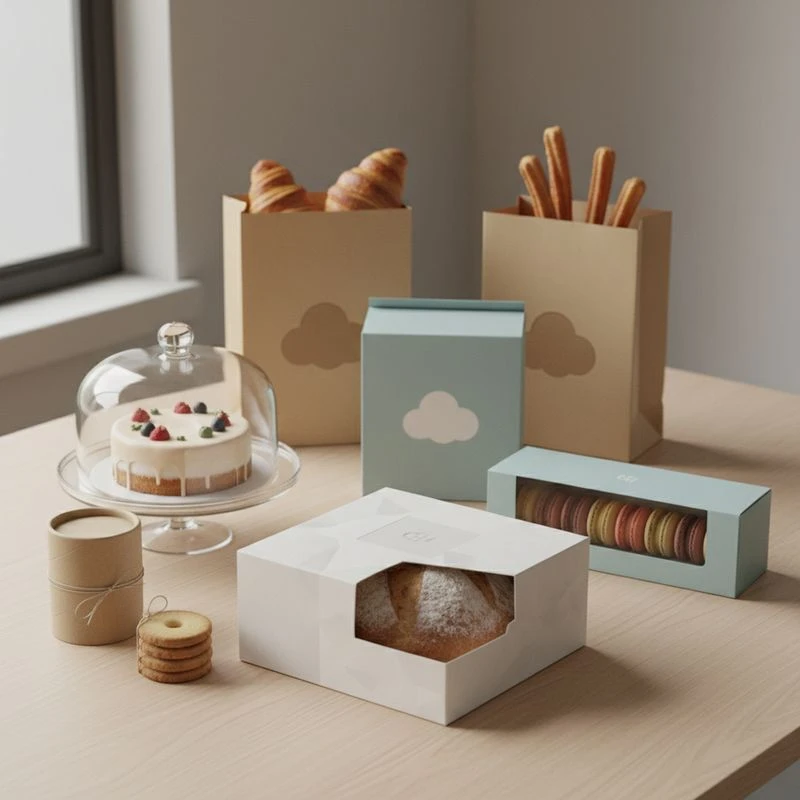
Custom packaging for bakery and confectionery products should do three jobs at once: protect the food, make handling easier and present the product in a way that suits the brand. The right choice depends on the item’s weight, moisture, fragility, shelf life, display method and whether it is sold individually, in multipacks or as a gift.
Start with the product rather than the artwork. A beautiful cake box that is too shallow, a window box that scuffs easily, or a sweet box without sufficient barrier protection can create avoidable waste and a poor customer experience. Specify the product dimensions, packing method and food-contact requirements before choosing board, coatings, inserts or print finishes.
Bakery Packaging
Bakery packaging needs to protect products from crushing, grease transfer, moisture changes and movement during handling. It should also allow staff to pack items efficiently without damaging frosting, toppings or delicate pastry.
The best format differs by product category. A flat-fold carton may suit biscuits, while a high-sided box with an insert is more appropriate for decorated cupcakes. Consider the final packed product, including any liner, wrapper, tray or label, when calculating internal dimensions.
Match the box style to the product
Use this guide as a starting point when selecting custom bakery boxes:
| Product type | Suitable packaging approach | Important specification to confirm |
|---|---|---|
| Loaves, rolls and artisan bread | Sleeves, bags with branded labels, cartons or windowed boxes | Ventilation needs, grease resistance and whether the product is packed warm or cooled |
| Cupcakes and muffins | Deep tuck-top boxes or cartons with inserts | Insert hole size, box height and clearance above icing |
| Slices, brownies and tray bakes | Individual cartons, sleeves, wrap-and-label formats or multipack boxes | Portion dimensions, barrier needs and ease of opening |
| Biscuits and rusks | Cartons, sleeves, pouches placed in boxes, or gift tins with printed inserts | Protection against breakage, internal wrapping and pack count |
| Doughnuts and pastries | Wide, shallow boxes with suitable internal protection | Grease management, stacking strength and product movement |
| Celebration cakes | Rigid or folding cake boxes with bases and optional supports | Board strength, internal height, carry method and safe stacking |
| Gift assortments | Rigid boxes, drawer boxes or presentation cartons with dividers | Divider fit, product separation and the unboxing sequence |
A practical box should leave enough clearance for the product without creating excessive empty space. Too little room can mark icing and toppings. Too much room allows products to slide, collide and lose their presentation.
Consider the full packing journey
A packaging specification should account for what happens after the product leaves the bakery bench. Ask these questions:
- Will products be packed after fully cooling, or while still releasing heat?
- Does the product contain buttercream, chocolate, syrup, oil or fillings that could affect the pack?
- Will the box be carried by hand, placed in a delivery bag or stacked in-store?
- Does the packaging need an insert, food-safe liner, tamper-evident seal or outer sleeve?
- Is the product sold from a chilled display, at room temperature or as a made-to-order item?
- Will staff need to assemble the box quickly during busy trading periods?
For example, a cake box may need a sturdy base and sufficient headroom, whereas a biscuit gift box may place more emphasis on dividers, print finish and a neat closure. Treat these as separate packaging briefs rather than applying one box design across every product line.
Board strength and structural design
Paperboard packaging varies in thickness, stiffness and surface finish. The appropriate material depends on the product’s weight, box size, stacking needs and intended handling. Larger or heavier bakery packs may require a more supportive construction than lightweight confectionery cartons.
Structural details matter as much as the material selection. Discuss:
- Locking tabs and closure security
- Reinforced bases for heavier products
- Fold direction and panel alignment
- Finger notches or easy-open features
- Inserts, dividers and trays
- Whether the carton must stack when filled
- Flat-packed versus pre-assembled supply formats
Request a physical sample or plain structural prototype before approving a large run. Artwork proofs confirm the printed design, but they do not always show how the finished pack performs with the actual product inside.
Food-Safe Packaging
Food-safe packaging begins with understanding whether the box or printed surface will touch food directly. The packaging used for a wrapped sweet may have different requirements from packaging used for an unwrapped biscuit, chocolate or pastry.
Do not assume every paper, ink, coating, adhesive or decorative finish is suitable for direct food contact. Confirm the intended use with the packaging supplier and verify applicable food-contact, labelling and packaging requirements for the South African market before production.
Identify the food-contact level
Define the pack in one of these broad categories when preparing your brief:
- Indirect-contact packaging: The food is sealed in another wrapper, pouch or tray before it goes into the printed box.
- Limited-contact packaging: The product touches an unprinted or suitably protected internal surface, possibly with a liner or tray.
- Direct-contact packaging: The food comes into contact with the box, insert or paper component itself.
The higher the likelihood of direct contact, the more important it is to confirm material suitability, printing placement and barrier design. A printed outer carton can often carry strong branding while a separate inner wrap or liner manages direct food contact.
Specify barriers for the product, not just the box
Bakery and confectionery items can be affected by grease, moisture, aroma, light and handling. Packaging may need an additional barrier layer or a separate inner component depending on the product.
Consider the following compatibility questions:
- Can butter, oil or chocolate migrate through the packaging surface?
- Is the product sensitive to humidity or loss of crispness?
- Could a strong flavour or aroma affect nearby products in a mixed pack?
- Does the product require a wrapper, tray, cup or liner inside the printed carton?
- Will chilled conditions cause condensation on a window or coating?
- Could product heat soften adhesives or change the shape of the box?
A window carton can be attractive for fresh baked goods, but the window material, adhesive and placement should be checked against the product and storage conditions. Similarly, a premium coating may improve the outer look of a gift box, but it is not automatically the right choice for the inside surface.
Labelling space should be planned early
Even a small confectionery carton may need room for essential product information. Leave a clear panel for details such as product name, ingredients, allergen information, storage guidance, batch identification, date marking and other information relevant to your sales channel and product category.
Avoid placing essential text across folds, seams, windows, barcodes or highly textured finishes. Small type, low contrast and busy backgrounds can make information difficult to read. Build the information panel into the dieline from the beginning instead of trying to squeeze it into leftover space after the design is complete.
Food packaging checks before approval
Before releasing artwork, confirm:
- The internal and external box dimensions
- Which surfaces may touch food
- The intended liner, wrapper or tray
- Material and coating suitability for the application
- Ink and adhesive considerations for the final packaging format
- Storage temperature and moisture conditions
- Required label content and barcode position
- Whether the product is packed manually or mechanically
- Whether a sample has been checked with the actual product
These checks reduce the risk of approving packaging that looks correct on screen but is unsuitable in day-to-day use.
Window Boxes
Window boxes help customers see the product without opening the pack. They are particularly useful for decorated cupcakes, biscuits, macarons, chocolate assortments, pastries and gift selections where colour, shape and finishing are part of the purchase decision.
However, a window is not automatically the best choice. It adds another material component, can reduce the available print area and may reveal product movement, condensation or inconsistent packing. Use one where visibility genuinely supports the product.
When a window box works well
A window is most useful when:
- The product has a strong visual finish.
- Buyers need to see the assortment or portion size.
- The contents stay neat in transit.
- The pack is displayed on a shelf, counter or gifting table.
- The window does not expose products to unsuitable light or storage conditions.
- The internal tray or insert keeps every item in position.
For a premium assortment, a smaller shaped window may provide a more controlled reveal than a full-panel window. For everyday baked goods, a larger viewing area can make product identification easier.
Choose the right window shape and placement
The window should frame the product rather than compete with it. Common options include:
- Full top windows for packs viewed from above
- Front-panel windows for shelf-facing displays
- Die-cut shapes that echo a brand motif
- Narrow strips that reveal only part of the contents
- Corner windows that preserve more print space
Keep adequate space around the cut-out to maintain carton strength. Also consider how the box will be folded and glued; a window too close to a crease, closure or glued panel can complicate assembly.
Risks to manage with window packaging
Window boxes need extra testing during product development. Check for:
- Scratching or clouding during transport and stacking
- Condensation where chilled products are packed or displayed
- Product contact with the window material
- Gaps that allow crumbs or toppings to move out of position
- Visibility of unattractive internal seams or labels
- Reduced stacking strength in large cut-out areas
- Difficulty separating materials where recycling is considered
If the product already has a sealed primary wrapper, a windowed outer carton can offer both product visibility and an added layer of protection. For unwrapped food, confirm that every component in the pack is appropriate for the intended use.
B2B Printing
B2B printing for bakery and confectionery packaging is not simply a matter of adding a logo to a standard box. Procurement teams need a repeatable specification that can be reordered, evaluated and used across product lines without avoidable variation.
A clear packaging brief helps suppliers quote and manufacture against the same requirements. It also makes internal approvals easier for product development, marketing, operations and retail teams.
Build a useful print specification
Your specification should include the following:
- Box style and dieline reference
- Internal dimensions: length, width and height
- Product weight and packing arrangement
- Board or substrate preference, where known
- Whether the food is wrapped, lined or in direct contact with packaging
- Print areas and number of colours
- Artwork files and brand colour references
- Finishes such as matt, gloss, foil, embossing or spot effects, if required
- Window, insert, divider or tray requirements
- Closure method and tamper-evidence needs
- Flat-packed or assembled supply preference
- Quantity per design and the number of artwork versions
- Labelling, barcode and variable-data requirements
Where brand colours are important, provide approved colour references and request a proofing process appropriate to the print method. Colour can appear differently on uncoated board, coated board and textured materials, so do not approve an important design based solely on a screen display.
Balance quality, practicality and order quantity
A packaging concept may look impressive but be difficult to assemble, slow to pack or unsuitable for the order volume. The most suitable option is often the one that protects the product reliably and gives the brand enough presence without unnecessary complexity.
| Decision area | Lower-complexity option | Higher-presentation option | What to assess |
|---|---|---|---|
| Structure | Standard folding carton | Rigid box, drawer box or multi-part gift pack | Product value, storage space and packing time |
| Decoration | Printed logo and brand colours | Foil, embossing, textured board or special coatings | Readability, budget and whether the finish suits the product |
| Product retention | Simple fold or paper liner | Custom insert, divider or tray | Product movement and presentation consistency |
| Visibility | Fully printed carton | Die-cut or film window | Product appearance, storage conditions and material choices |
| Range management | One adaptable box size | Multiple sizes and designs | Stock control, fit and brand consistency |
For seasonal gift packaging, plan ahead for artwork versioning and any special structural elements. For a core range, reducing the number of box sizes can simplify ordering and stock management, provided the products still fit securely.
Avoid common printing mistakes
Common problems in custom bakery packaging include:
- Measuring the product but not the finished packed item.
- Forgetting the height of toppings, icing or internal trays.
- Using a dark print background behind mandatory small text.
- Placing a barcode across a fold or curved panel.
- Choosing a finish before checking its food-contact role.
- Creating an intricate box that staff cannot assemble quickly.
- Ordering an insert without confirming its fit with each product variant.
- Treating product photography as a substitute for product protection.
- Changing artwork after structural approval without checking panel positions.
A pre-production sample, prototype or mock-up can help reveal these issues before the main order is committed.
Branding
Packaging is often the most consistent physical brand touchpoint for a bakery or confectionery line. It should help customers recognise the product, understand what they are buying and feel that the packaging matches the quality and occasion.
Branding does not require every panel to be heavily printed. Clear hierarchy is usually more effective: product name first, then flavour or variant, pack size, key product information and supporting brand elements.
Design for the sales environment
Think about where customers first encounter the pack:
- On a retail shelf, the front panel may need to identify the product quickly.
- At a counter, the top and side panels may be more visible than the front.
- In e-commerce, the box should arrive intact and still look considered when opened.
- For corporate or celebration gifting, the unboxing sequence and personalisation area may matter more.
- In a mixed hamper, the packaging should remain recognisable among other products.
A consistent brand system can be applied across cartons, sleeves, labels, inserts and gift boxes. Use repeated colours, type choices, illustration styles or patterns while allowing flavours and product categories to remain easy to distinguish.
Use packaging tiers deliberately
Not every product needs the same level of finishing. A useful range may include:
- Everyday packaging: straightforward cartons, sleeves or labels that support regular sales.
- Premium packaging: more considered board, finishes, inserts or gifting details for higher-value lines.
- Seasonal packaging: adaptable artwork for holidays, gifting periods or limited flavours.
- Corporate packaging: options with space for co-branding, messages or custom inserts.
This tiered approach helps prevent premium packaging costs from being applied to products where they do not add meaningful value. It also allows gift ranges to feel distinct without disconnecting from the main brand.
For brands developing multiple formats, custom printed boxes for product packaging can provide a useful starting point for comparing structures and presentation options.
A practical checklist before ordering
Use this checklist to finalise a custom packaging brief:
- Pack the actual product in a plain-size sample or prototype.
- Confirm every internal dimension, including the tallest and widest product variation.
- Decide whether food touches the box, liner, wrapper, tray or window.
- Verify material suitability for the product and intended storage conditions.
- Confirm required information panels and barcode placement.
- Check that the box can be packed, closed, carried and stacked as intended.
- Review artwork at final size for readable text and accurate panel alignment.
- Assess whether the finish, window and insert support the product rather than only the visual concept.
- Define quantities by design, product variant and packaging tier.
- Retain the approved dieline, artwork version and material specification for repeat orders.
Frequently asked questions
What is the best packaging for cupcakes?
Cupcakes usually need a box with adequate height and an insert that holds each cupcake securely. Confirm the insert size against the cupcake case, topping width and icing height. A window can work well when the product remains stable and the storage conditions suit it.
Should bakery products be packed in boxes or bags?
It depends on the product. Bags may suit bread, rolls and some loose baked goods, while boxes offer better protection for decorated, fragile or giftable items. A bag can also be placed inside a branded carton where extra presentation or structure is needed.
Can confectionery packaging have a window?
Yes, provided the window design suits the product, packing process and storage conditions. Check for scuffing, condensation, product movement and any food-contact considerations before approval.
How do I make bakery packaging look premium?
Start with a well-fitting structure, clear typography and quality product presentation. Premium details such as textured board, foil, embossing, inserts or ribbon-style closures should support the product’s price point and gifting purpose, not replace practical protection.
What should I send a packaging supplier for a quote?
Provide the box style, internal dimensions, product weight, quantity, artwork requirements, material preferences, food-contact details, window or insert requirements, finish preferences and the way the product will be packed and distributed.
A well-defined packaging brief makes it easier to compare options on structure, usability and presentation rather than choosing on appearance alone. When ready, use the checklist above to prepare product samples, dimensions and artwork requirements for a focused discussion with XGolden Print or another suitable packaging supplier.
