
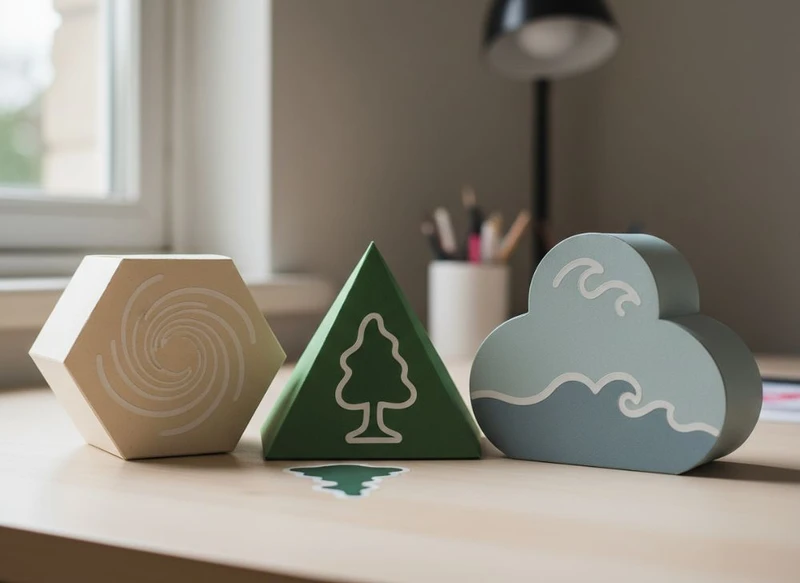
Die-cut packaging lets a brand move beyond the standard rectangle without making the product difficult to pack, display or use. A shaped carton can hold an item more securely, reveal a product feature, create a stronger gift experience or make the pack easier to open. Similarly, a custom-shaped sticker can follow a logo, product silhouette or seal position far more naturally than a square label.
The best results come from choosing a shape that has a clear job to do. Start with product protection and packing efficiency, then add distinctive details where they support the brand rather than complicate production.
The Impact of Non-Traditional Box Structures
Non-traditional box structures include packs with curved edges, angled panels, shaped windows, handles, sleeves, interlocking tabs and folding display features. These details can make packaging more noticeable, but their real value depends on whether they improve the product experience.
For example, a die-cut paper box may be appropriate when it needs to:
- Hold an irregularly shaped product in a more stable position.
- Create a practical carry handle for a lightweight gift pack.
- Show selected parts of the product through a shaped window.
- Open in a memorable but intuitive way.
- Present several items in organised compartments.
- Stand upright or convert into a small display format.
A distinctive outline can be especially effective where several similar products appear together on a shelf or in an online product photograph. However, shape alone does not create a premium result. The board choice, fold quality, print design, closure and ease of assembly must all support the concept.
Choose functional originality over novelty
An unconventional silhouette should not introduce confusion. If a customer cannot see where to open the box, cannot reseal it, or struggles to remove the product, the design may work against the brand.
Before approving a complex structure, consider these questions:
- Does the shape protect the product through handling and storage?
- Can the pack be assembled consistently?
- Are closure tabs large enough to work reliably?
- Does the design remain practical for stacking, merchandising or e-commerce fulfilment?
- Is the product information still easy to read?
- Can the customer understand how to open and dispose of the pack?
A structurally simple carton with one memorable die-cut detail is often more effective than a box with multiple competing features.
Cost Considerations for Custom Die-Cutting
Custom die-cutting involves more than selecting an outline. Cost can vary according to the complexity of the cutting form, number of cut-outs, board type, finishing requirements, pack size, order quantity and assembly method.
A basic carton with straight cuts and standard folds generally requires less development than a shaped box with windows, curves, locking mechanisms and internal inserts. That does not mean complex packaging is unsuitable for smaller ranges, but it should be evaluated against the role it plays in the product offer.
| Design choice | Likely commercial effect | What to check |
|---|---|---|
| Simple outer silhouette | Usually easier to develop and produce | Whether it stands out enough for the product category |
| Multiple windows or internal cut-outs | Can increase production complexity and waste areas | Board strength around openings and visibility of the product |
| Fine details and narrow tabs | May be harder to cut, fold or assemble | Minimum practical feature sizes with the printer |
| Built-in handles | May remove the need for a separate carrier in some uses | Load suitability and reinforcement needs |
| Separate insert or tray | Adds parts but can improve product protection | Assembly time, fit and whether the insert is necessary |
| Foil, embossing or raised finishes | Adds a decorative layer to the die-cut concept | Registration tolerances and readability of artwork |
The right question is not simply, “What is the cheapest shape?” It is, “Which structural feature delivers the greatest practical or brand benefit for the available packaging budget?”
Ways to control cost without losing character
You can often retain the core idea while simplifying the construction:
- Use one shaped panel rather than cutting the full box outline into a complex contour.
- Replace several small windows with one larger, well-positioned opening.
- Design a standard tuck closure with a distinctive front flap.
- Use printed graphics to suggest depth, texture or shape instead of adding extra cuts.
- Avoid very narrow bridges of board between cut-outs, which can weaken the pack.
- Keep internal inserts separate only where they genuinely protect or organise the product.
- Ask for a structural review before finalising artwork and finishing choices.
For custom retail cartons, explore the practical options available through custom packaging boxes before treating a visual concept as production-ready.
Designing Product-Specific Paper Box Shapes
The product should determine the box structure. A shape that suits a candle, cosmetic item or confectionery assortment may be unsuitable for a fragile component, a flat garment accessory or a multi-piece kit.
Start by recording the physical needs of the product:
- Length, width and height.
- Weight and centre of gravity.
- Corners, protrusions and fragile areas.
- Whether it needs to remain upright.
- Sensitivity to rubbing, movement, moisture or light.
- Number of pieces to be packed together.
- How customers will remove, use and store the item.
Match the structure to the product’s use
A good paper box is designed around the complete product journey, not only the moment it is photographed. Consider the following approaches.
Tapered or angled cartons can give a product a more distinctive profile while still using familiar folding principles. They work best when the product has a compatible shape or when the angled panel serves as a clear branding area.
Sleeve-and-tray packs can provide a layered opening experience and help hold the contents in place. They may suit gift sets, premium accessories and products that benefit from a gradual reveal.
Pillow-style boxes have curved ends and a soft profile. They are typically better suited to lightweight, compact items than products requiring rigid protection.
Handle boxes can be useful for gift packaging or multipacks where the handle is integral to the customer experience. The handle position, board strength and load must be checked carefully.
Window cartons allow customers to inspect the product before purchase. The opening should frame the item intentionally and leave enough board around it to maintain structural integrity.
Display-ready formats may include a folded-back panel or easel feature. These require extra attention to balance, product weight and the intended display environment.
When selecting gift packaging, consider whether the packaging will be retained after purchase. A reusable-looking structure may support the perceived value of a gift, but it still needs a straightforward opening method.
Using Kiss-Cut Stickers for Unique Shapes
Kiss-cut stickers are cut through the sticker material but not through the backing sheet. This leaves each individual sticker easy to peel while keeping the sheet intact. They are useful for logos with irregular outlines, illustrated designs, product seals and sticker sheets containing several shapes.
By contrast, a die-cut sticker is generally cut through both the sticker material and its backing, creating an individually separated shape. Both formats can be appropriate; the better choice depends on how the stickers will be supplied and applied.
| Sticker format | Best suited to | Main consideration |
|---|---|---|
| Kiss-cut sticker sheet | Multiple designs, promotional sheets and organised application | Leave enough backing border around each shape |
| Individually die-cut sticker | Single stickers, inserts and handouts | Small or detailed shapes may need careful handling |
| Round or rectangular label | High-volume, straightforward product labelling | May be less distinctive for an irregular logo |
| Contour-cut label | Branding that follows a logo or illustration | Ensure important text does not sit too close to the edge |
Design rules for shaped stickers
A custom outline should make application easier, not harder. Avoid sharp, fragile points and excessively thin sections, especially if the sticker will be handled individually. Keep text, barcodes, small icons and other important artwork within a safe inner area rather than close to the cut line.
Also consider the surface where the sticker will be applied. A label that works well on a flat carton may need a different size or construction for a curved container, textured paper or folding flap. Adhesive selection, finish and suitability for the intended surface should be confirmed with the printer.
Browse custom stickers and labels when comparing sticker formats for sealing, product identification or promotional use.
Maximising Material Use with Efficient Nesting
Nesting is the arrangement of box or sticker shapes on a printed sheet before cutting. Efficient nesting can reduce unused areas and help make a design more economical, particularly where the shape includes curves, diagonal edges or large cut-outs.
The designer cannot always see the final production layout, but early structural choices affect how efficiently a pack can be nested. A highly irregular outline may leave more unused space between units than a design with compatible edges.
Design choices that support efficient nesting
Consider these practical measures:
- Use repeated angles or curves that can sit close together when rotated.
- Avoid unnecessary exterior protrusions.
- Keep decorative cut-outs within the box panel where possible.
- Design paired shapes that complement each other, if the range includes multiple pack sizes.
- Use the same basic structure across related products, changing artwork rather than the full die-line.
- Review whether an internal cut-out delivers enough value to justify the material removed.
Material efficiency is only one consideration. A slightly less efficient nest may still be worthwhile if the shape improves protection, shelf presentation or user experience. The key is to assess the trade-off early, before artwork and finishing decisions are fixed.
Pop-Up and Interactive Box Features
Pop-up and interactive features can turn packaging into part of the product experience. These may include pull tabs, lift-up panels, reveal doors, fold-out messages, built-in stands or internal shapes that rise when the box is opened.
They are most effective when they support a clear purpose, such as guiding the opening sequence, presenting a gift item or explaining how a product should be used.
Keep interaction intuitive
Every interactive element adds another point that must fold, align and function correctly. To keep the pack practical:
- Make the first opening point obvious.
- Use short, direct instructions where the mechanism is not self-evident.
- Avoid placing essential product information beneath a tab or inside a hidden panel.
- Check that pull tabs and tear lines are accessible once the pack is filled.
- Ensure moving parts do not catch on the product or protective insert.
- Consider how the pack will be closed again, if resealing matters.
A pop-up detail can be memorable, but it should not replace the fundamental requirements of safe containment, readable information and uncomplicated packing.
How to Prepare Complex Die-Lines for Your Printer
A die-line is the technical layout that shows where packaging will be cut, creased, perforated, glued or otherwise finished. Complex die-lines need disciplined artwork preparation because small placement errors can become visible once the box is folded.
Always obtain the final approved die-line from the printer or packaging supplier before building the production artwork. Do not assume that a die-line from a previous project, a template found online or a design created for another board type will be suitable.
Essential die-line preparation checklist
Before sending files, check that the artwork includes or accounts for:
- Cut lines: The outer edges and any internal openings.
- Crease or fold lines: Areas where the board is intended to fold.
- Perforation lines: Where a section needs to tear or detach.
- Glue areas: Kept free of artwork where necessary and clearly identified.
- Bleed: Background colours and images extended beyond the cut edge.
- Safe area: Text and key elements kept away from cuts, folds and edges.
- Panel orientation: Correct placement for front, back, sides, base and flaps.
- Overprint and colour settings: Checked according to the printer’s file requirements.
- Linked images and fonts: Supplied or outlined as requested.
- Version control: One clearly named final artwork file to prevent mix-ups.
Common die-line mistakes
The most frequent problems are avoidable during artwork review:
- Placing small text over a fold or close to a cut line.
- Forgetting that artwork on a flap may be hidden once the box is closed.
- Designing a window that exposes an unintended part of the product.
- Ignoring the thickness of the board when aligning graphics across folded panels.
- Using very fine cut-out details that may not remain clean after cutting.
- Putting a barcode over a crease, texture or highly reflective finish.
- Treating guide lines as printable artwork instead of separate technical layers.
Request a physical sample, prototype or structural mock-up where available before committing to a complex pack. It is the most practical way to inspect opening, fit, panel alignment and visual hierarchy. Requirements for labelling, safety information or product claims can vary by product category, so verify applicable South African requirements before print approval.
Examples of Creative Box and Label Pairings
Box and sticker designs work best as a coordinated system. The carton gives the product its structure and main story; the label can add a seal, variant marker, instructional detail or campaign element.
Here are practical pairings to consider:
1. Shaped window box with a contour-cut seal
A carton with a simple product window can be paired with a contour-cut sticker that seals the opening flap. The sticker outline may echo a logo or a key motif from the printed design. Keep the seal easy to remove if customers need to open the pack without damaging it.
2. Sleeve-and-tray gift pack with variant labels
Use a consistent sleeve-and-tray structure for a product range, then differentiate flavours, colours, fragrances or editions with clearly designed labels. This can keep the outer structure consistent while helping customers identify the correct variant.
3. Handle box with an information sticker
For a lightweight gift or event pack, a handle box can carry the main branding in print while a shaped sticker provides personalisation, a batch reference or a short message. Ensure the sticker does not interfere with the handle fold or opening point.
4. Die-cut display carton with removable promotional stickers
A compact display-ready carton may include a small sheet of kiss-cut stickers as an added brand interaction. This approach works only if the stickers do not obscure mandatory product information or make the outer pack difficult to recycle.
5. Minimal carton with a bold, irregular label
Not every product needs a complex box. A clean rectangular carton paired with a well-designed die-cut label can create contrast while keeping the pack straightforward to manufacture, stack and store.
A Practical Selection Process
Use this short process when deciding whether a die-cut shape is appropriate:
- Define the product’s protection, presentation and opening needs.
- Choose one primary structural feature that solves a genuine need.
- Identify where a shaped sticker adds value: sealing, branding, variant identification or promotion.
- Review the design for material use, assembly and storage practicality.
- Prepare artwork only on the approved die-line.
- Check the physical sample or mock-up before final production approval.
- Confirm board, finish, adhesive, quantity and any product-specific compliance requirements with the supplier.
For brands developing a new shaped packaging concept, XGolden Print can be considered as a printing and packaging partner; learn more about the business through XGolden Print’s company overview. Bring a clear product brief, dimensions, intended use and artwork references so the structural discussion can focus on the details that matter.
